
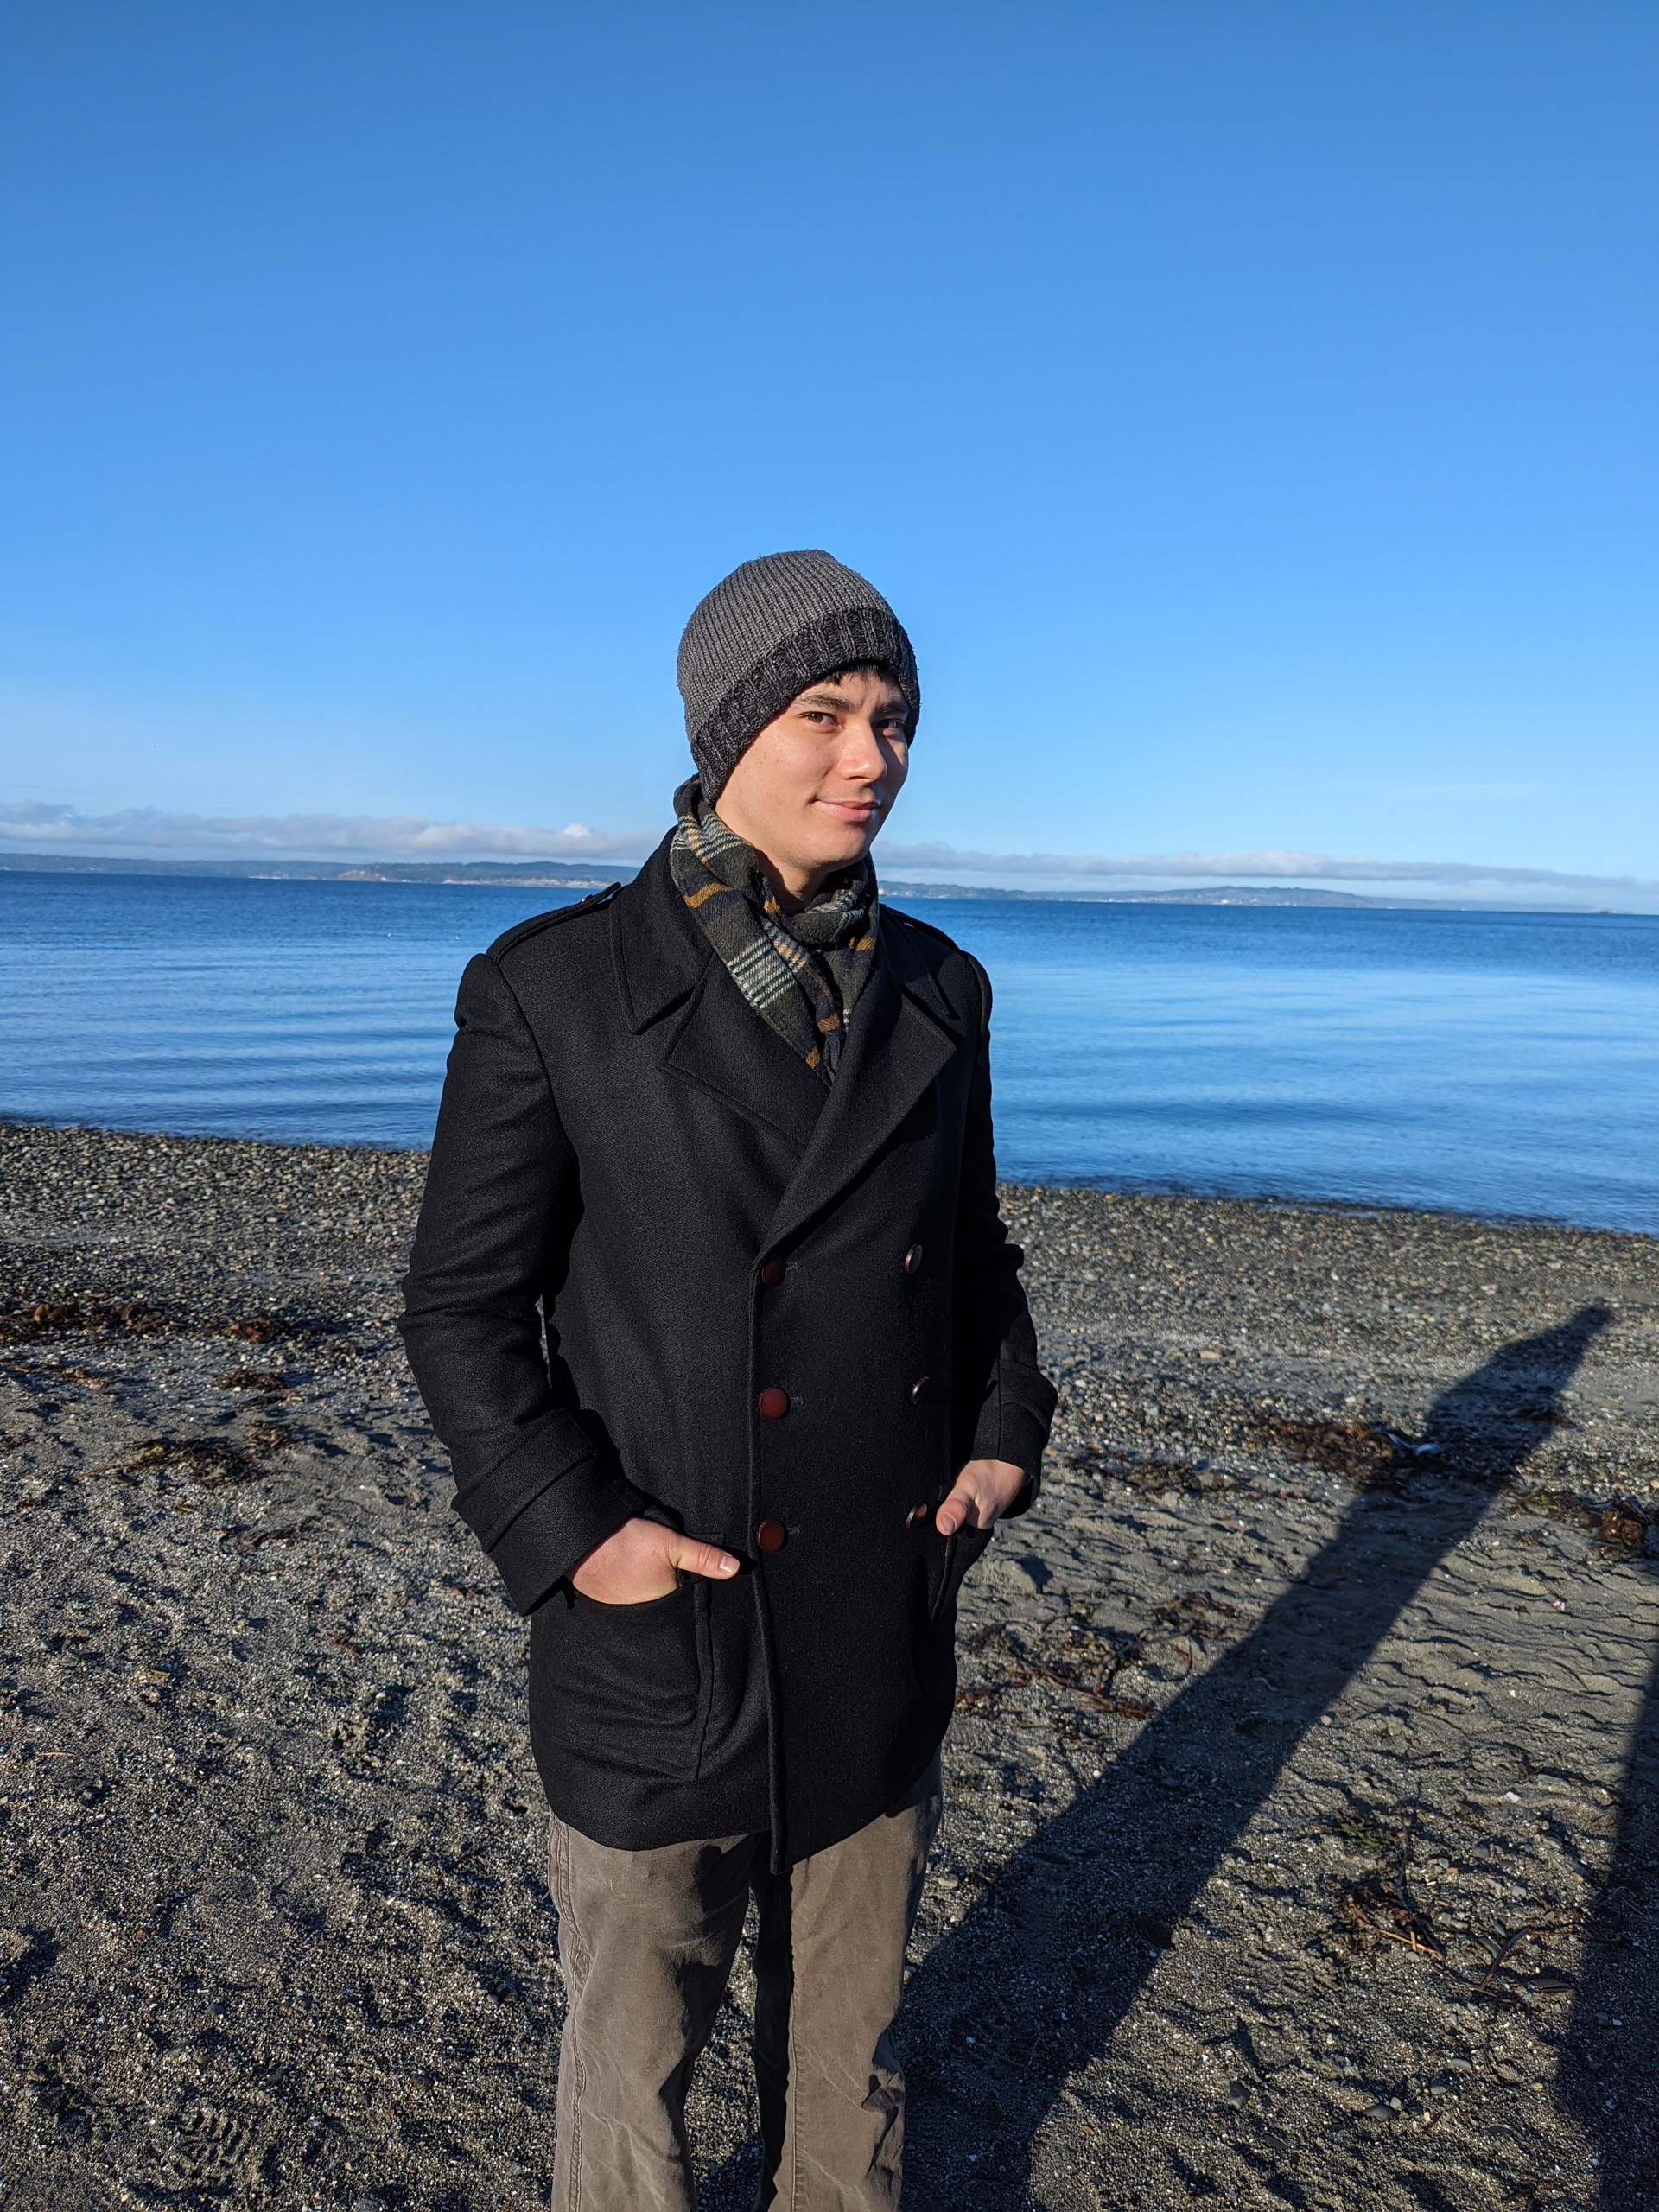
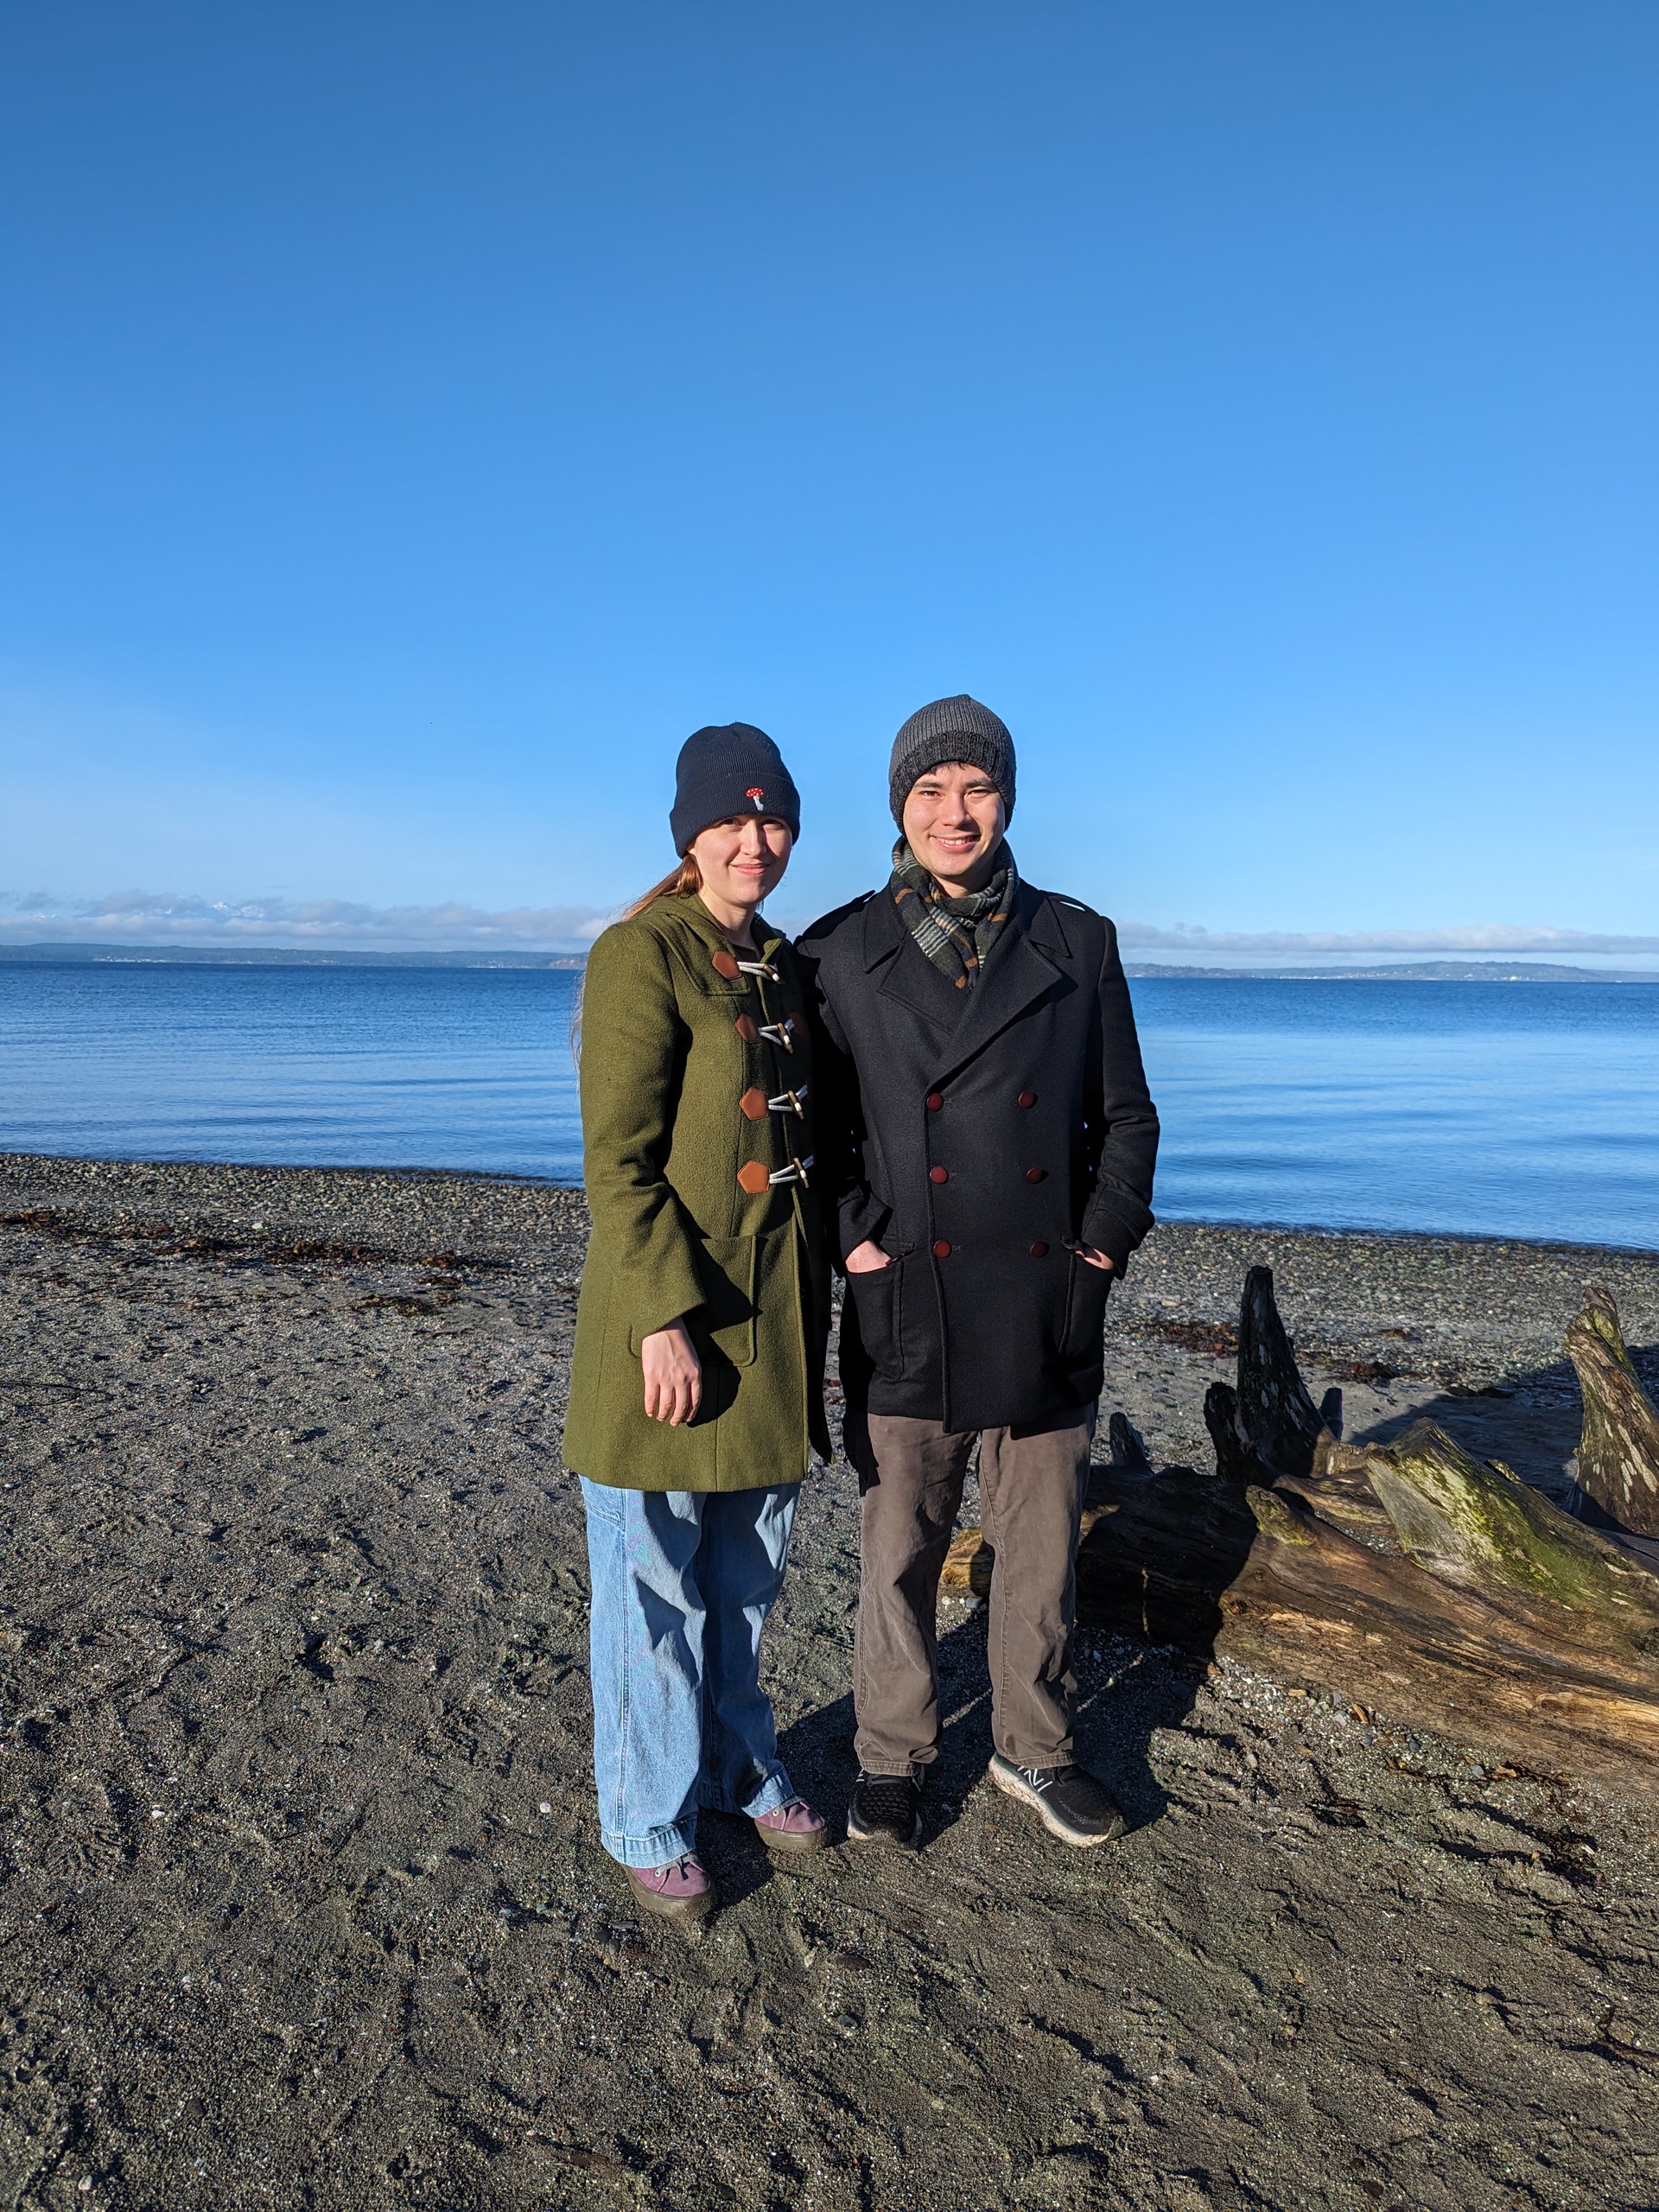
A Peacoat with Love in Every Stitch

This Christmas has been a busy one! I wanted to make something for my partner, and asked what he might want (there was no point in trying to make it a surprise if I was going to need to take measurements and do fittings.) With only some raincoats and hoodies in the closet, he wanted a nicer coat both for fancier occasions and just to feel a bit more dressed-up day-to-day, which I can obviously appreciate.
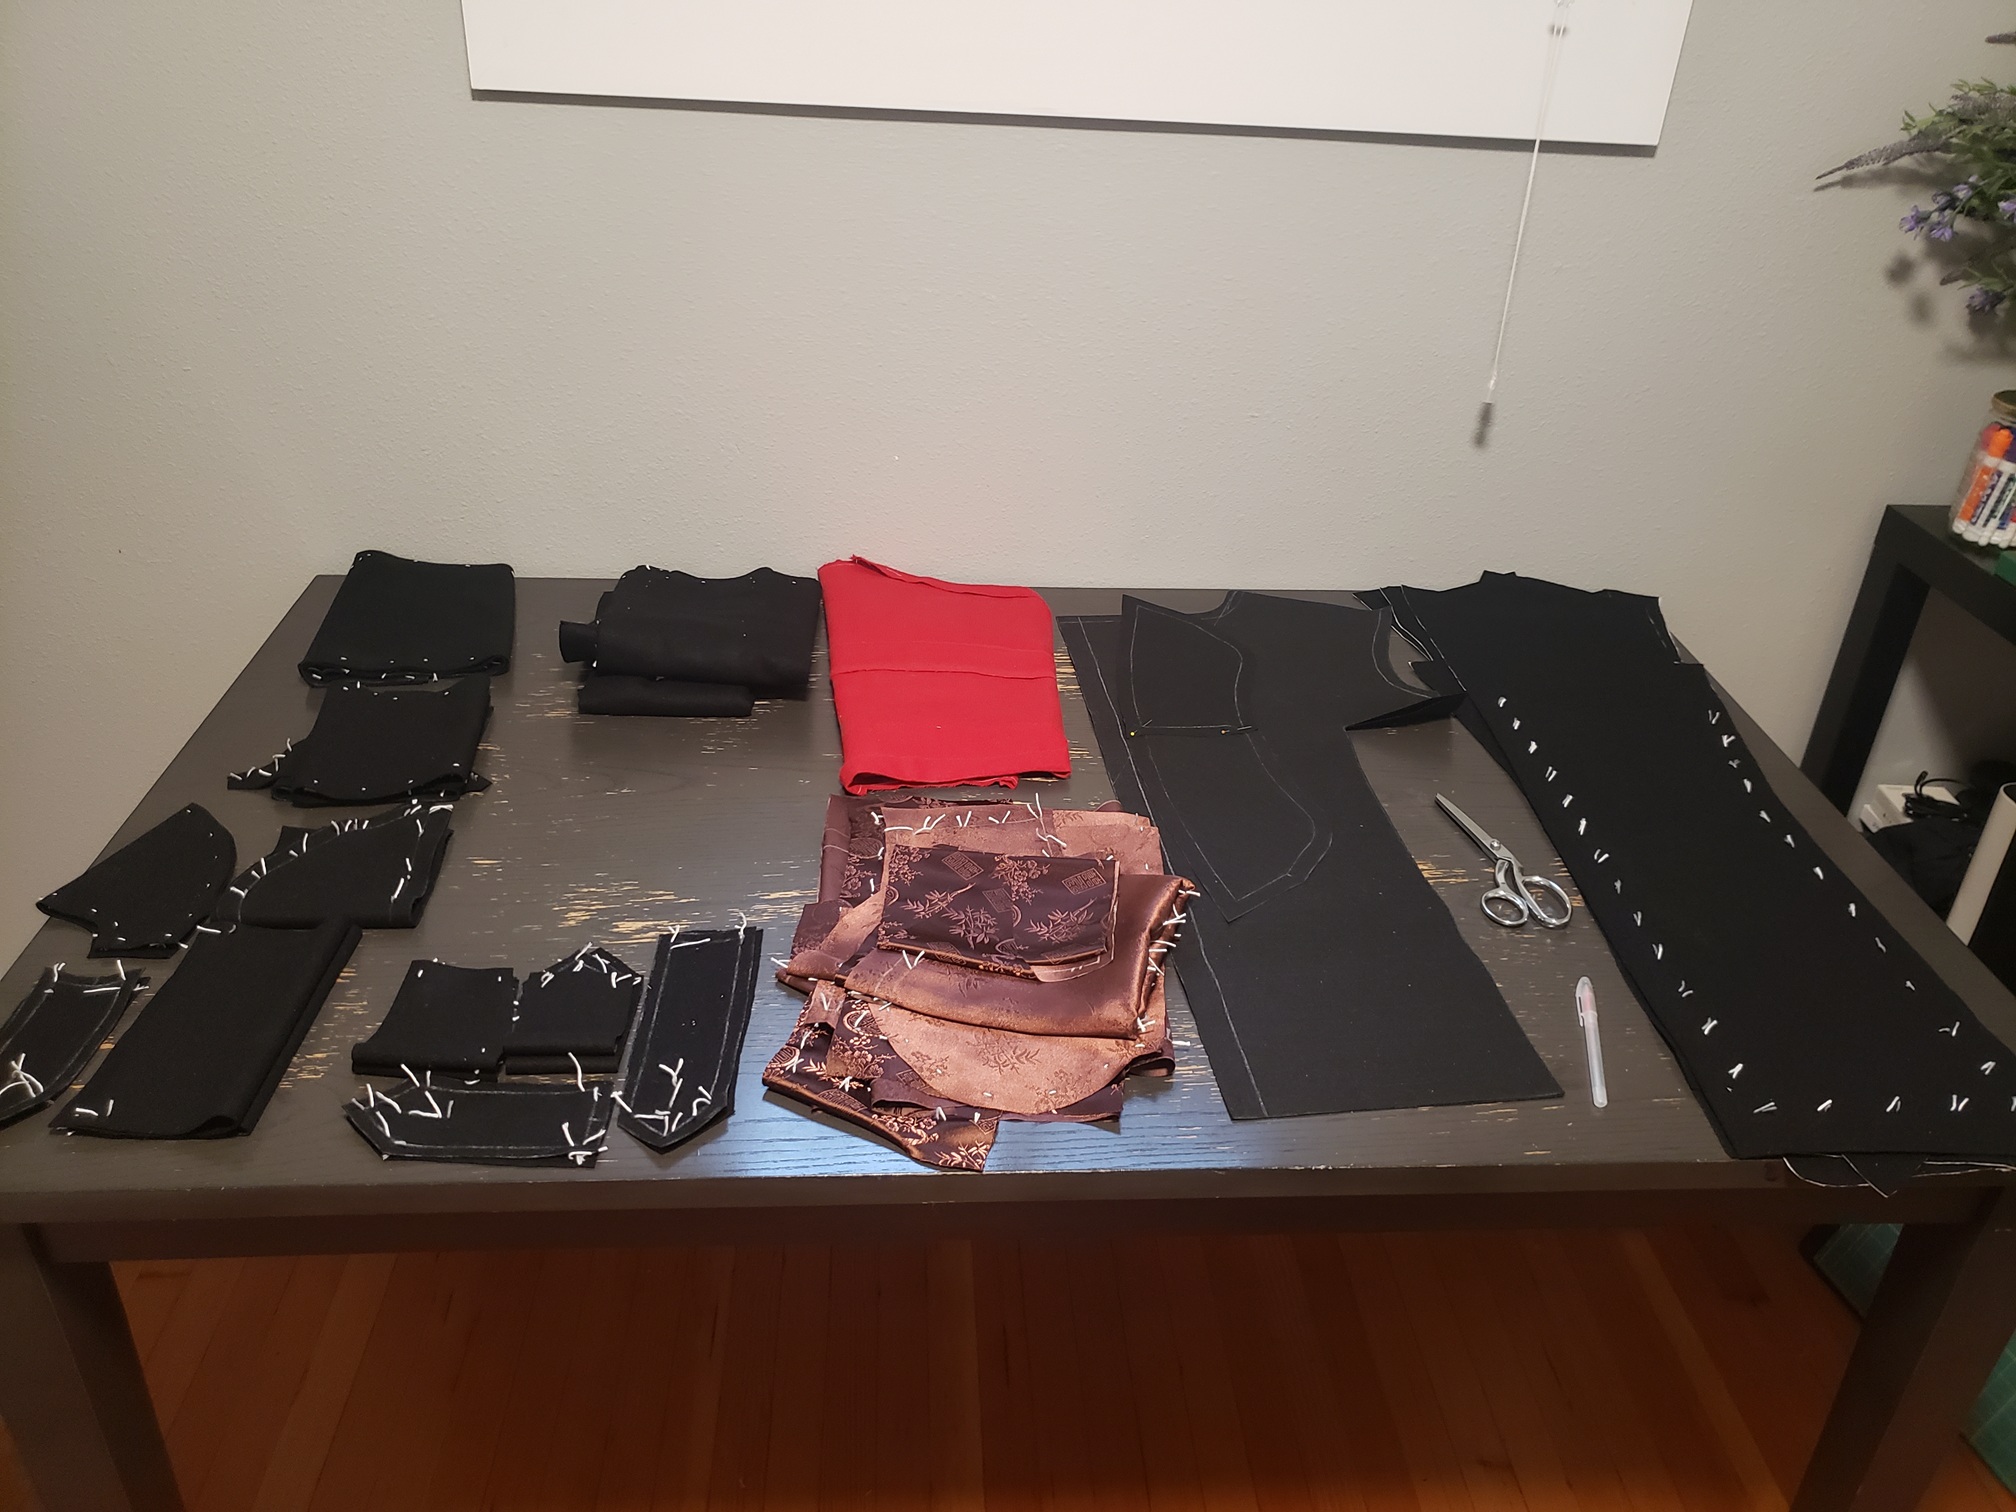
We went to our local fabric store together to pick out the materials (not Joann's because I think their selection of fashion fabrics are pretty limited.) We ended up picking out a black coating wool for the self fabric, a brown polyester satin brocade with pink Chinese motifs for the lining, mid-weight flannel as interlining for warmth, some plain weave mid-weight cotton fusible interfacing, Hymo hair canvas, cotton twill tape, and polyester thread (both regular, and a heavier weight, which I used to create the button holes), 1/2" shoulder pads, and leather buttons. I also used cotton embroidery thread and silk thread for tailor's tacks and temporary hand basting.
I think I assumed they'd have more peacoat pattern options than they did, but luckily the one they had was pretty decent. On its own, the Goldstream Peacoat by Thread Theory was not as structured as I would have liked. After visiting their website, however, I discovered a very useful tutorial in which a woman created a tailored version of this very coat! I am writing this post not as a step-by-step tutorial, but instead to document my process for future reference. So if you need more concrete instructions, I highly recommend referring to the linked tutorial insead. To fill additional gaps in my knowledge, I got the book Tailoring: the Classic Guide to Sewing the Perfect Jacket by the editors of Creative Publishing International. This was a great resource with TONS of pictures for reference.
First off, I pre-shrunk all of my fabrics and notions. Because wool will felt if you wash it, I had to steam it instead. I set my iron to the steam setting and painstakingly ran it over my 3.5 yards of fabric. This was kinda heavy for my noodle arms. I kept having to refill the water tank—I don't own a Gravity Feed Ironing System (I'm told it's worth it???)
Next, I created a mock-up out of the flannel I would later re-use as the interlining. I'm not sure if this was a wise choice. I wanted something that was similar enough to my wool, but was also inexpensive. Ultimately, I don't think that it was similar enough—it had way too much stretch on the bias and was weirdly clingy, so it was hard to tell whether it was fitting well. Either way, I decided "fuck it" and just used the pattern as-is without making any major alterations, except shortening the sleeves so that the cuff hung at the top of his hand.
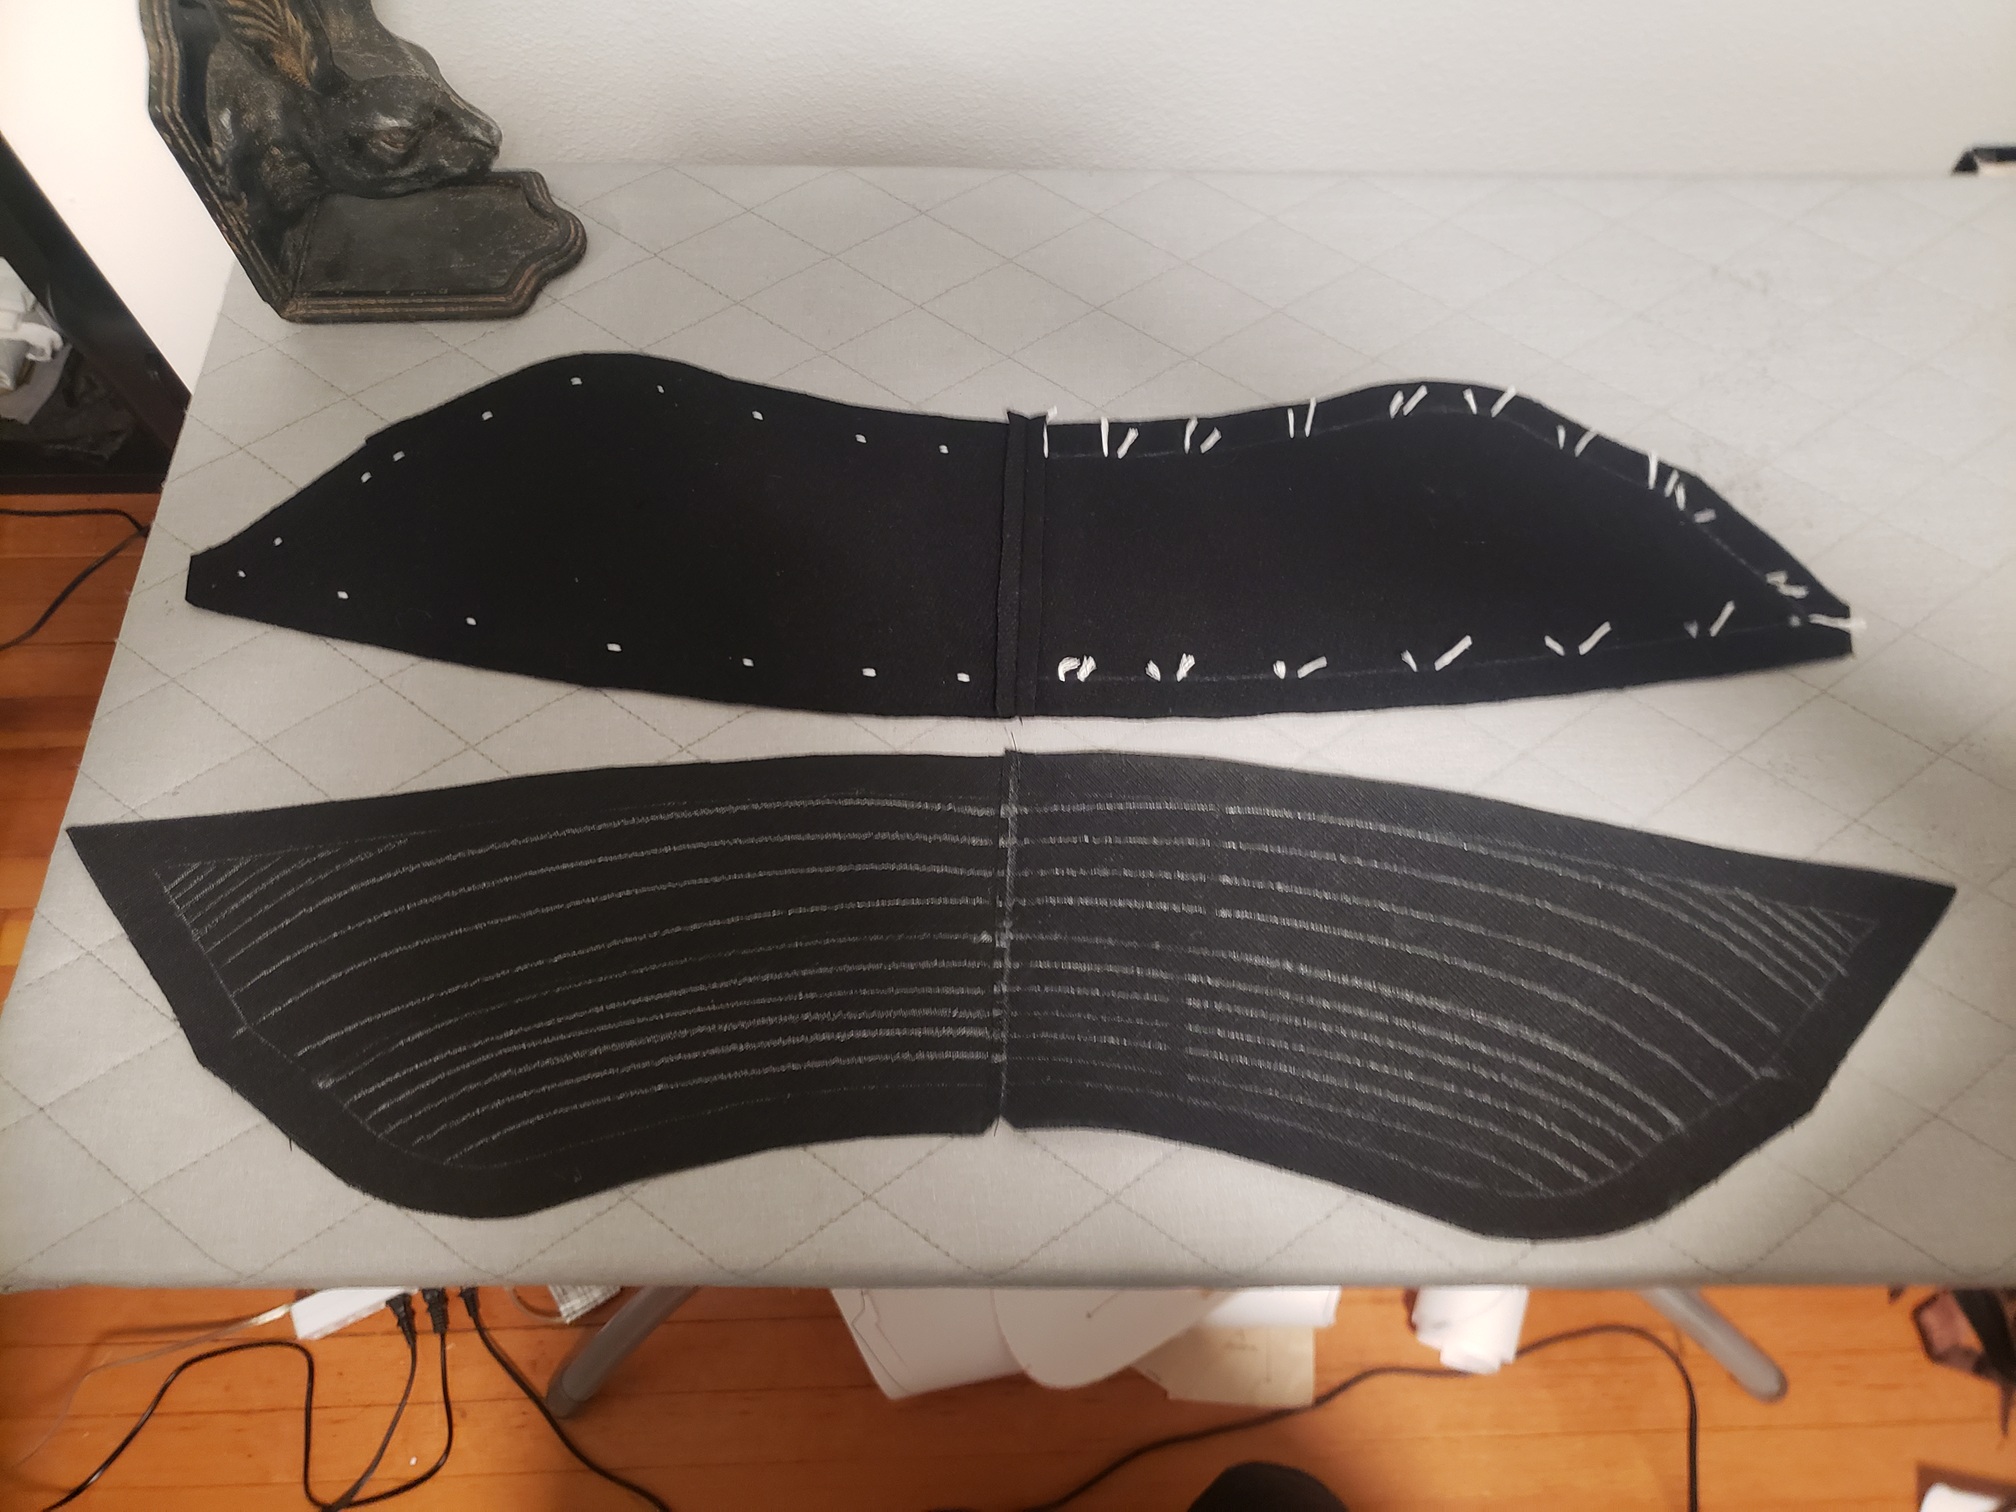
After that, I marked out my pieces with chalk and used tailor's tacks along the seamlines so that they could be handled without worrying about important markings being rubbed off. If you are unfamiliar with tailor's tacks, this is when you do a long stitch with a lot of slack, followed by a short stitch through both layers of fabric. That way, when you gently lift the top layer, you can snip the thread in between and essentially transfer the markings to both pattern pieces. I think I went a bit over-board with the tacks? It took sooooooo long, and for some of them, they had to be removed pretty much immediately to add fusible interfacing. Lesson learned.
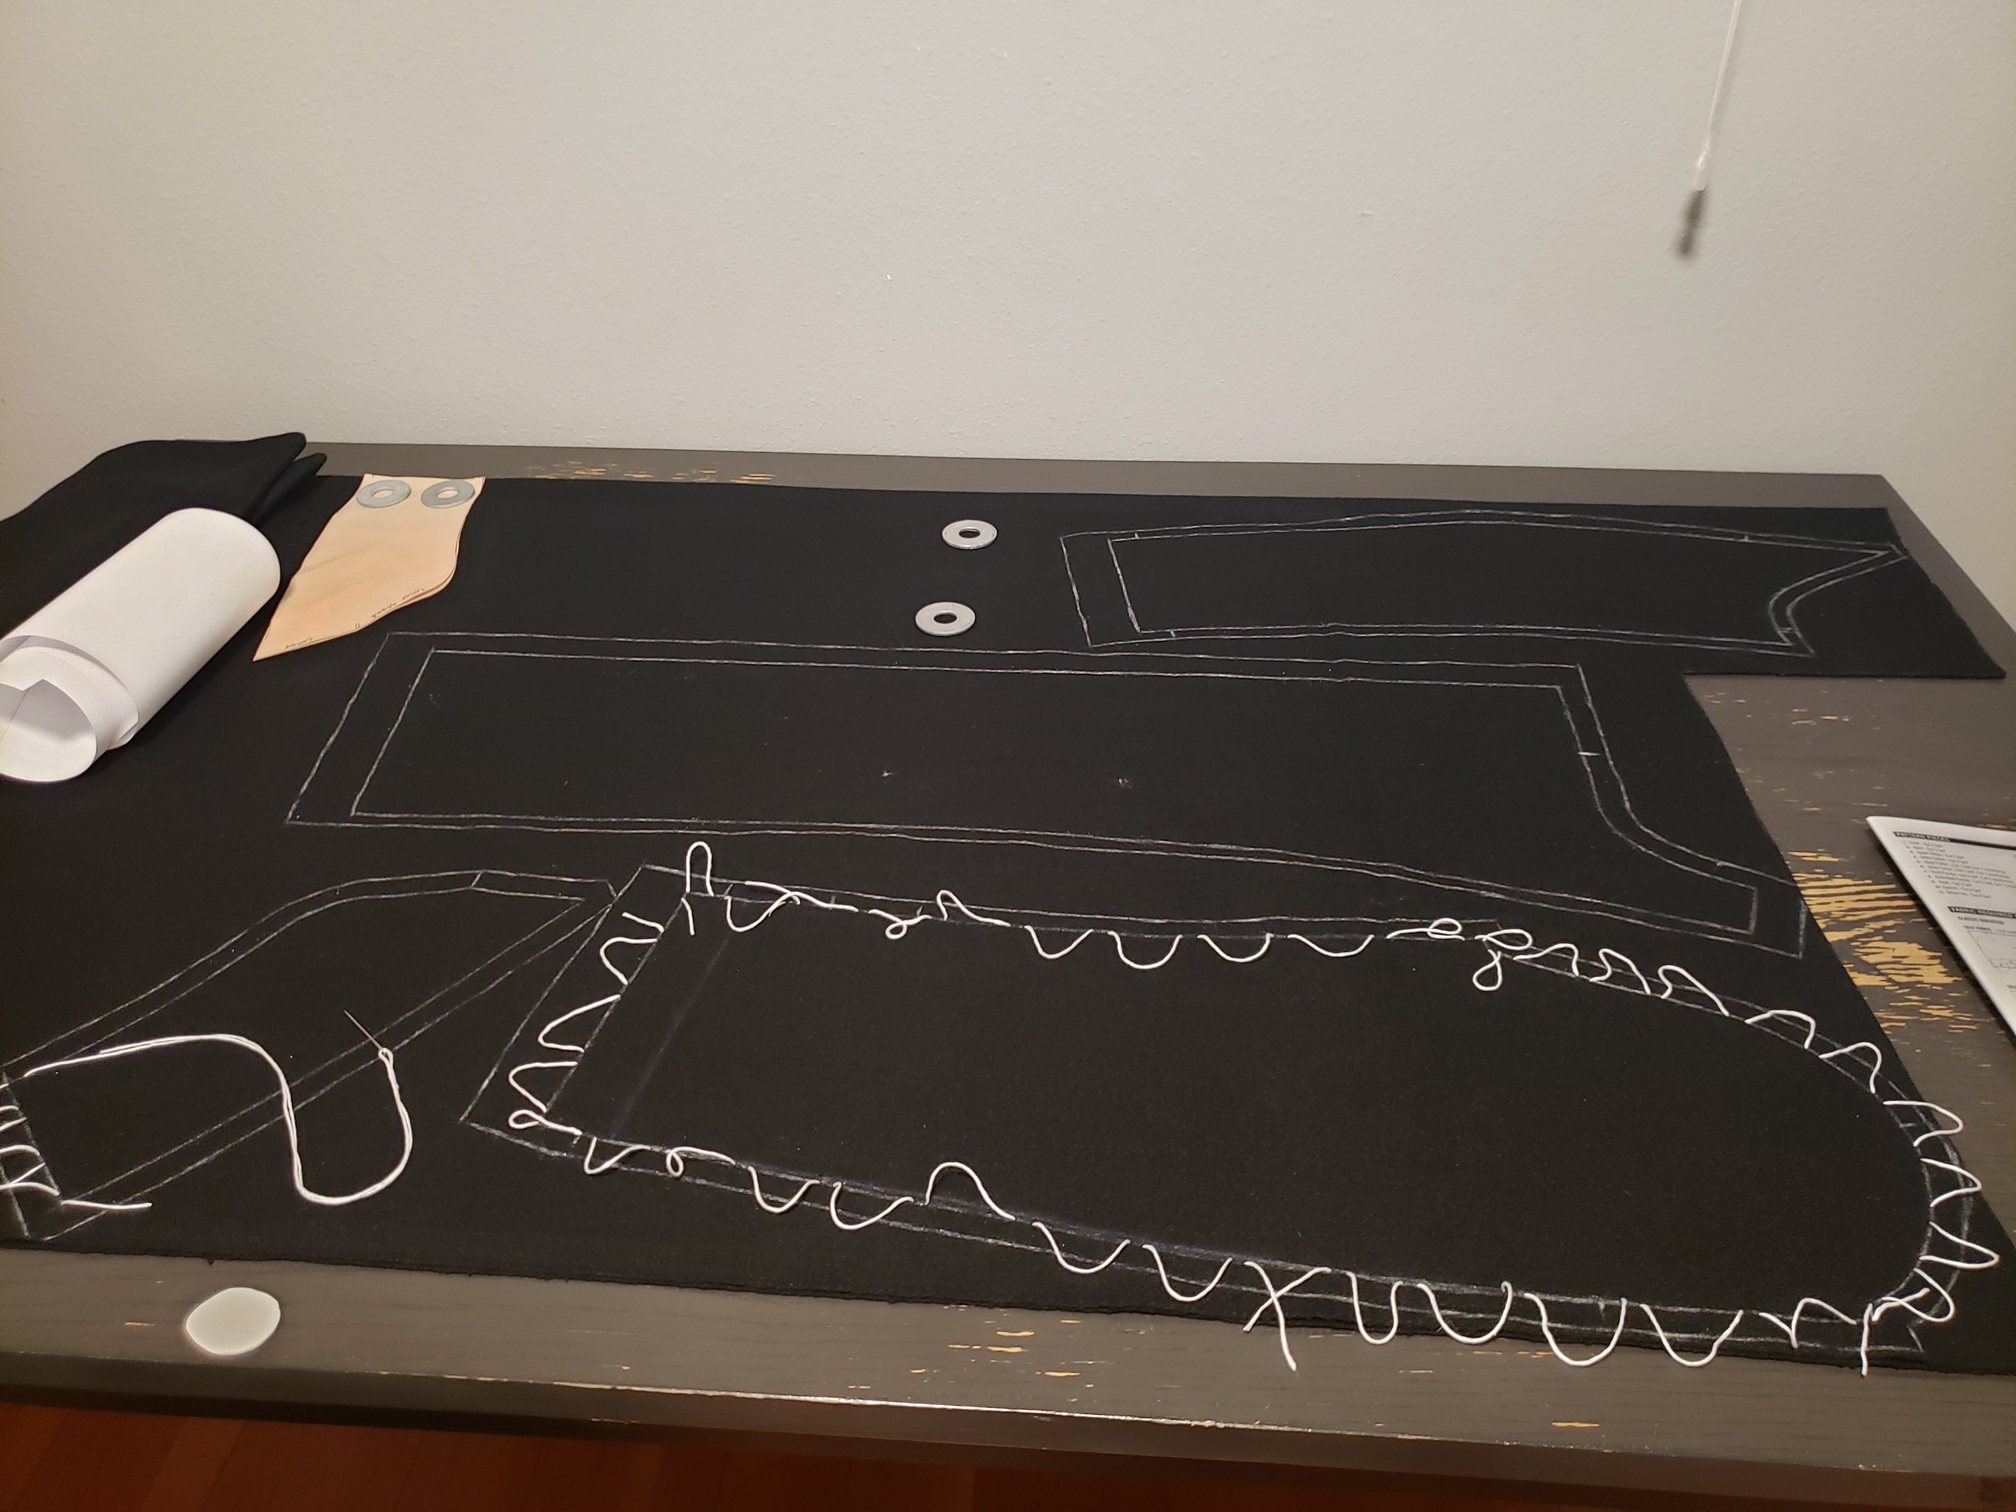
Because the original pattern did not call for it, I had to make my own pattern piece for the hair canvas that would be attached to the front of the coat. You can see the shape in the picture below, with the lapel already folded over:
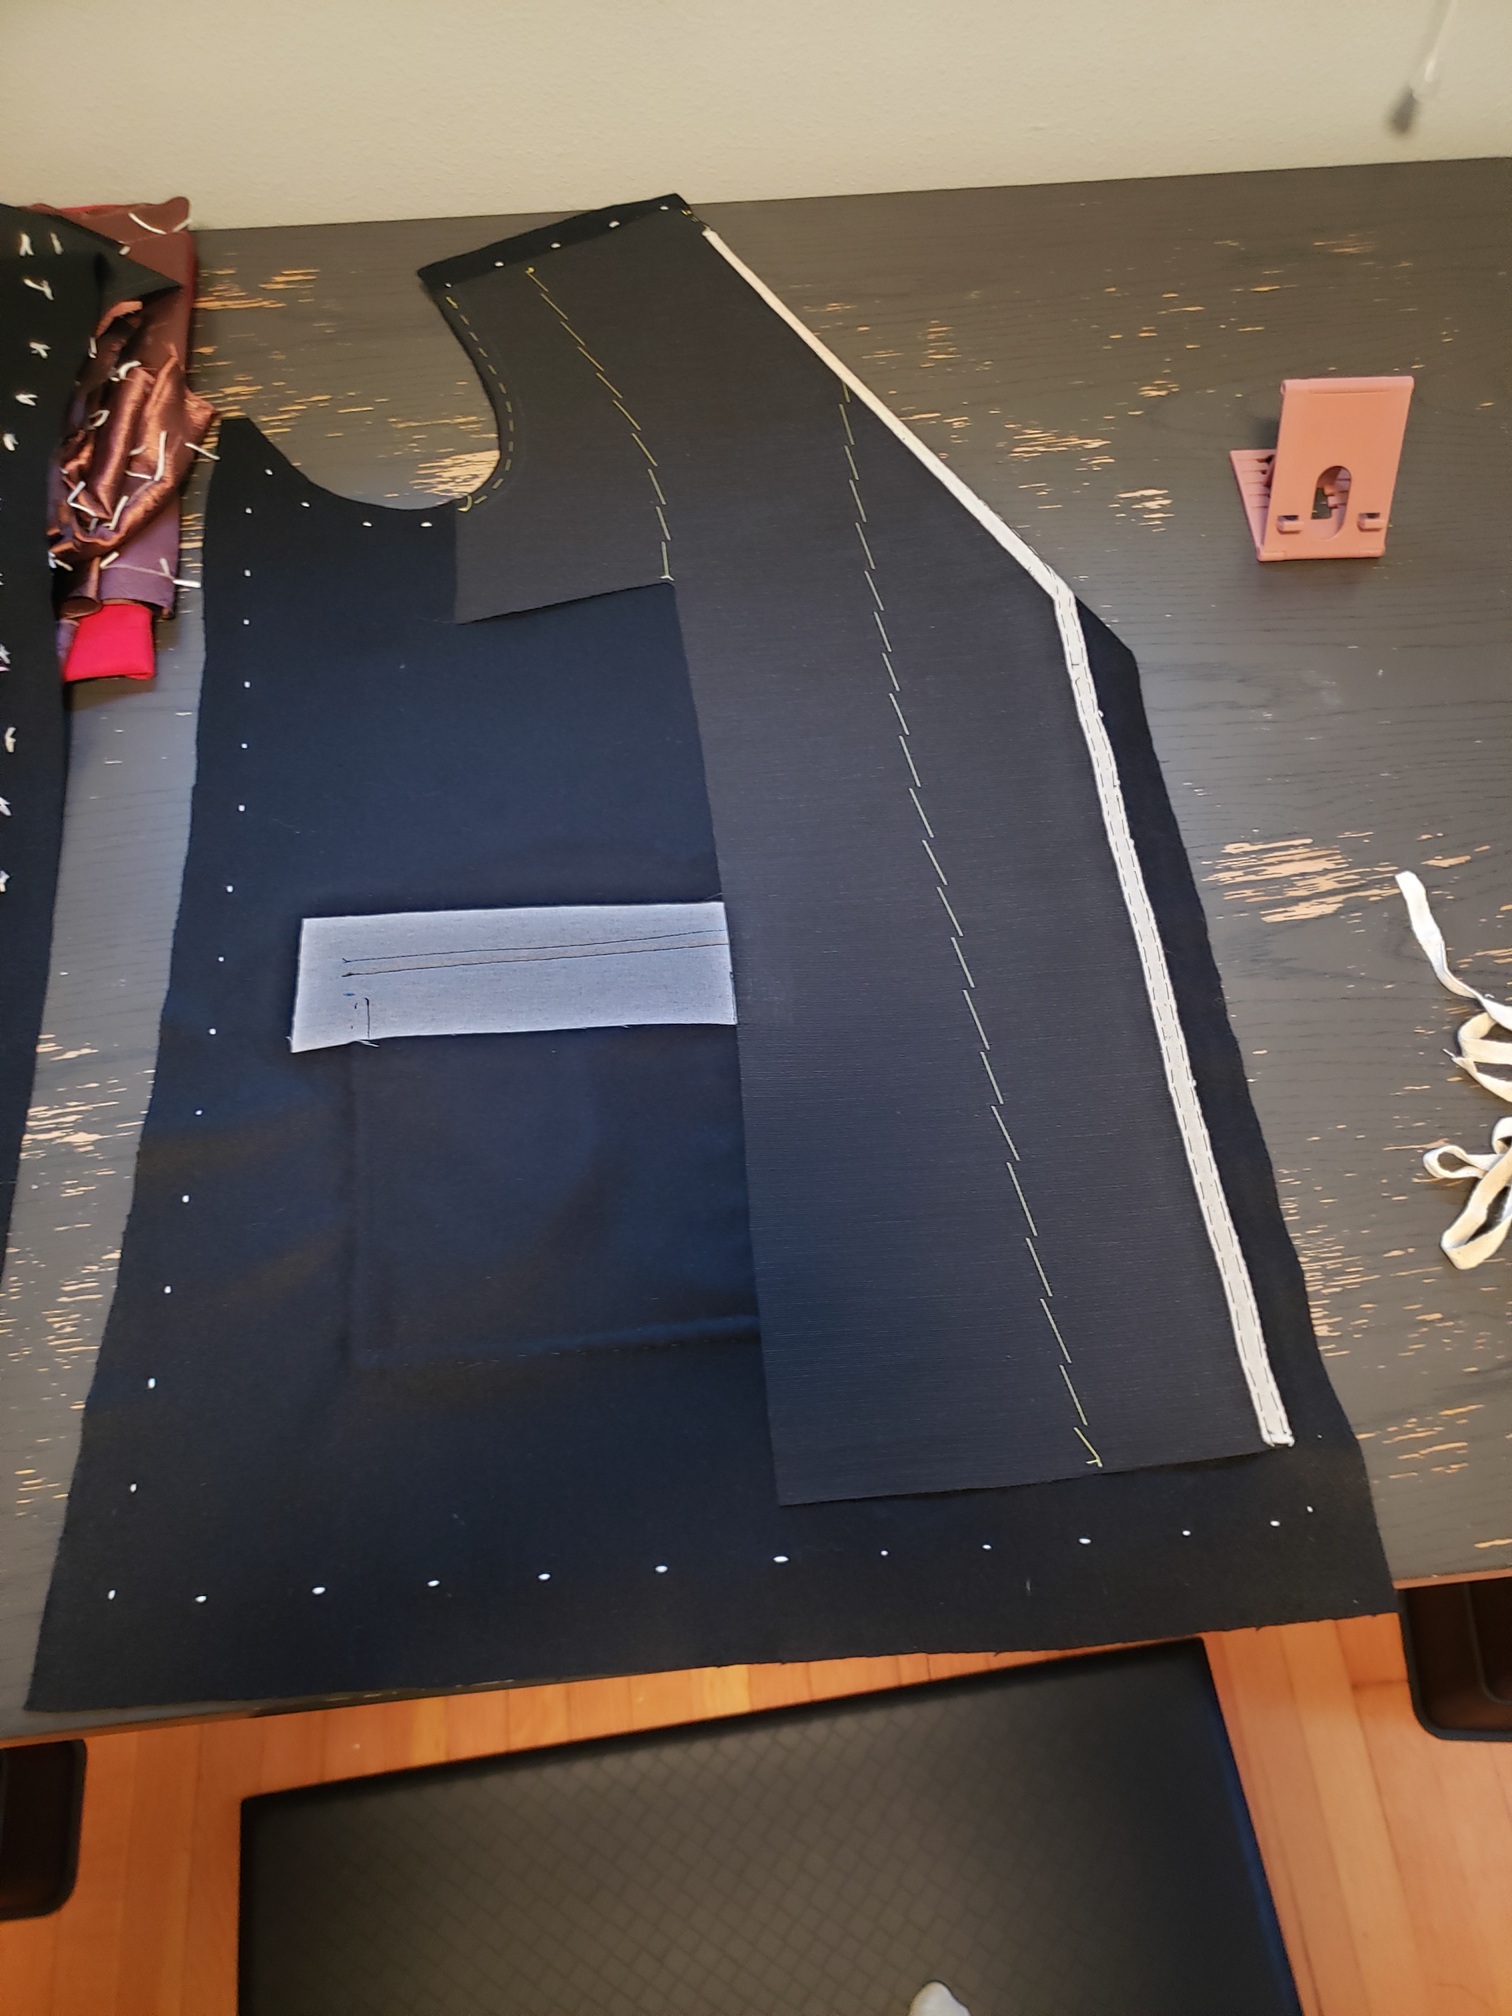
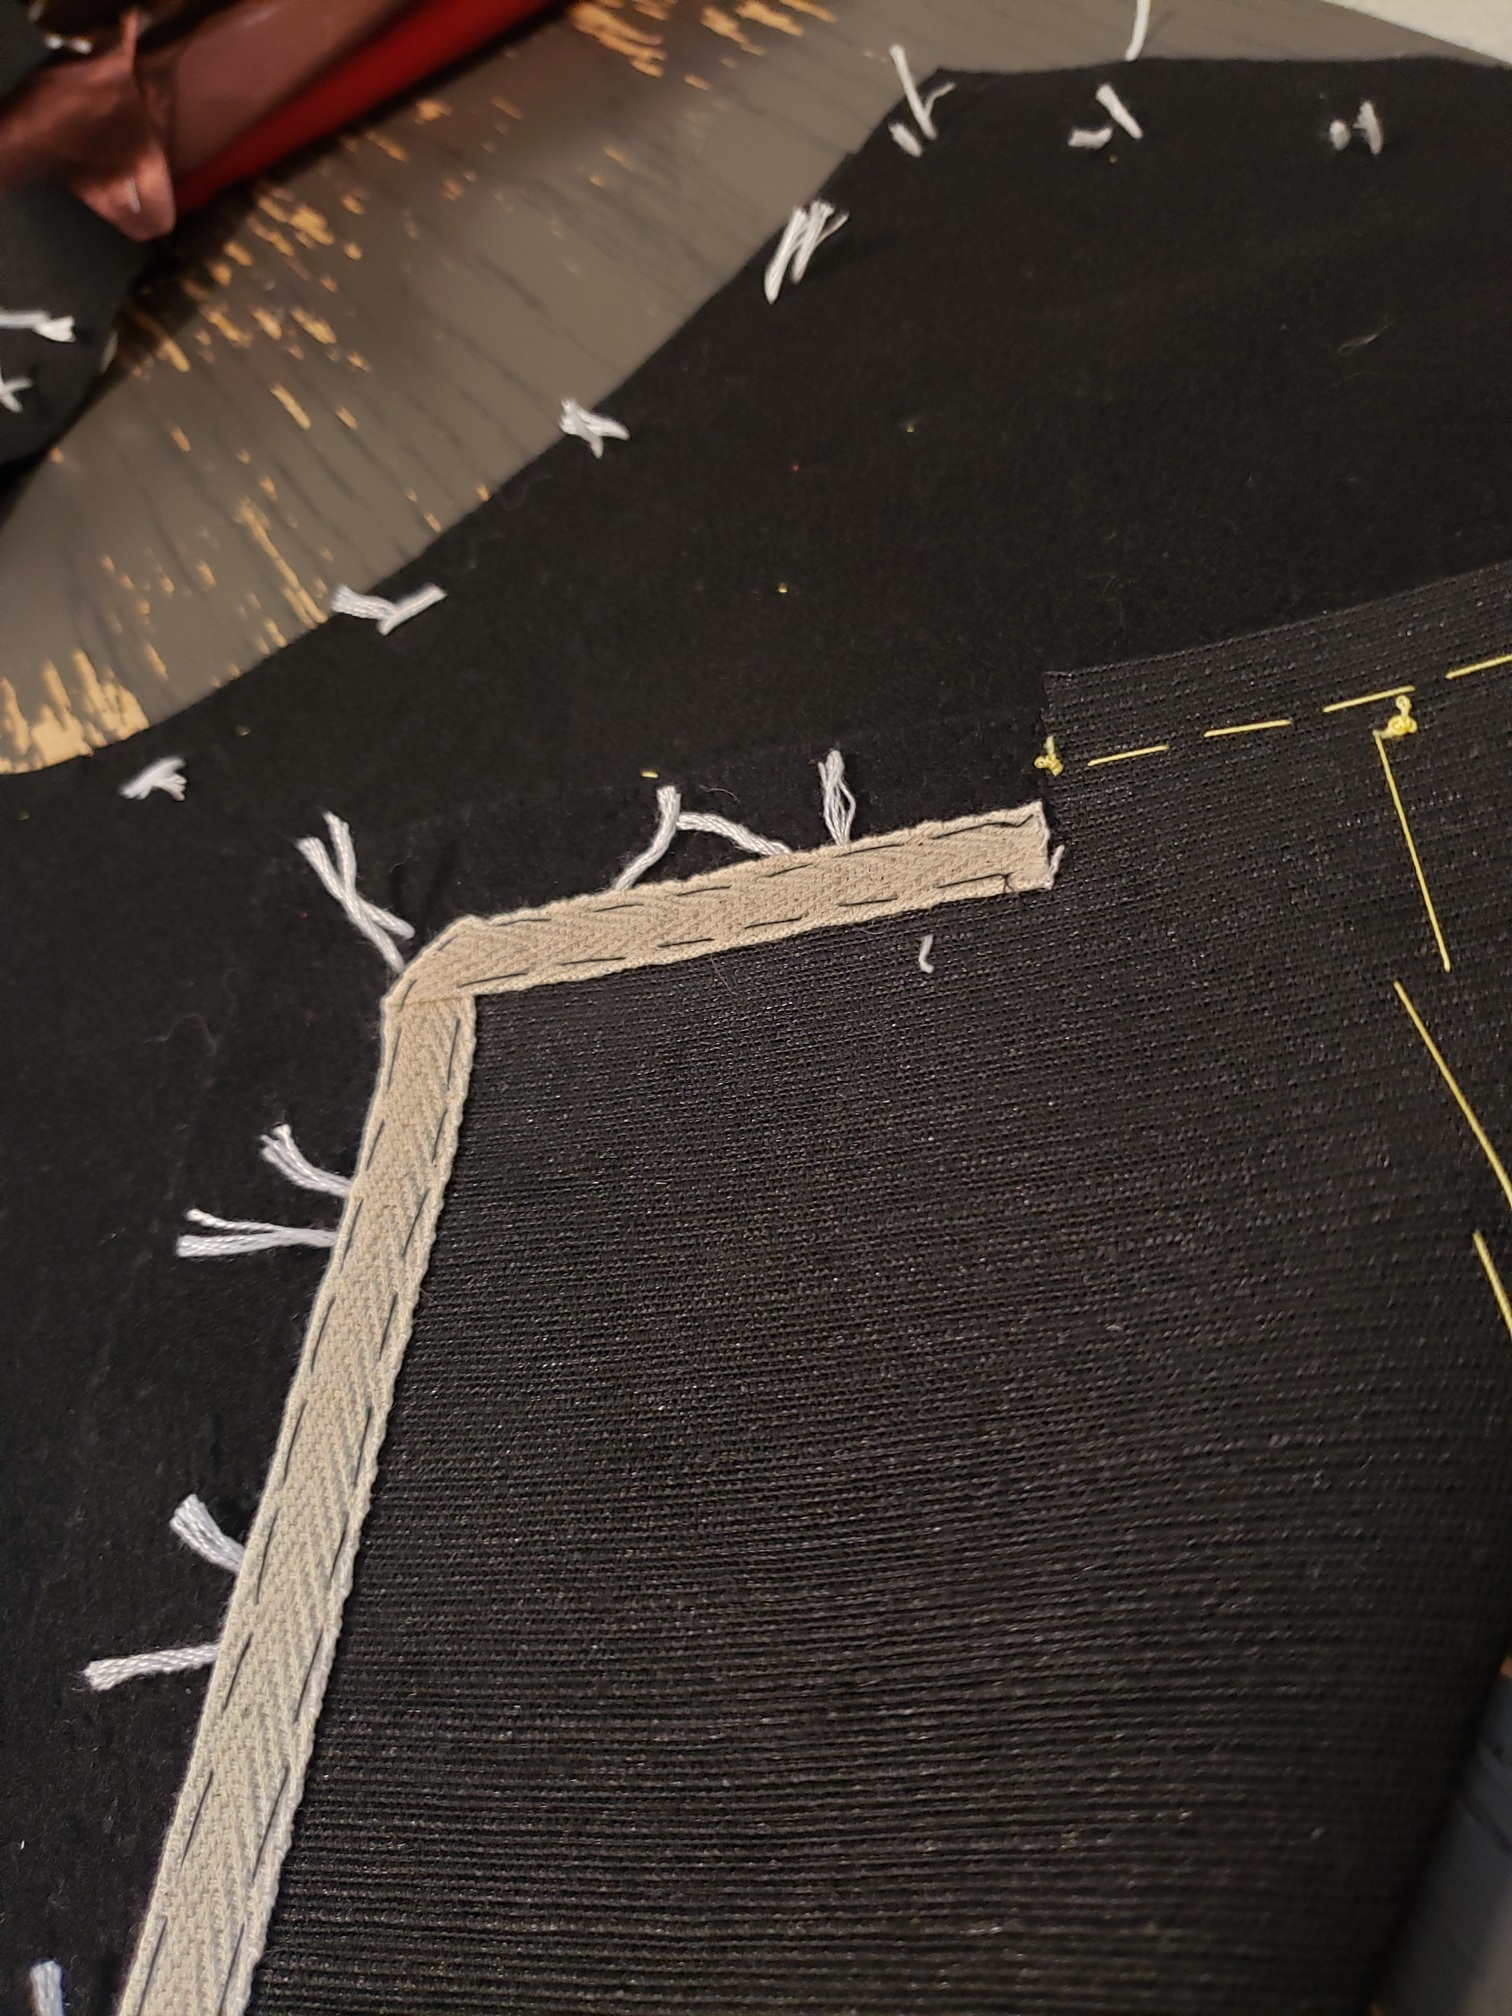
I learned that, in order to make the lapel want to naturally curl over, you use stay tape (like a cotton twill tape that doesn't stretch), and cut it slightly shorter than the length of your lapel roll line. When you pin the tape at the start and end of your roll line, the excess fabric underneath bunches slightly, so you have to ease it in as you stitch the tape in place. Having this tension makes the fabric more likely to then fold over and stay in place after steaming it. At this point, I could have padstitched the lapel (which creates even more shaping), but I opted not to, because this would have been visible if you popped the collar of the coat.
I used a yellow silk thread to do the basting (silk is less likely to catch and then tangle, which is preferable when basting), assuming that these stitches would be taken out at some point. To this day, I am still unsure if they were meant to be permanent, but once the coat was finished I did remove them because the yellow prick stitches were just bearly visible on the outside of the coat. It seemed very strange that the canvas would only be attached wherever it intersected with a seamline, and then one long edge was left loose? But if you think about it, if it is too affixed to the outer fabric, the coat fabric would move too stiffly, when the canvas is really there to smooth the lines of the wearer's body. Maybe one day I will learn the answer. Today is not that day.
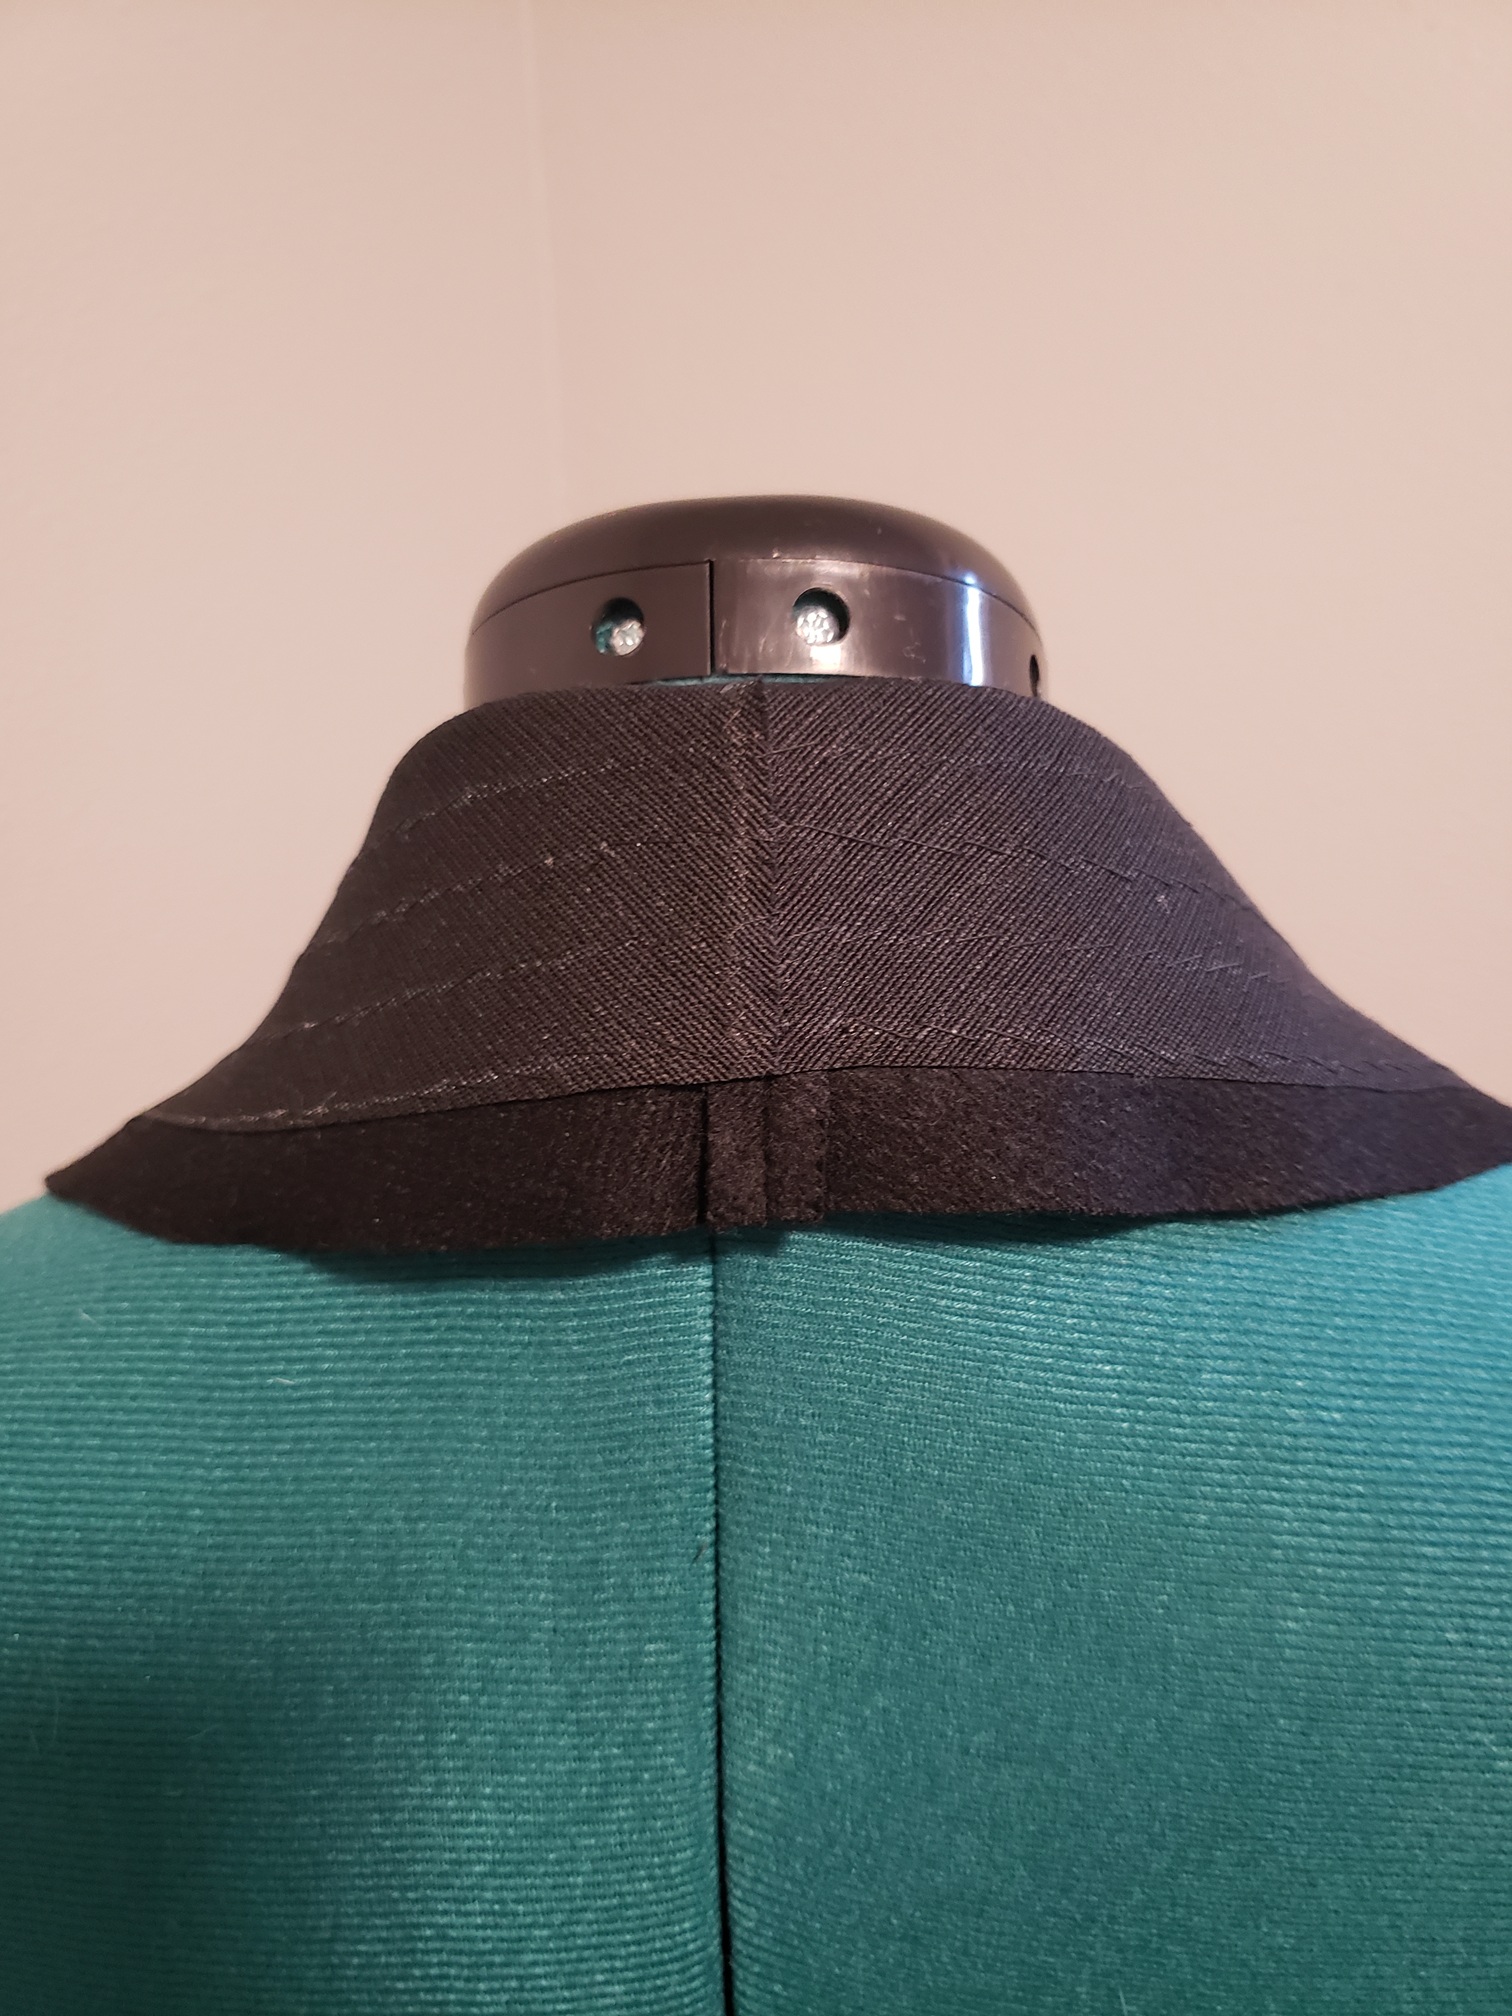
Unlike the lapel, the under-collar was pad-stitched to give it shape. It's not very visible in this picture, because the canvas and thread were black, but here is the collar before and after it was stitched and then steamed into place:
For the upper collar, I attached fusible interfacing. I think this was a mistake. Maybe I just got a cheap-o fusible, but either way, I probably won't risk it again and will instead opt for sew-in in the future. You see, when the coat was finished, my partner wore it on a rainy day (of which there are many here), and something about the moisture or the heat from his body caused parts of the fusible to come un-glued. This resulted in some unnattractive bubbling near the seam where the collar meets the lapel. But I digress.
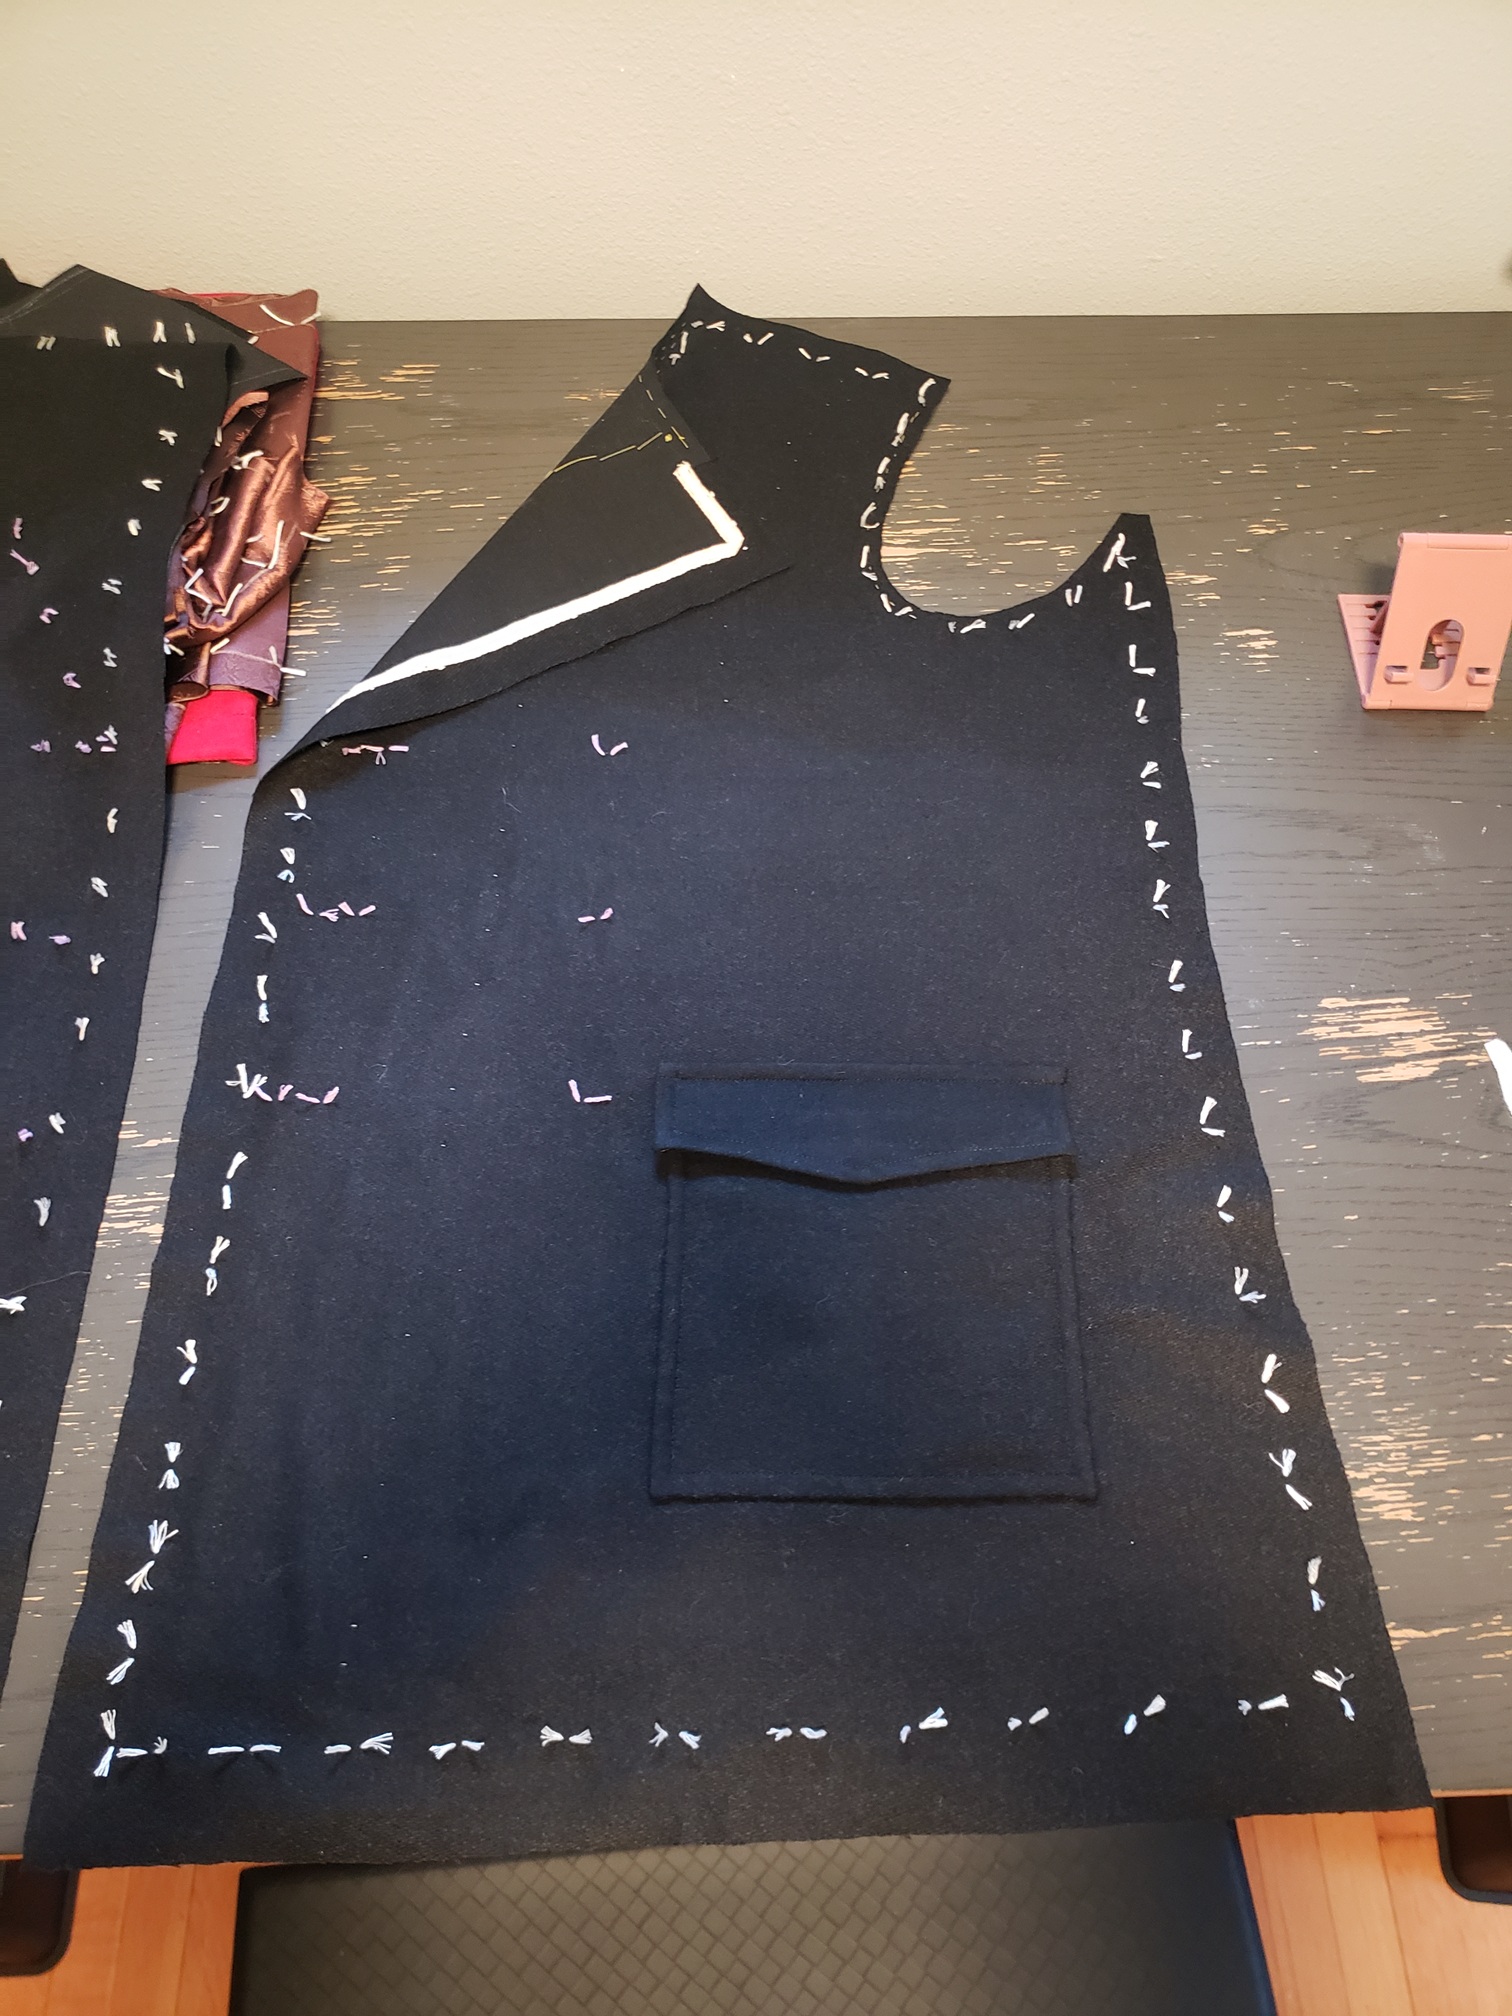
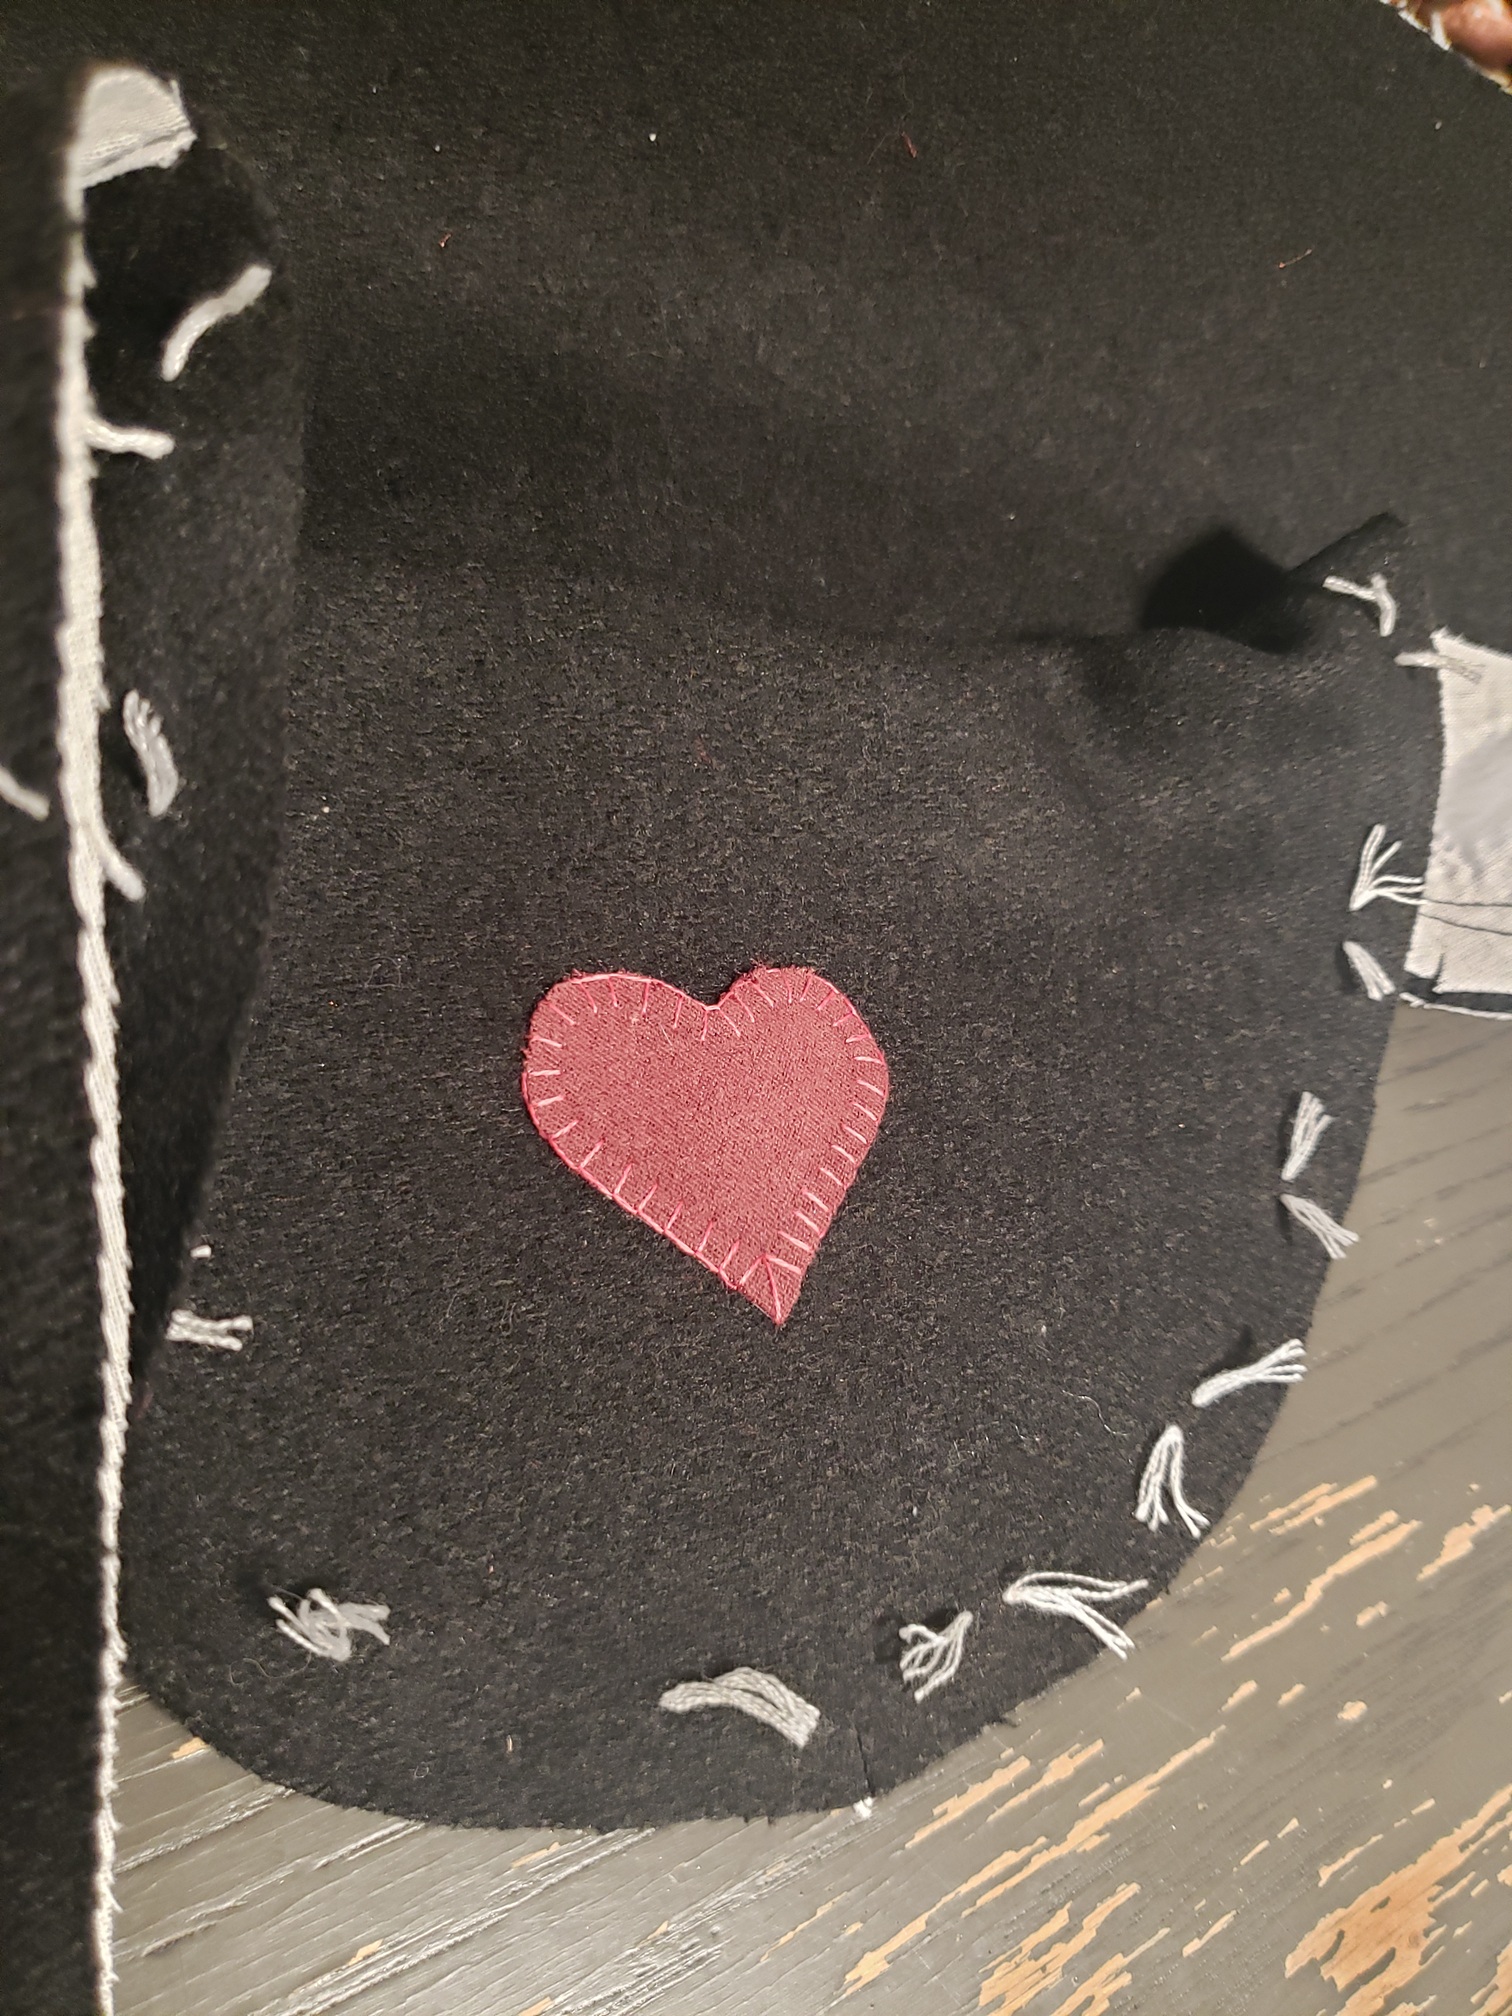
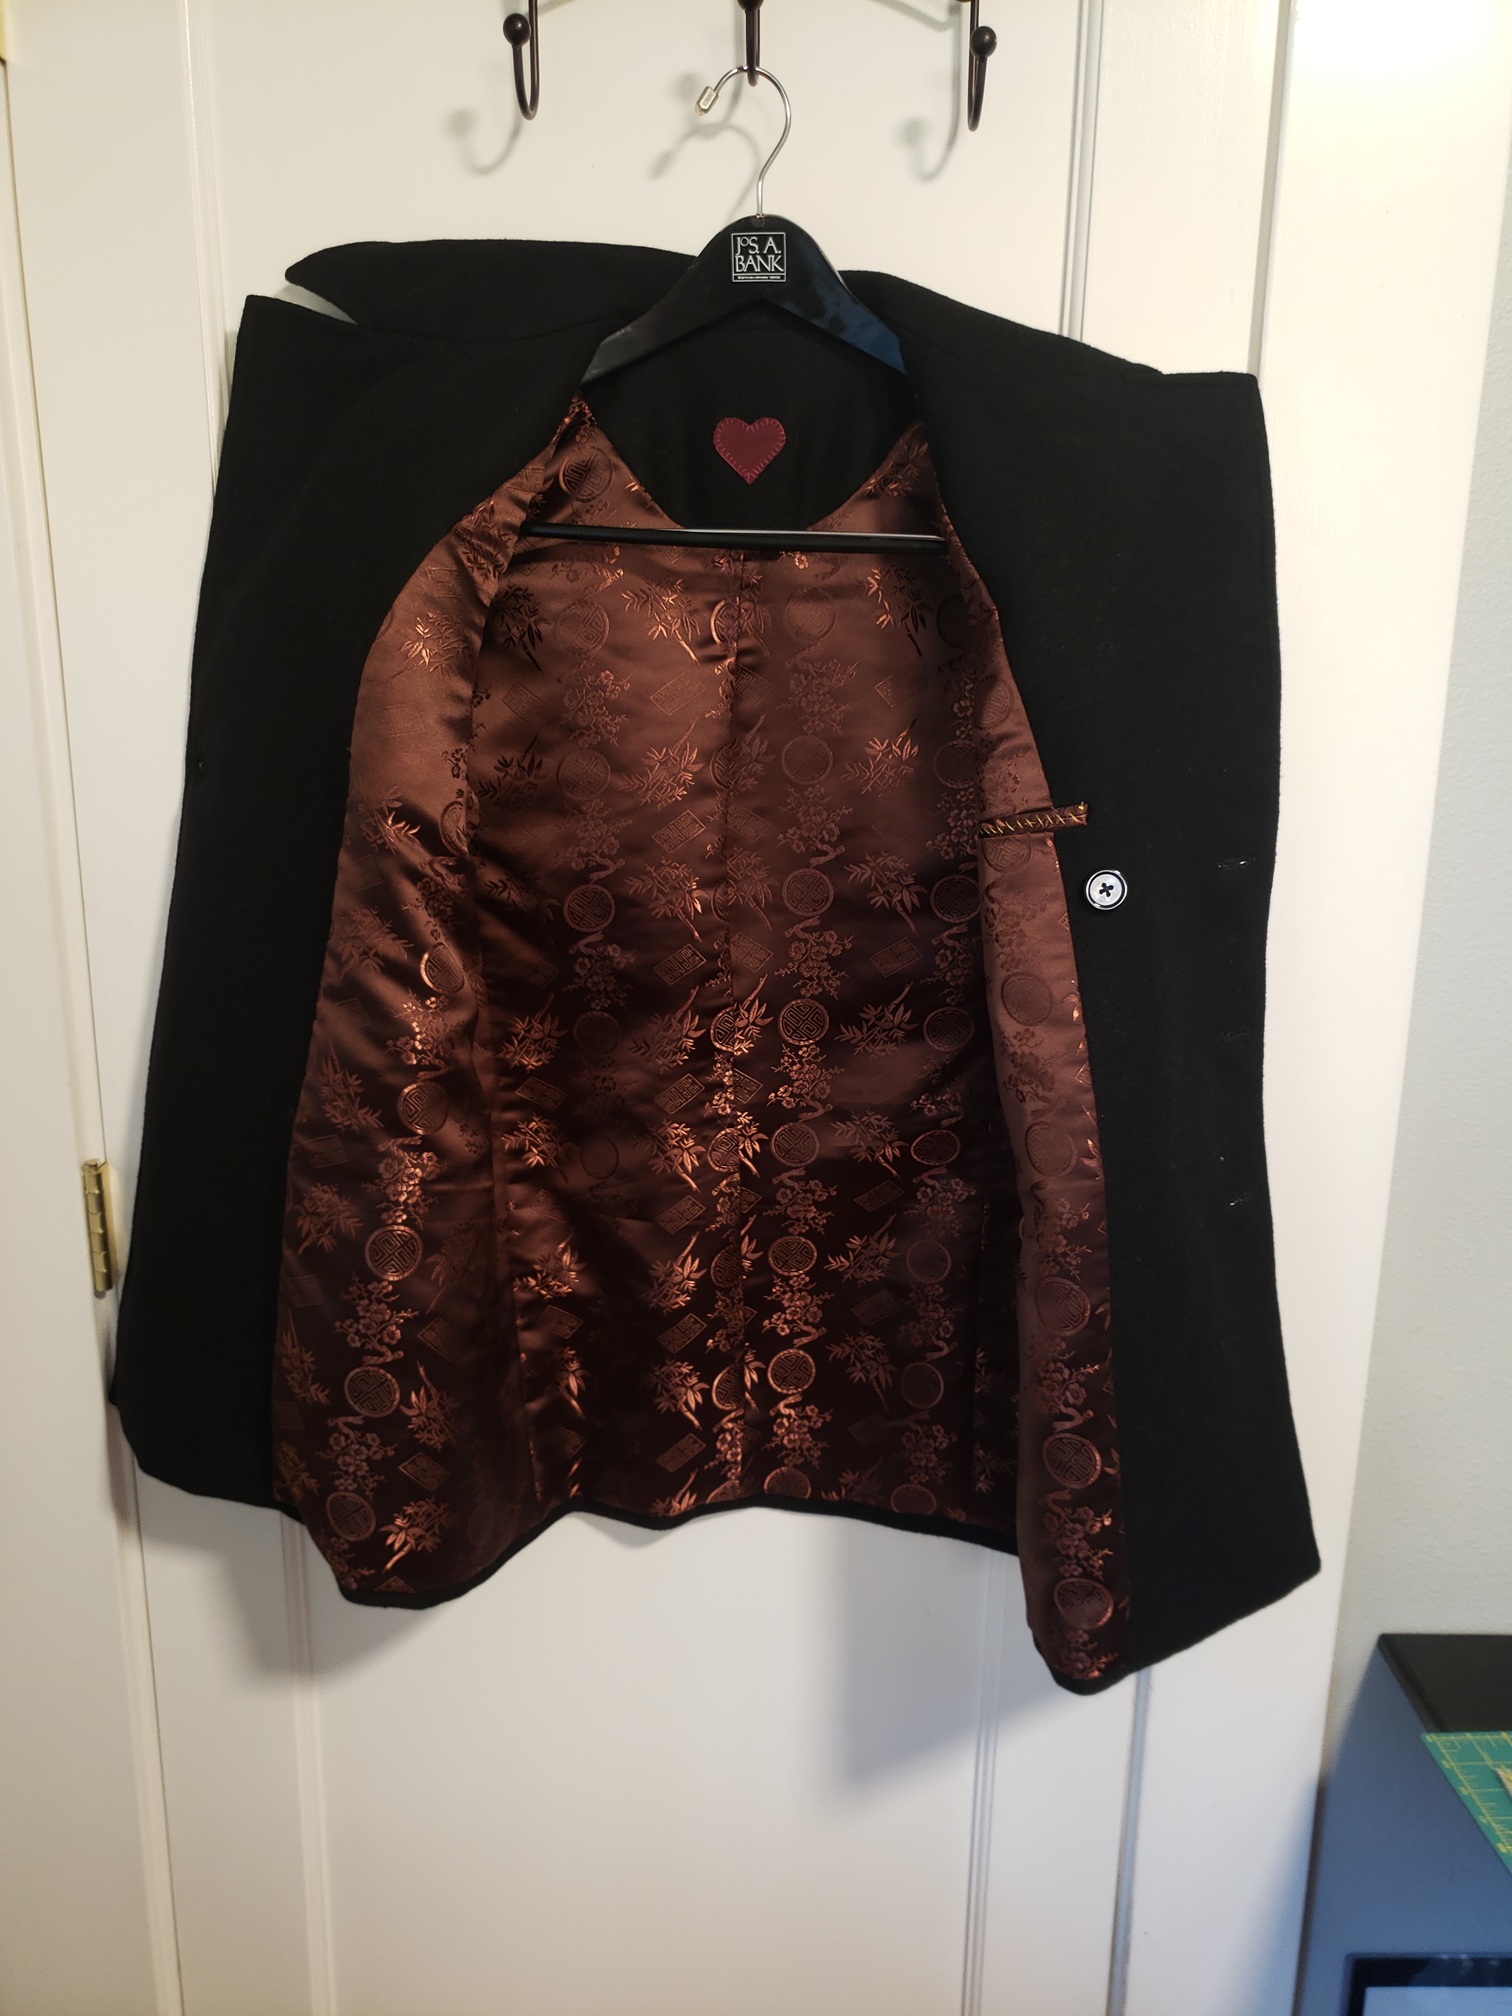
I added a fun touch to the back neck facing—a little heart to represent the love for my partner that I put into every stitch! I used a bit of fray check around the edges of the heart, and then did a blanket stitch to somewhat hide the glue and give it a neat home-made look.


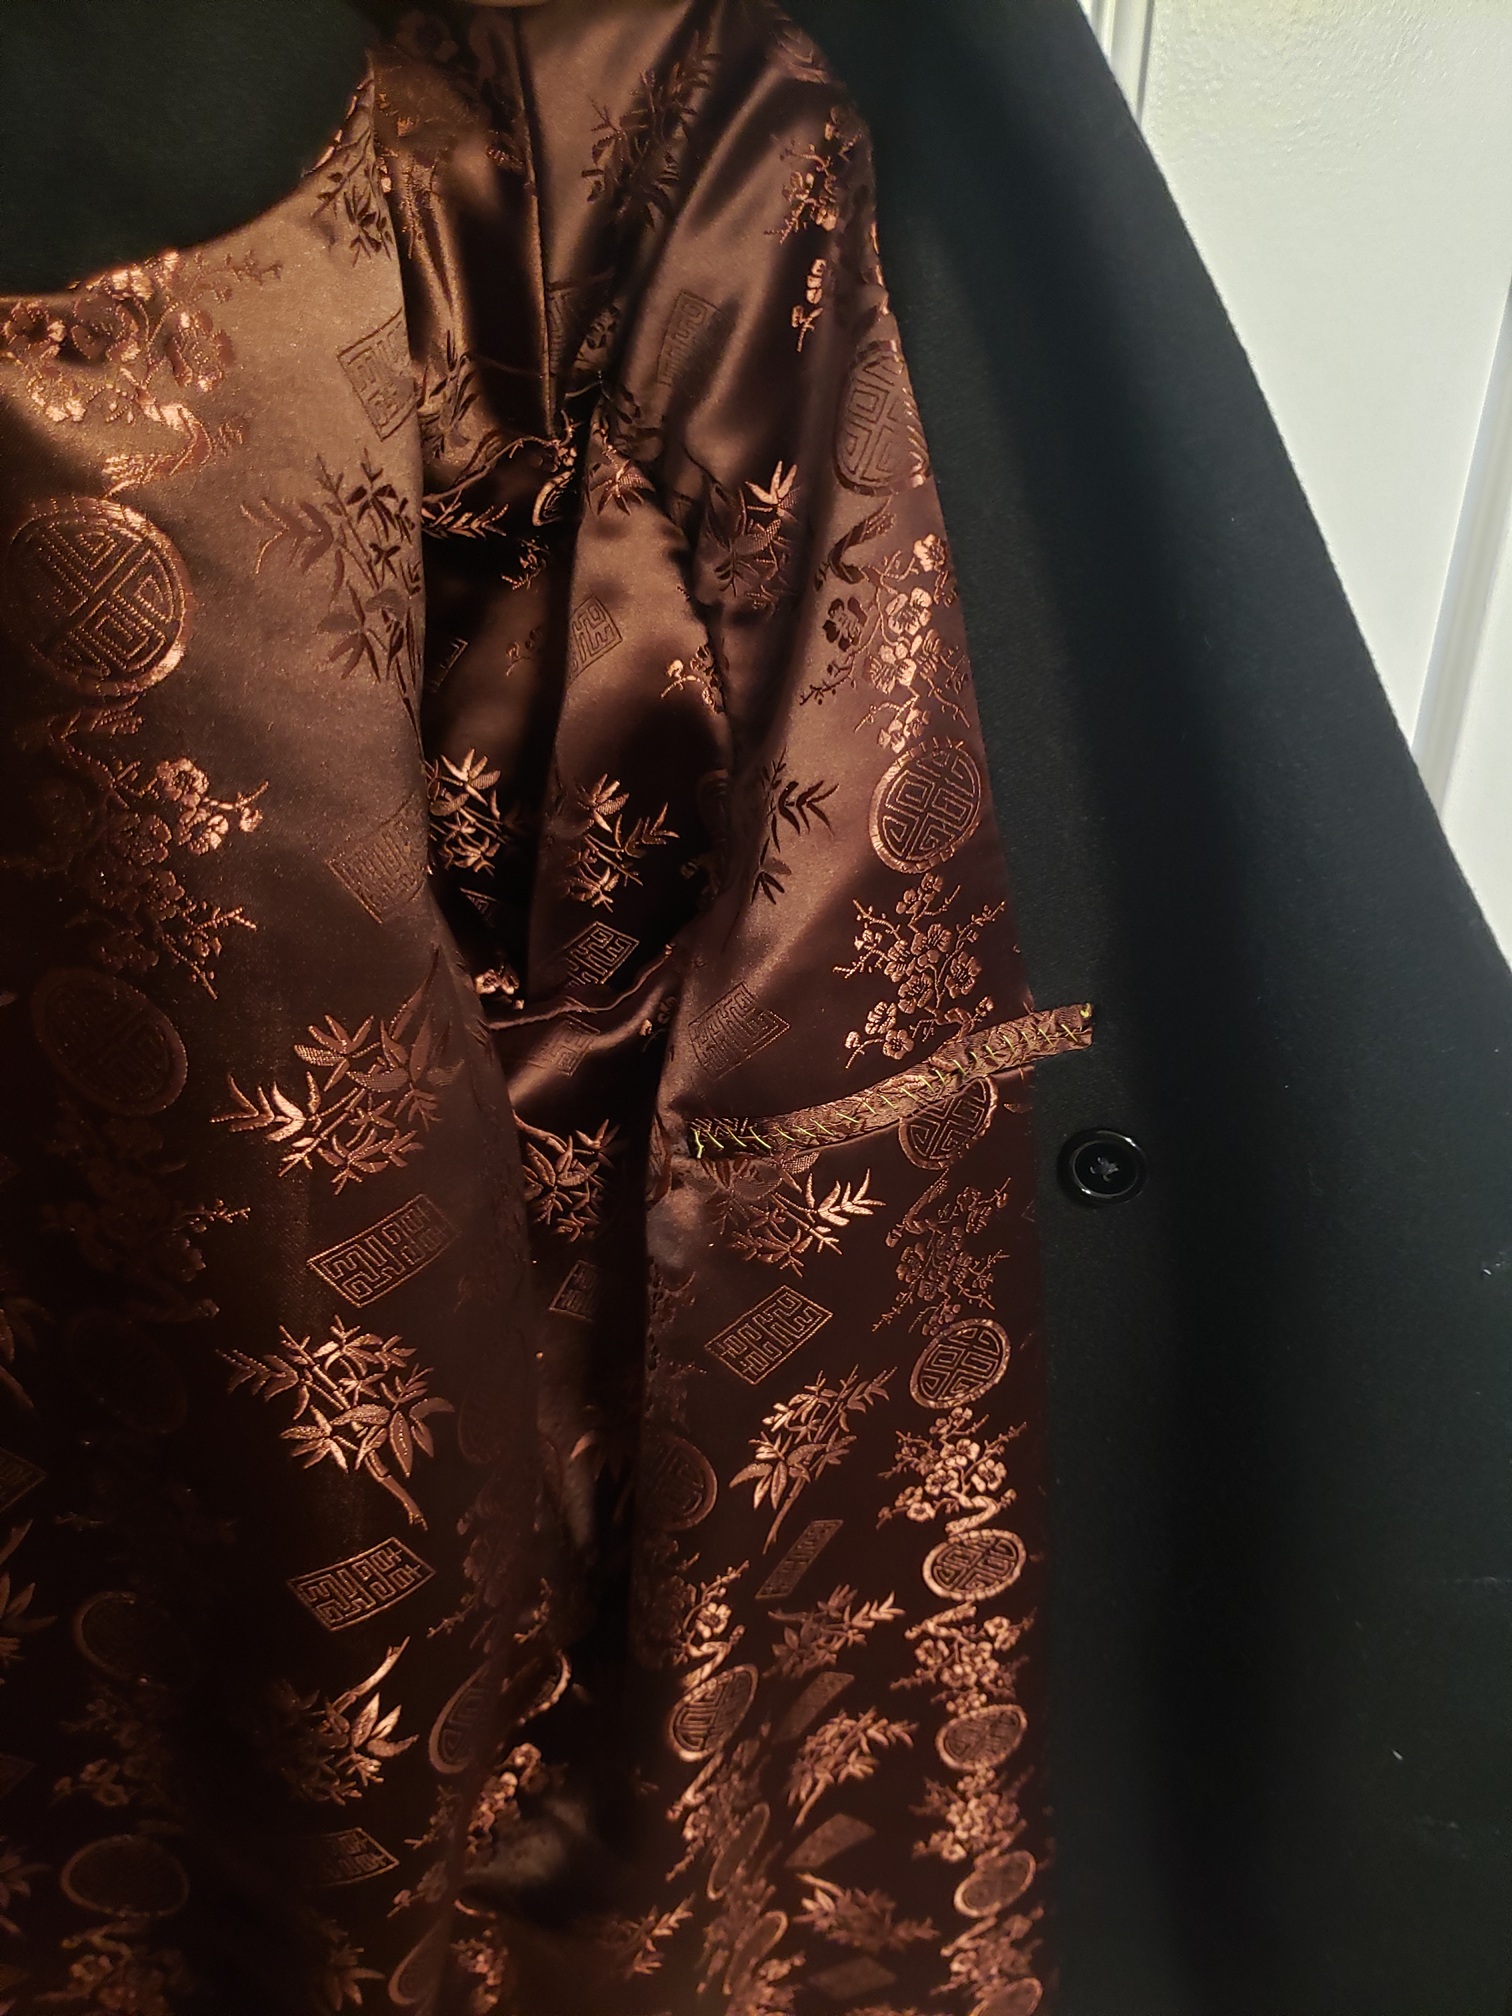
I flatlined my lining pieces with my flannel interlining and sewed them together as if they were one piece. The normally slippy satin was made just a bit more stable when sewing thanks to the flannel, plus it would offer a bit of added warmth. Instead of a patch pocket on the inside, I tried to do a welt pocket. This was a struggle because the satin brocade frayed like crazy. I knew this was a danger when we were picking out fabrics—it was already fraying quite a bit on the bolt—but the lining is the one place on an otherwise all-black jacket that's able to add a little character. My partner seemed really excited to use this particular fabric, so I was happy to take on the challenge! I think some extra love (plus blood, sweat, and tears) went into that welt pocket. Maybe I should have stuck with the patch pocket, but I felt the welt pocket was the quintessential look for a tailored coat!
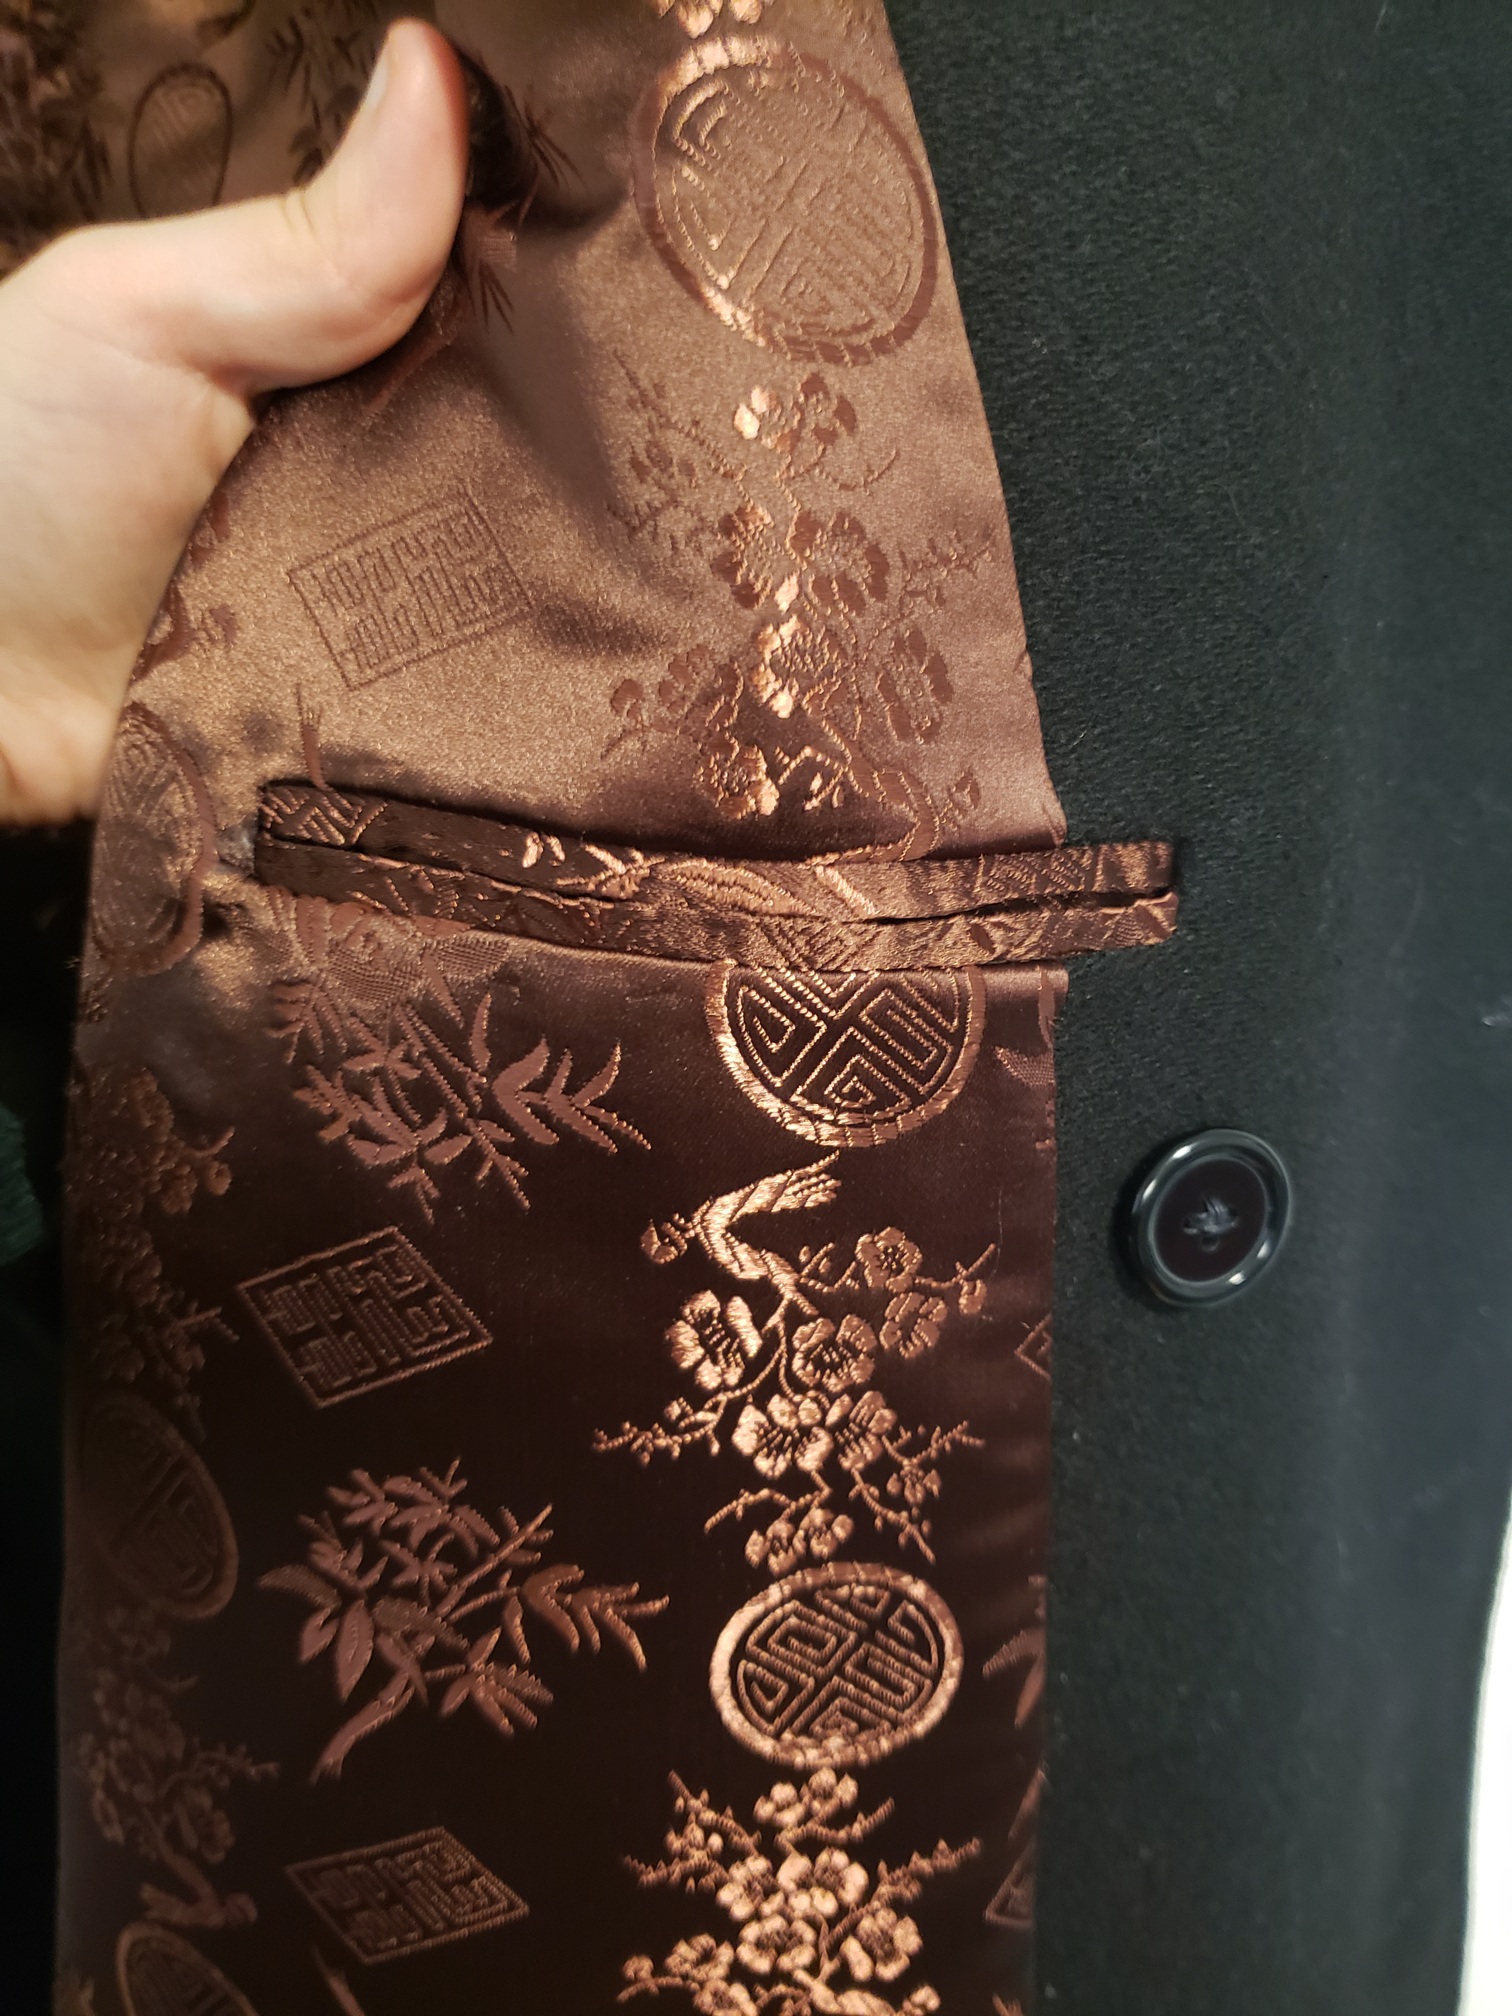
I had a bit of a scare when I was using fray-check on some of the raw-edges of the narrow seam-allowances; as I was squeezing the little bottle, a bit too much came out at once and dripped on the lining. I grabbed some acetone to try to get it out before the glue set. I think I was mostly successful, but there is a barely visible inch-wide stain on the inside. Oh well. Next time I'll use a toothpick to apply the glue!
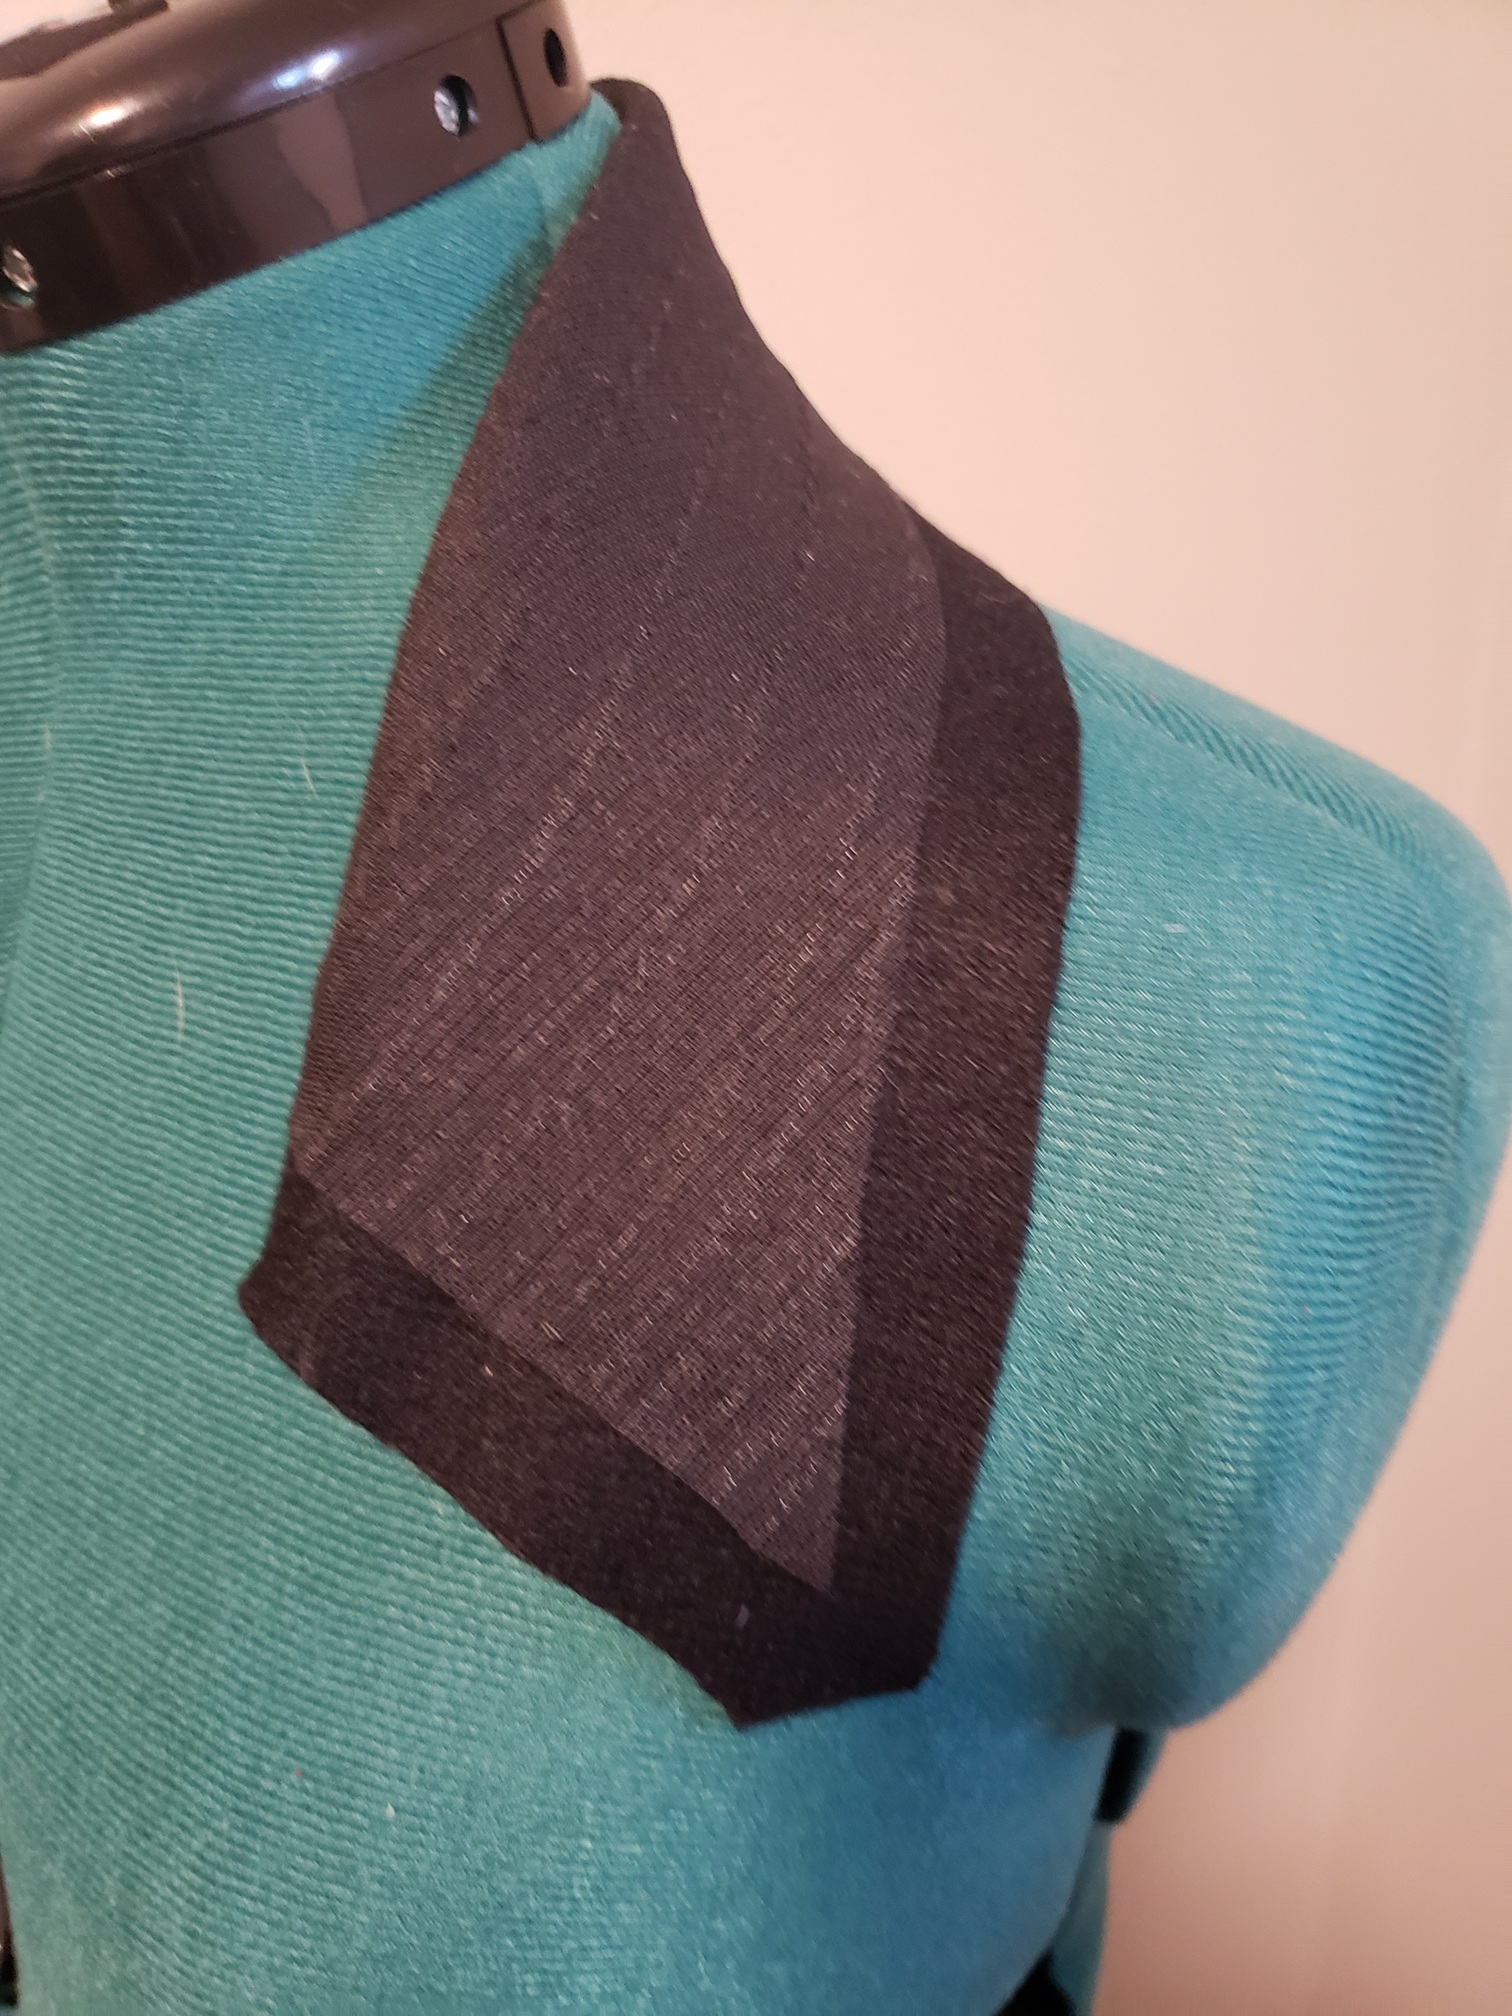
I constructed the outer coat shell, following the original pattern instructions: sewing the upper and under sleeves together, center back seam, shoulder seams, then side seams. I added three rows of ease stitching to the sleeve caps and, with the epulets sandwiched in between, inserted them into the armscye, adjusting the gathers to avoid puckering. I then attached the shoulder pads to the shoulder seam allowances with loose hand-stitching, and a sleeve head into he cap.
When it came to attaching the outer shell and lining, I actually forewent attaching the sleeve lining until the very end. At this point, I can't actually remember my reasoning for this, but I came to regret it—during the very last try on, my partner thought he felt bunching in the sleeves, and so yanked somewhat forcefully on the sleeve lining to dislodge whatever it was. At this point, it was a couple days before Christmas, and I was running on fumes, so when I heard a big RIIIIP I was devastated. After a good cry, and a lot of apologizing from my partner, I reattached the lining on both sleeves again with stronger, doubled-up thread. Build back better as they say!
My button holes were done by hand with a buttonhole stitch since my machine could not handle all the layers of fabric. The first one was iffy, but all the rest after turned out great! There were eight total. My last step was attaching the buttons. I WAS FINALLY DONE.
Comments