
All Hail Queen Mattress
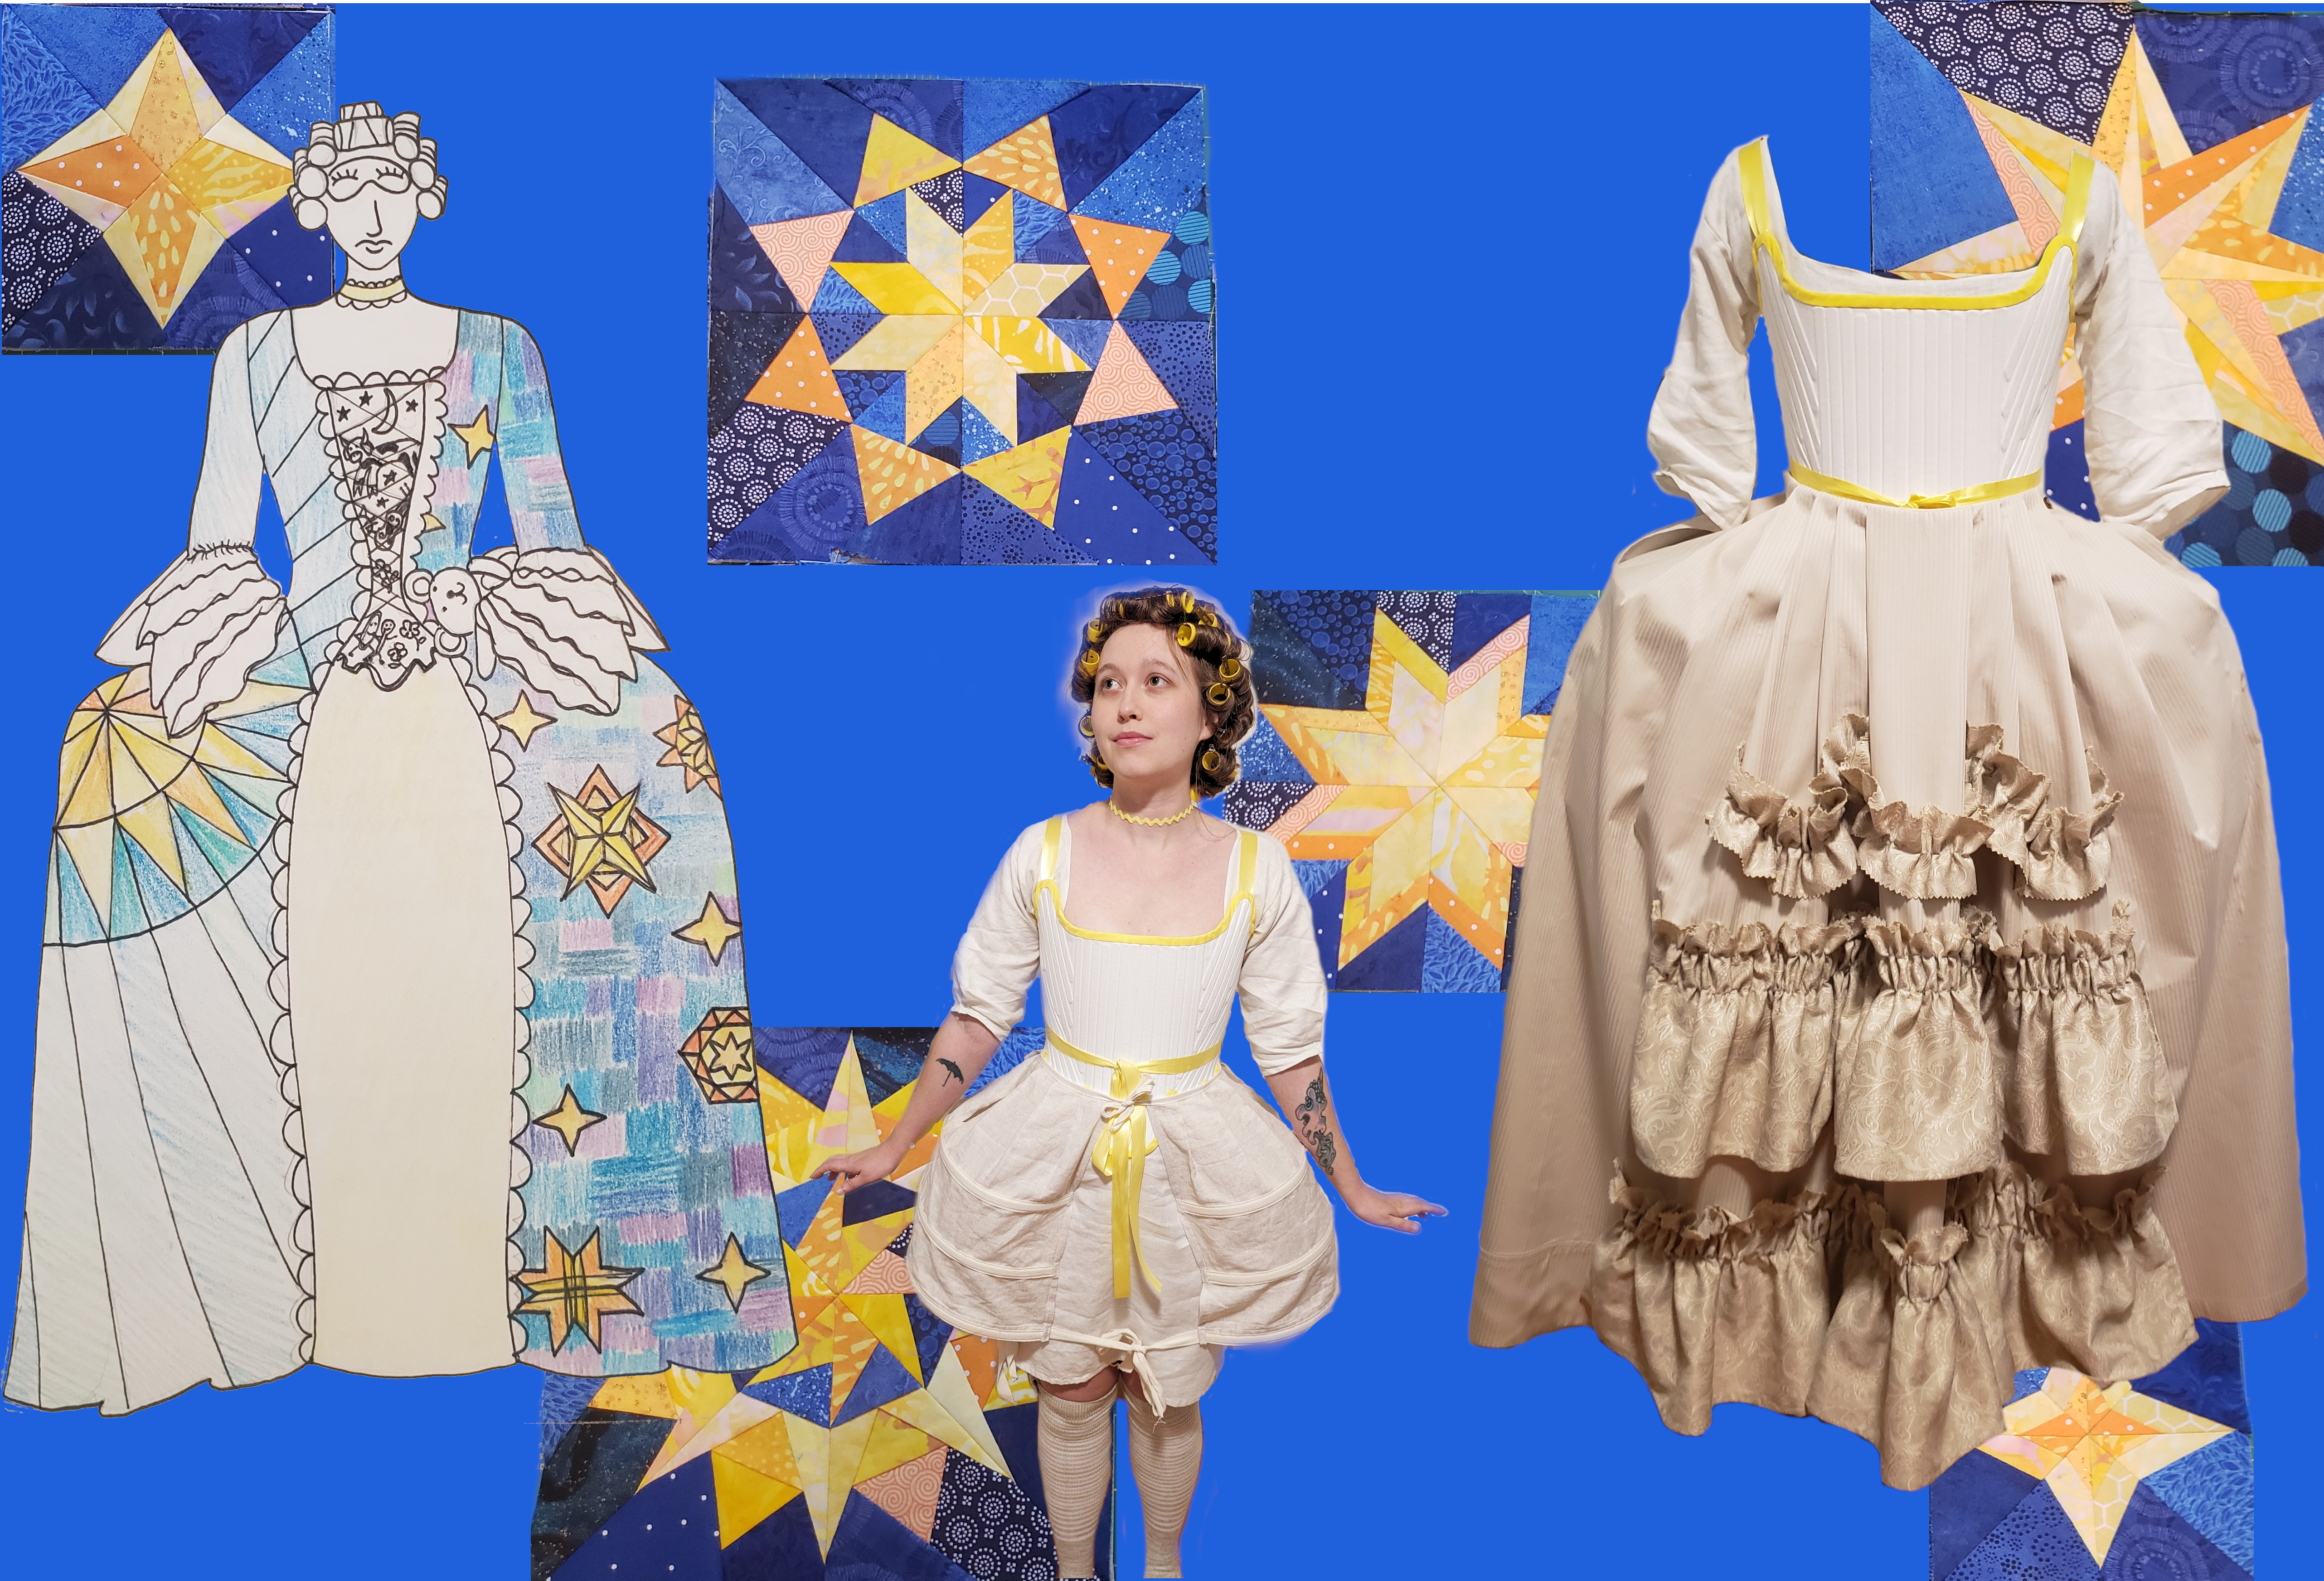
Table of Contents
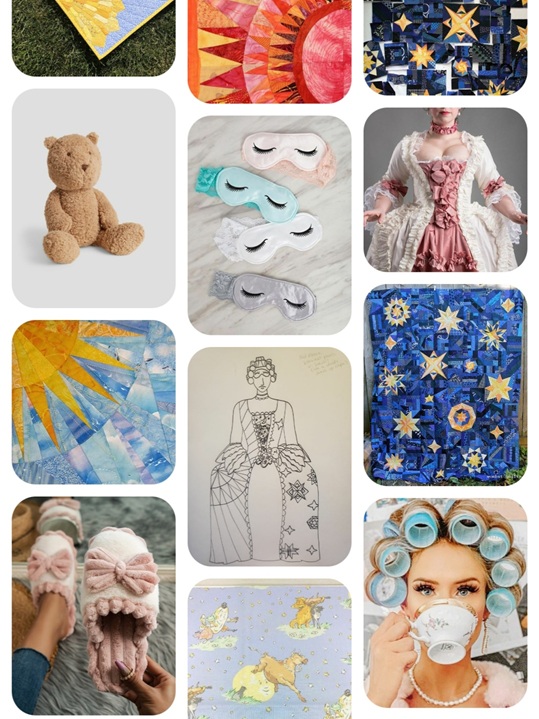
Brainstorming
This started the same way all the best costumes are generated: with a pun. Queen Mattress—Monarch of the Night, Ruler of REM, Sovereign of Siestas! I watch a lot of historical costubers on YouTube, and so got it in my head to make a robe a la francaise, but with a bedtime theme. Originally, I was thinking to restrict myself to only using bedding materials I found at GoodWill, but after coming up with a design based on elements I pinned on pinterest, I became too attached to the day vs. night quilt theme. I knew I'd have to make something custom for the fabric of the outer dress. I decided to use the book The American Duchess Guide to Eighteenth Century Dressmaking by Lauren Stowell and Abby Cox, plus the accompanying patterns Simplicity 8579 and 8578 for constructing the dress, and I've been pretty happy with the level of instruction.

Underpinnings
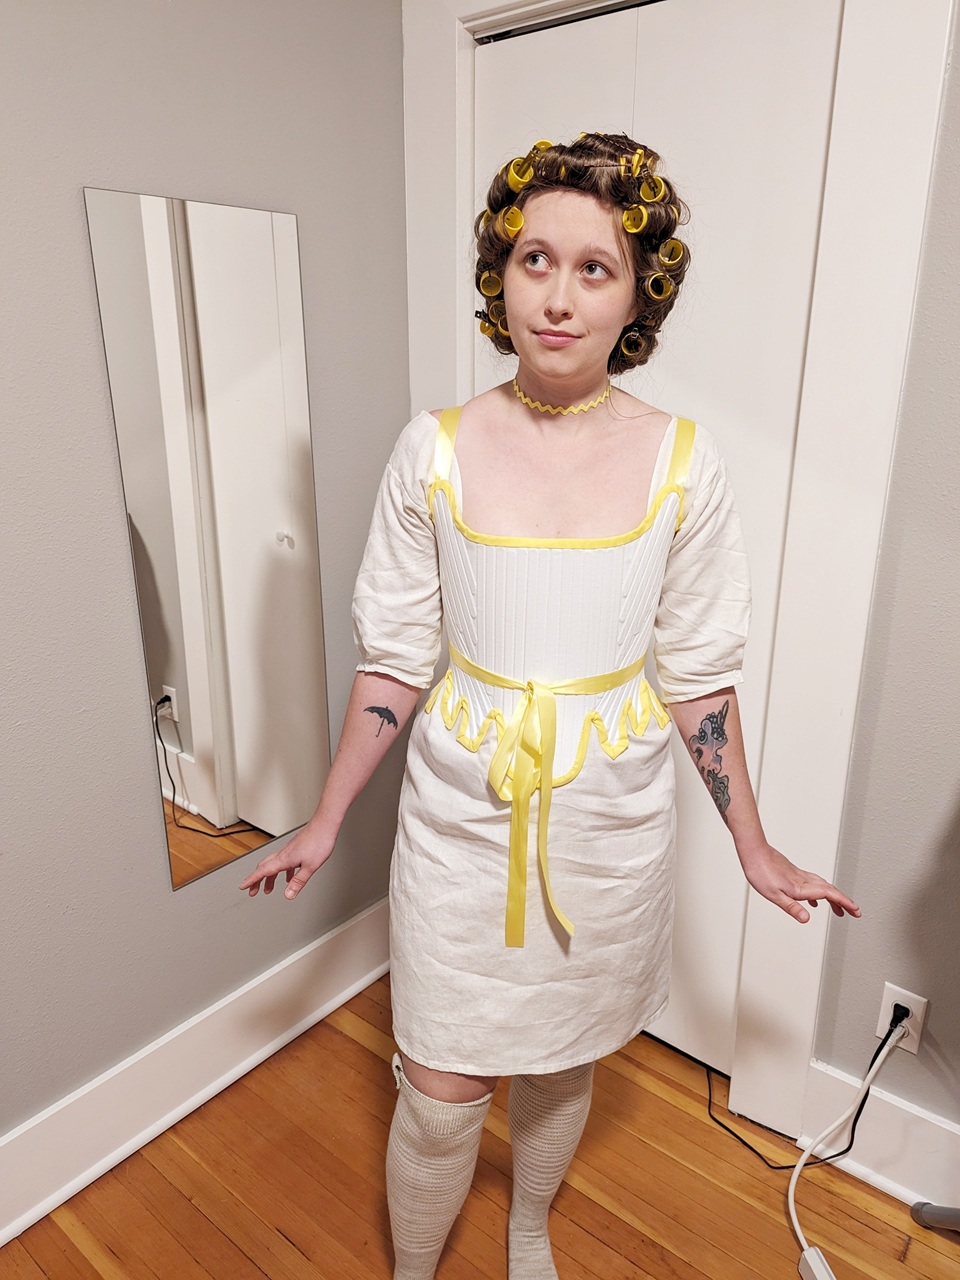
Chemise
Since I already had the white linen in my stash, I was reluctant to purchase a new one. I would have preferred a lighter-weight linen, but this one did the job! The pattern is very simple—essentially just a bunch of rectangles and triangles. The chemise was pretty large on me, because I made the mistake of using my hip measurement, when instead I should have used my bust measurement, to choose the correct pattern size to cut out. I ended up cutting the smaller size out of the old pieces, which meant laying the new pattern piece slightly under the previously cut neckline, and in effect shortening the chemise a bit. Since it was originally long, and wasn't going to be seen under all the other layers anyway, this was perfectly fine by me. However, the large neckline mean it was always slipping off of my shoulders, so eventually I did use some self-bias-binding along the neckline to create a channel for a drawstring. It's not the most elegant looking, but it does the job.
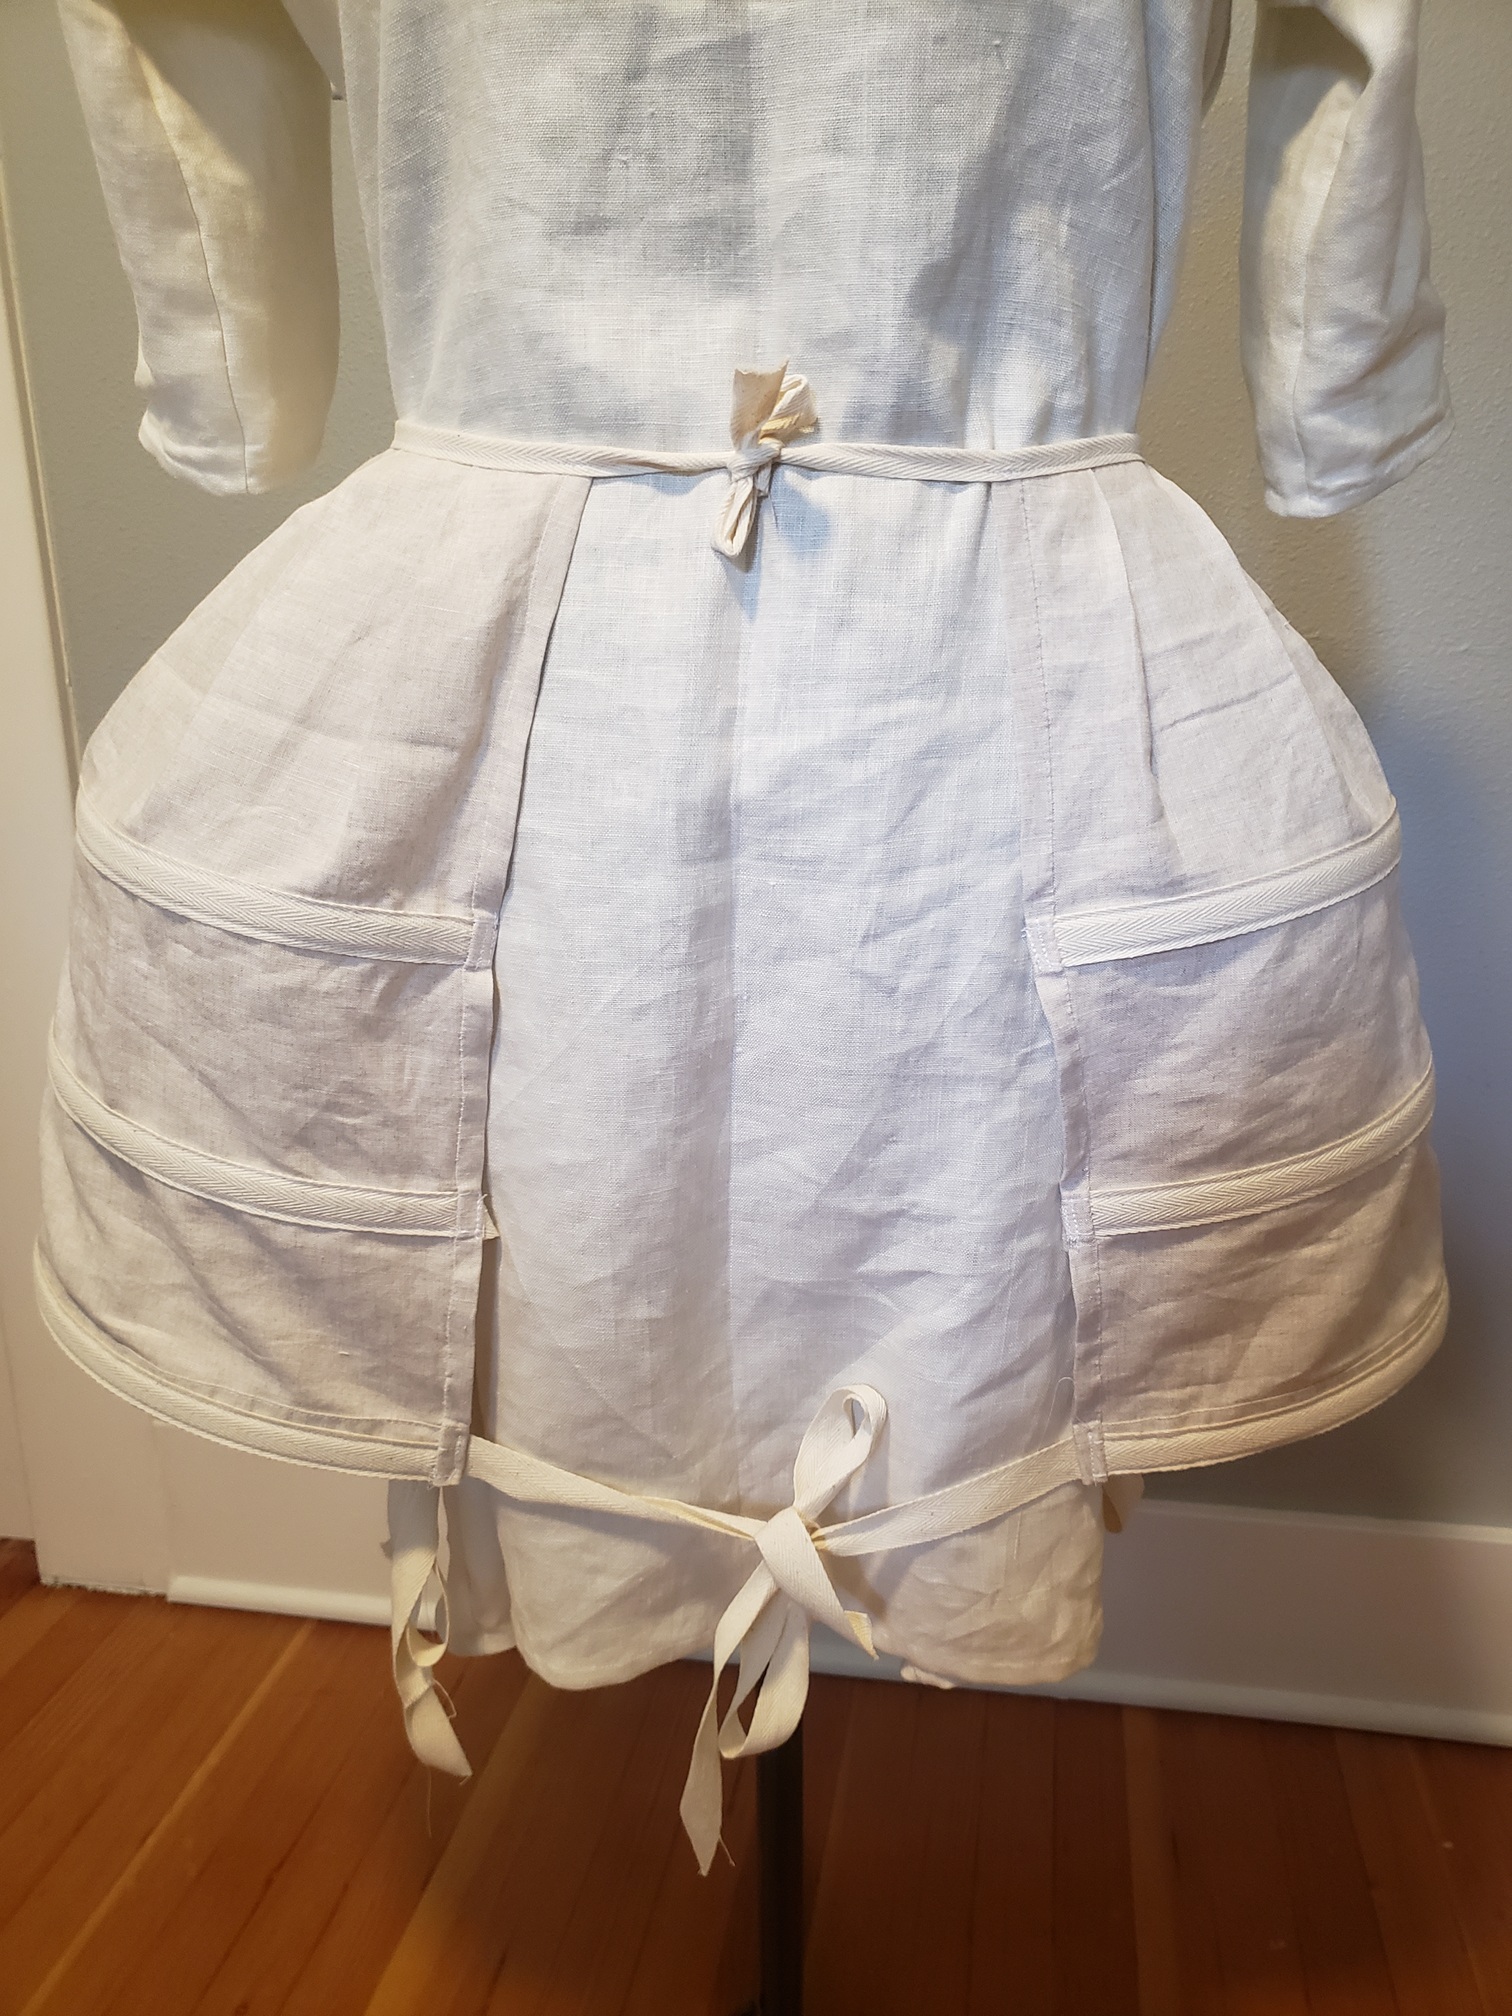
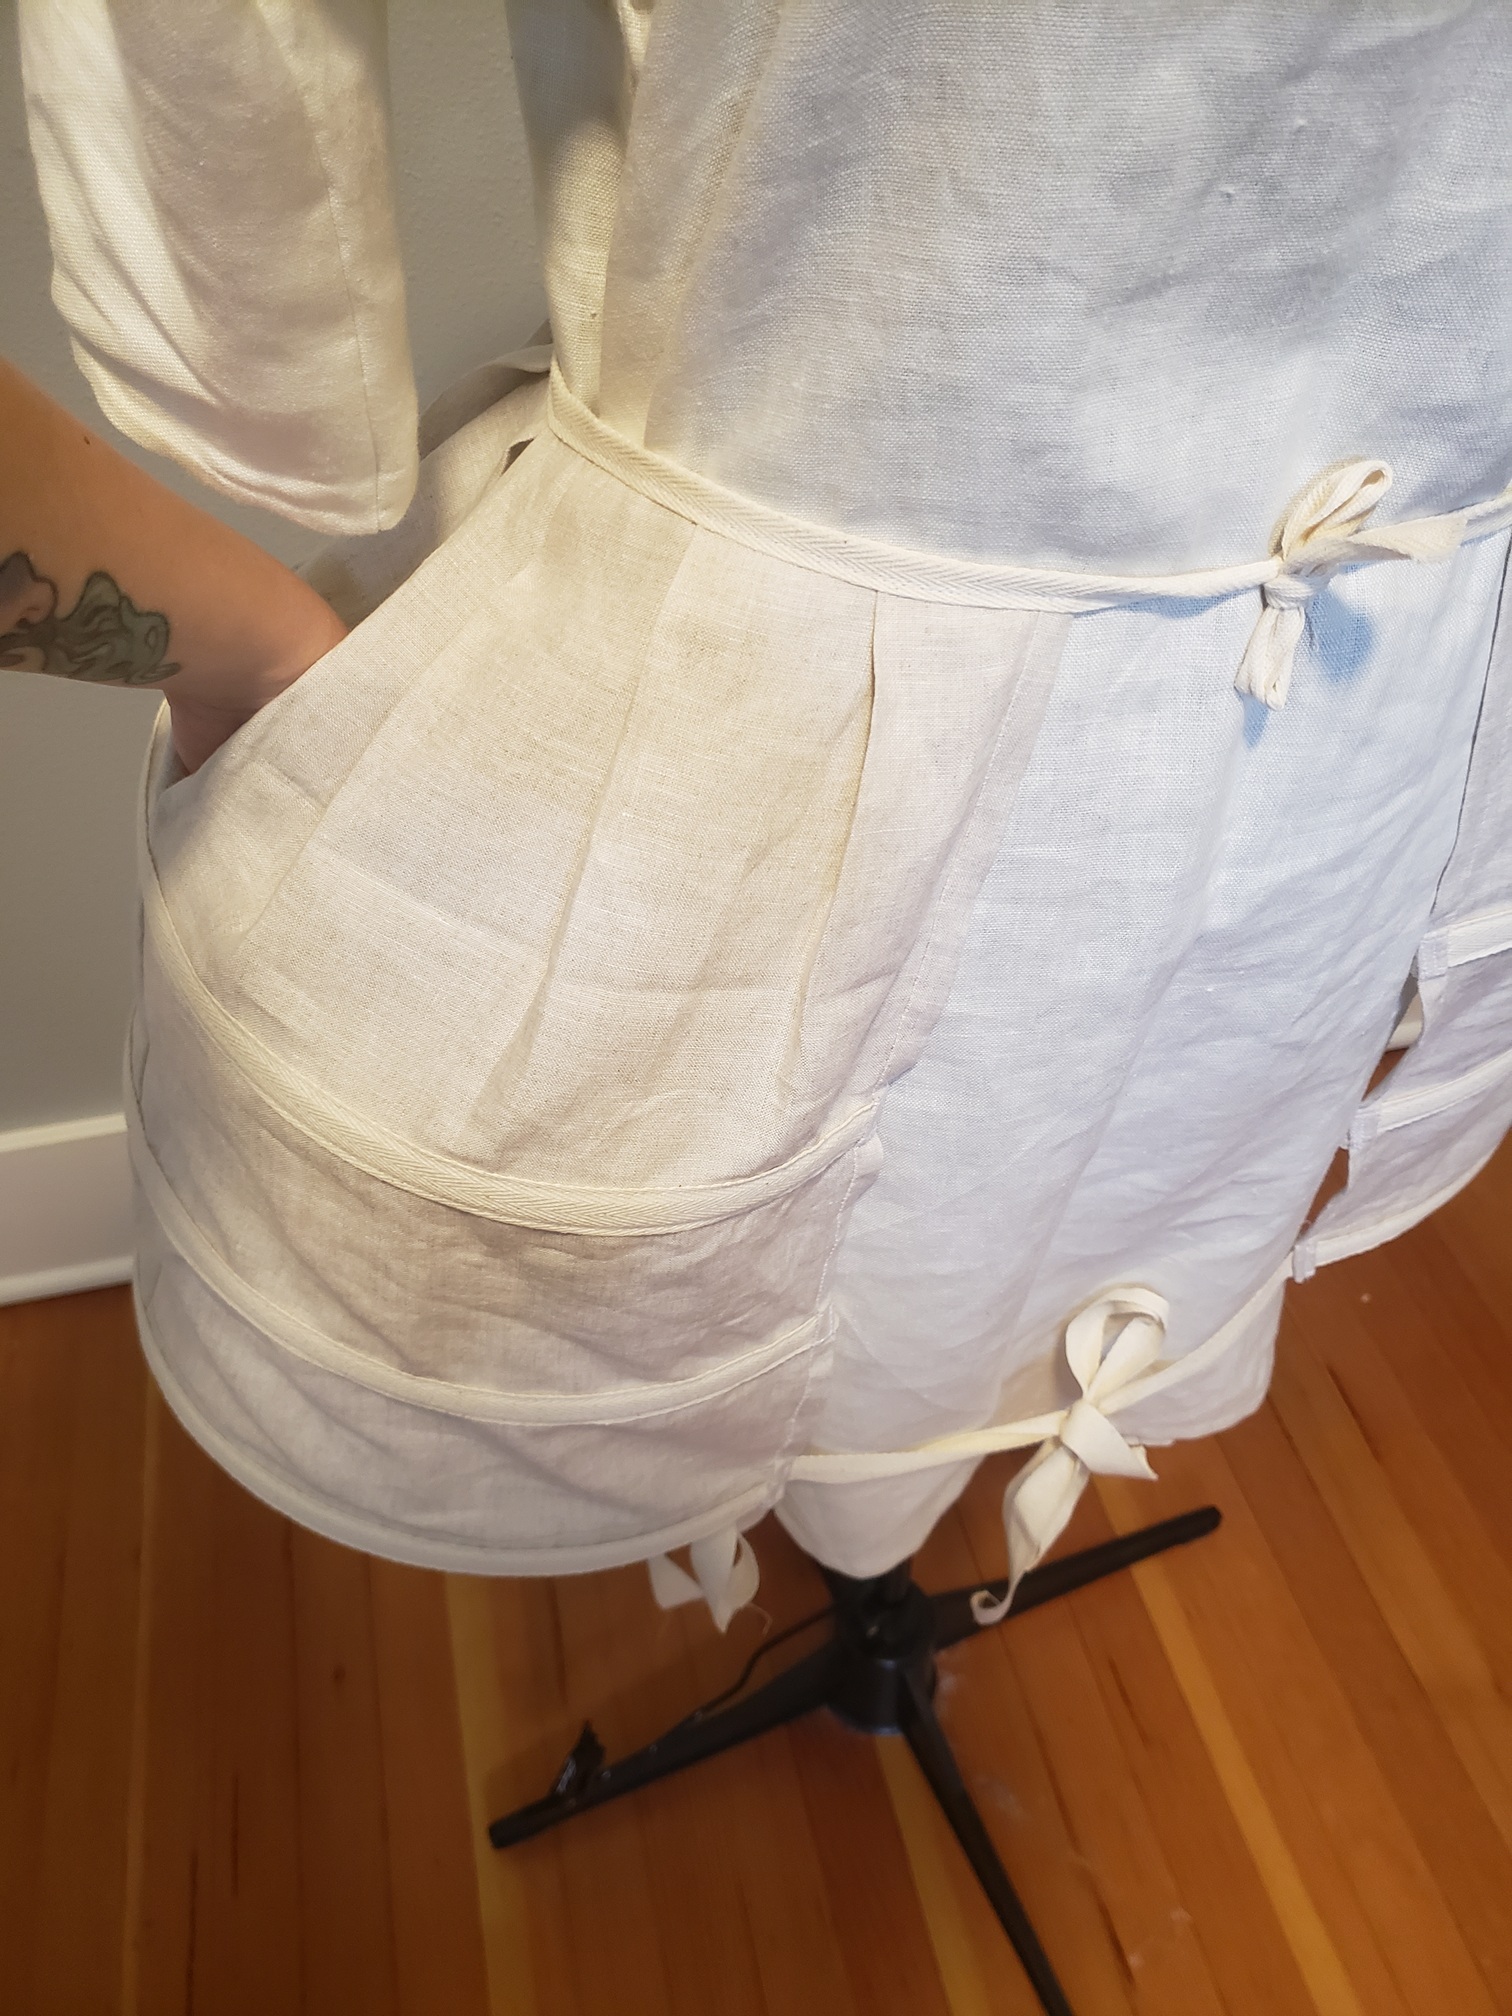
Panniers
The panniers, or side hoops, provide the wide-hipped silhouette that defines these 18th c. french gowns. Again, the pattern was fairly simple—they are essentially just rectangles with three horizontal boning channels, and a pleated top with a slit down the center for pocket access. Ties are added to the top and bottom of each hip piece to be tied together at the waist and knees. The pattern instructions I used called for bodice boning—you know the kind meant for structured bodices that you can sew through?—to be inserted into the channels. To my dismay, this ended up being flimsier than needed. The weight of my skirts flattened the hoops, leading to droopy hips. After enough time had passed to rid myself of the frustration of having to undo some of my work, I eventually went back and replaced it with steel boning. It massively improved the overall look and made it much more "mattress-y"! I was worried I'd have to make a set of grand panniers, so being able to get this affect with these was such a relief.
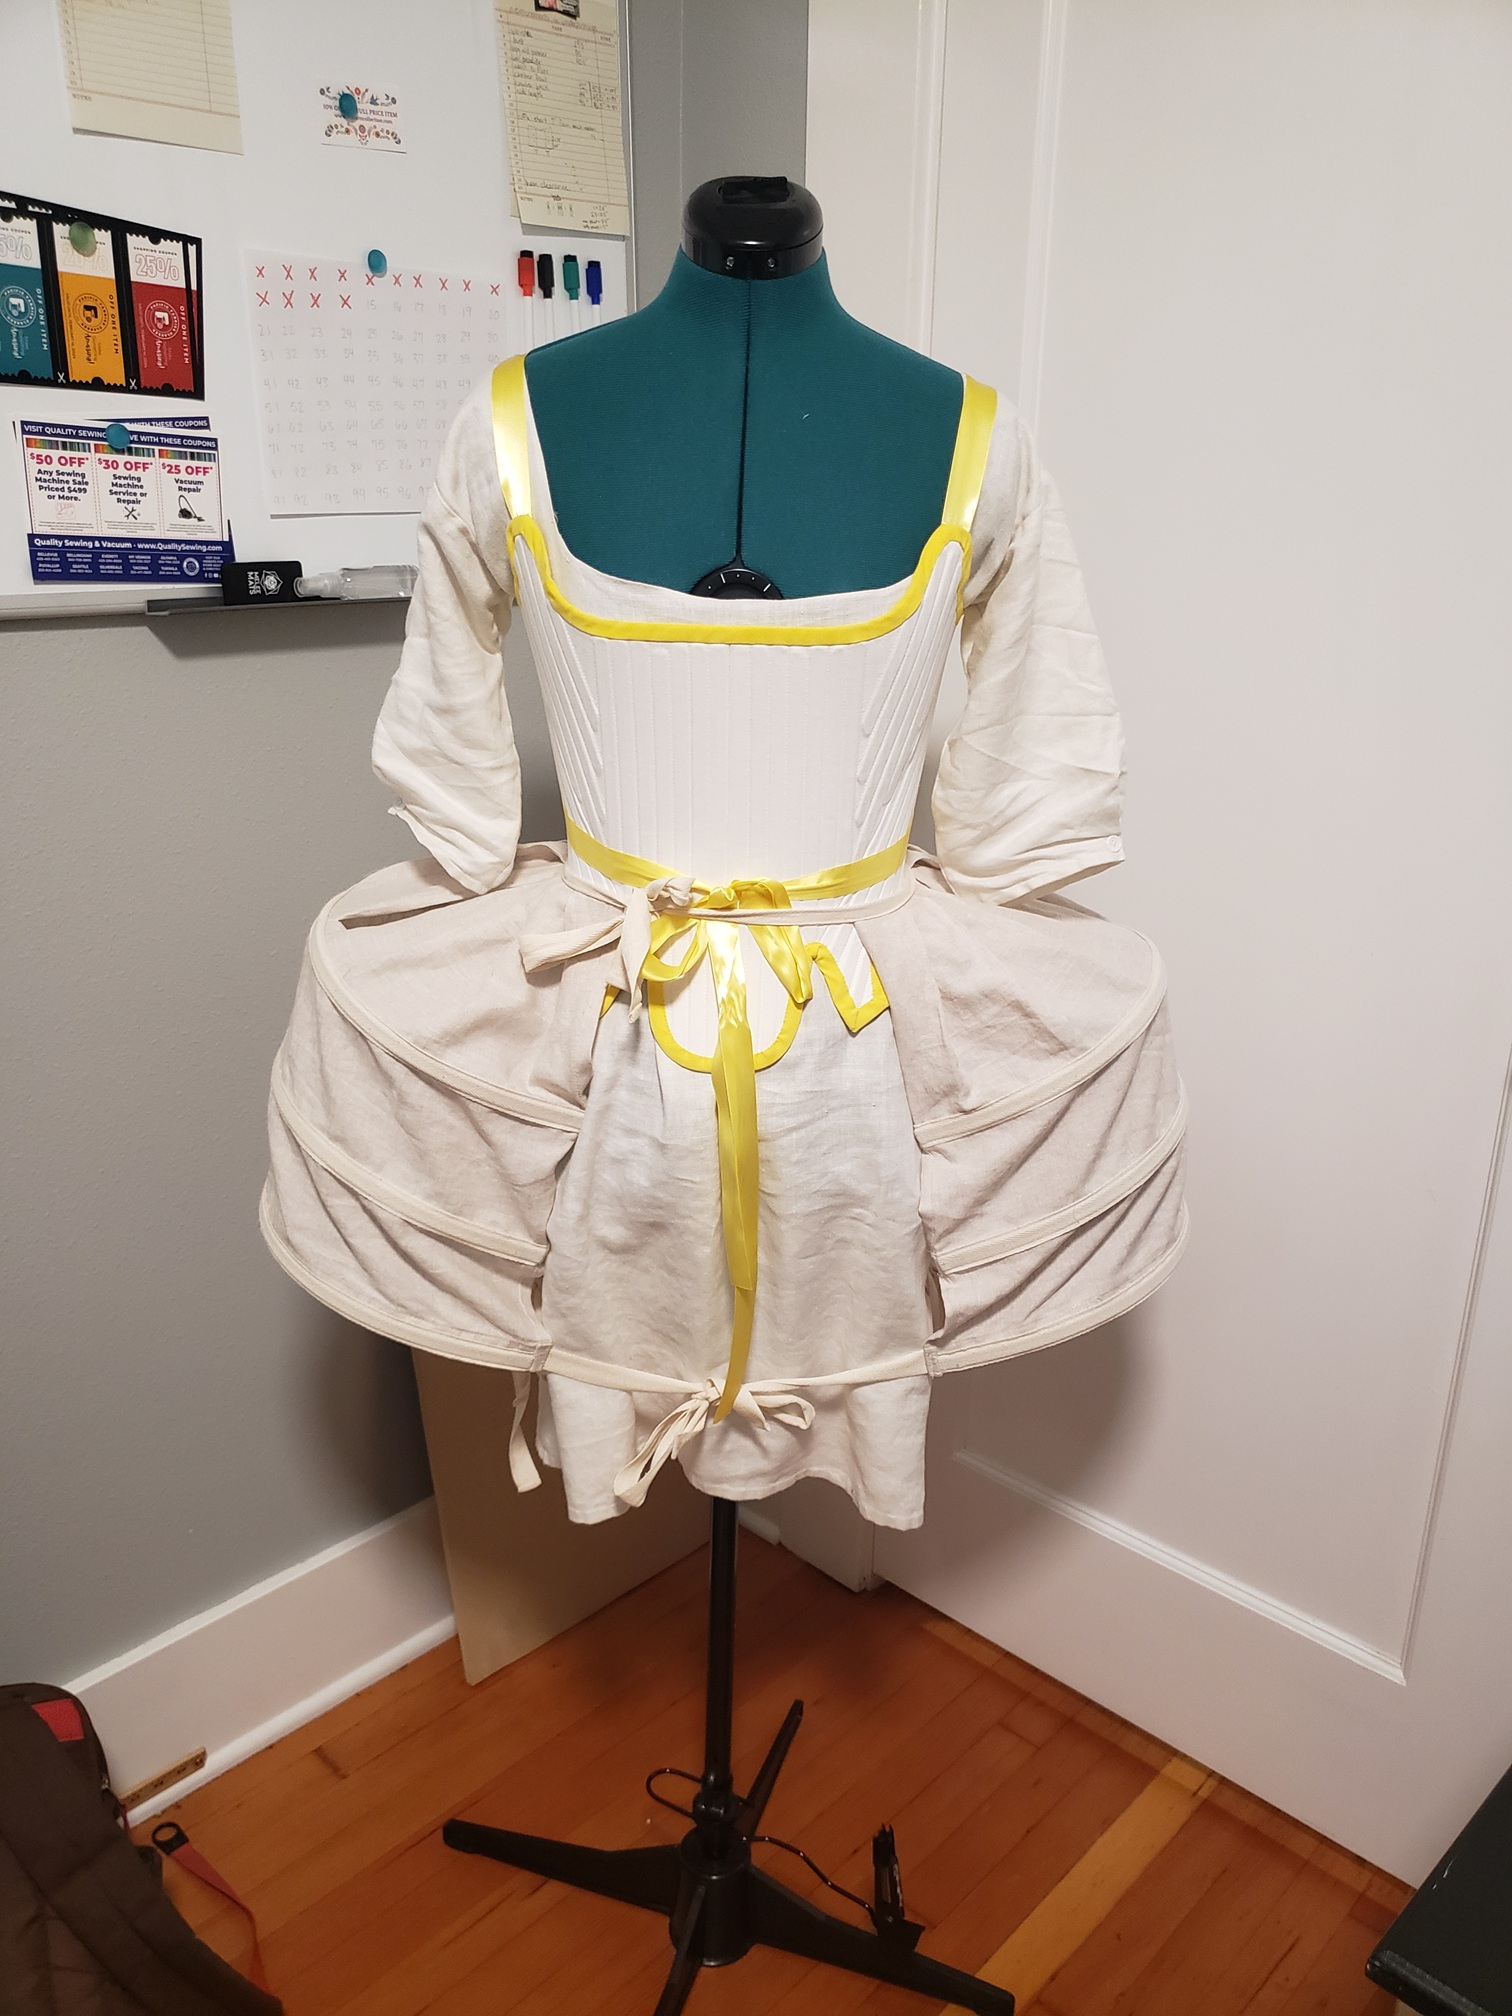
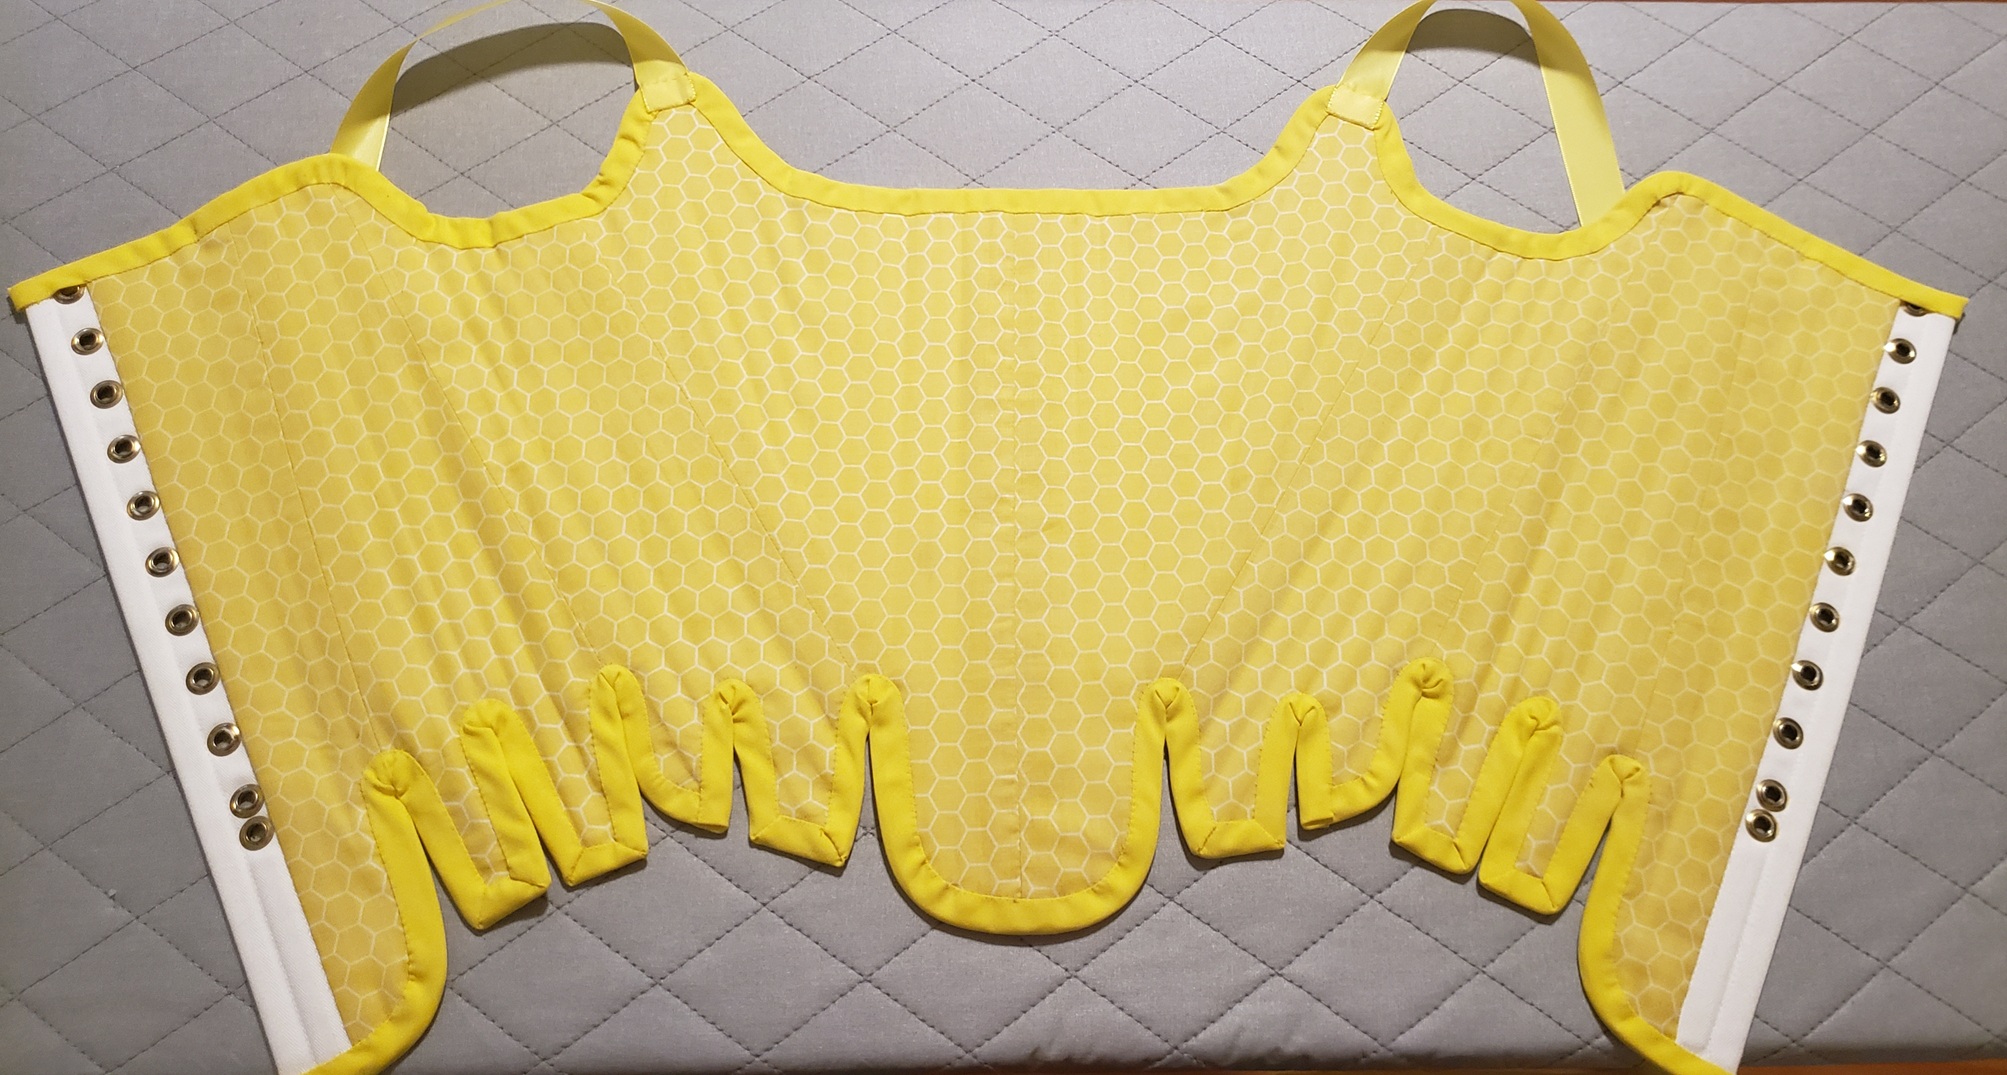
Stays
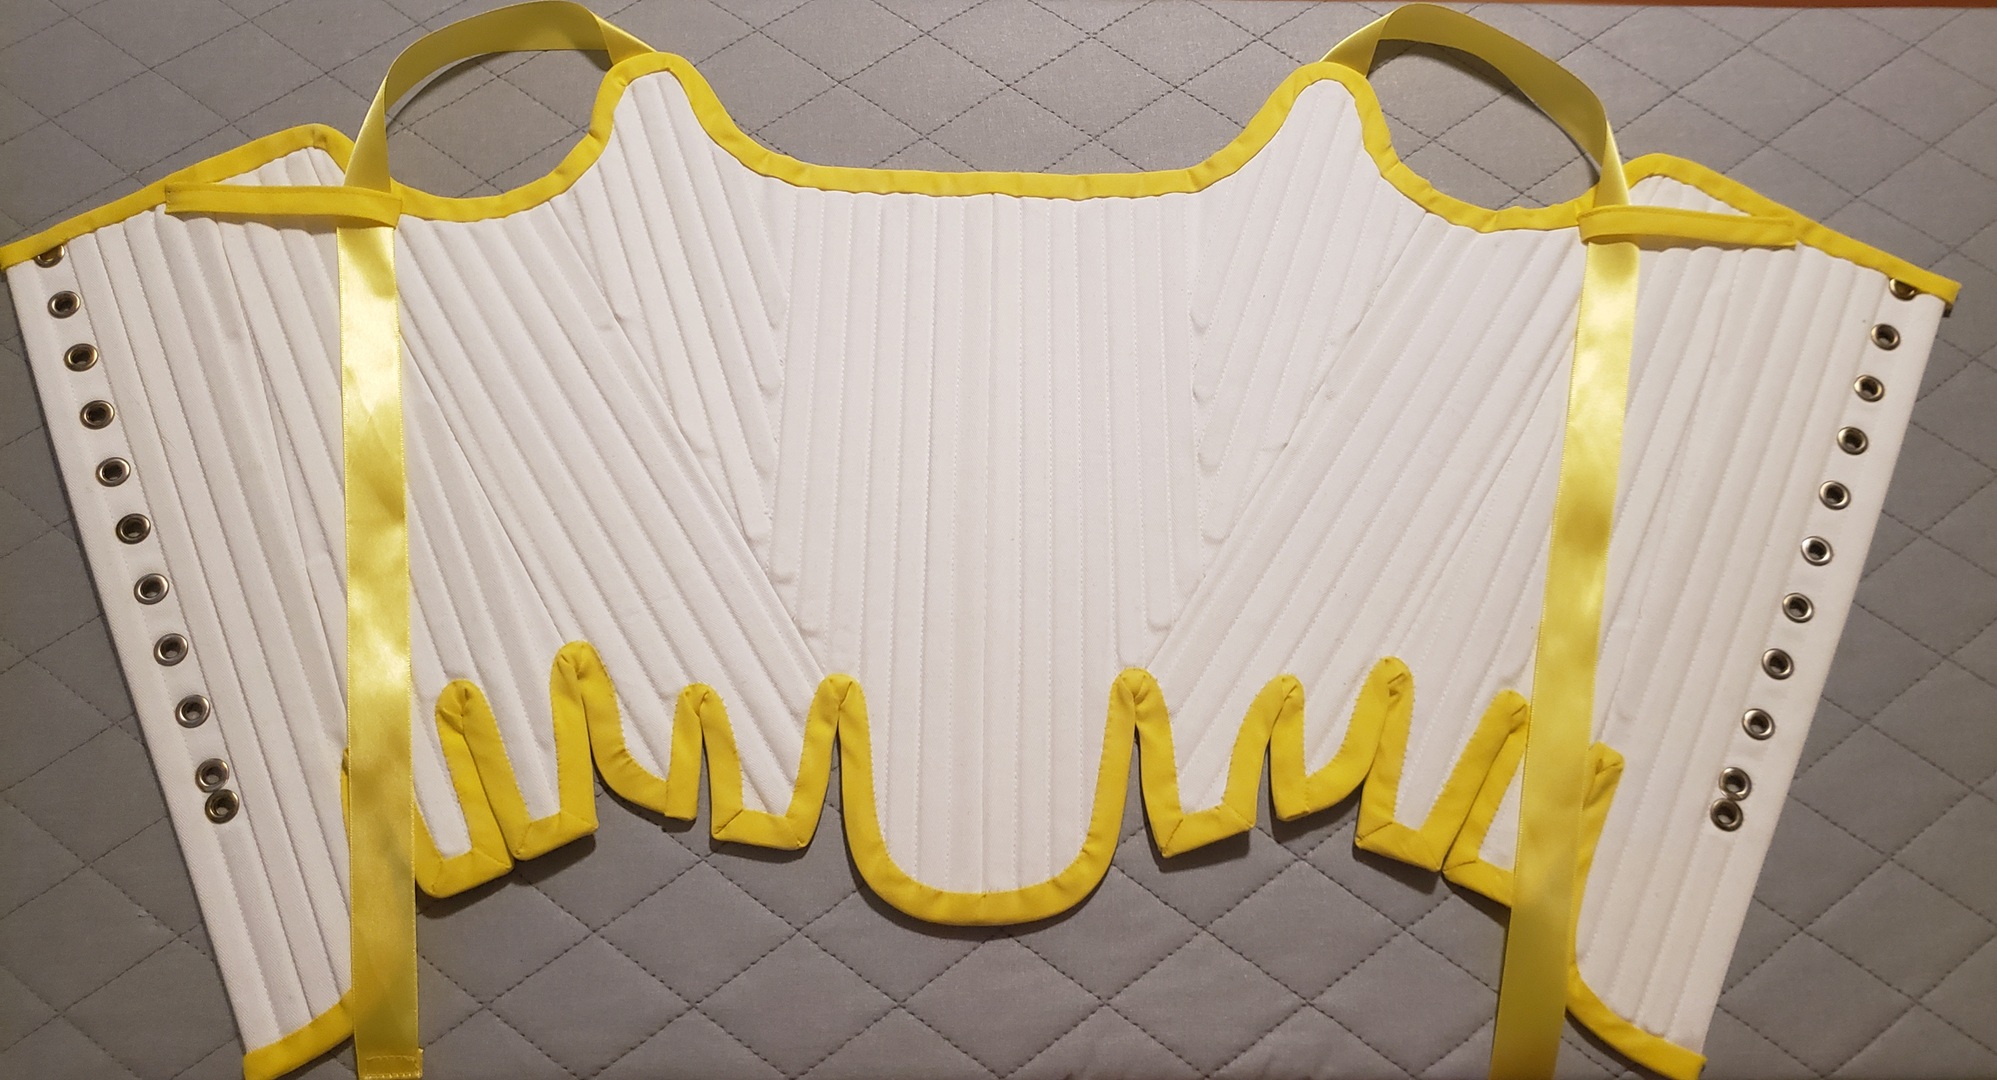
The stays I am pretty happy with. They are lined with a cute yellow honeycomb fabric, and have yellow binding around the edges. Originally, I bought white twill for the outer fabric, and coutil to use for the interlining. However, I didn't end up using the twill because the coutil seemed sturdy enough on its own. I think the original purpose of the outer fabric is to be more decorative, but I didn't realize this and bought both white coutil and twill, thus making the twill somewhat redundant if it wasn't needed for added structure. White was preferrable so that it wouldn't show through whatever I chose to wear over top. I actually bought a fancy schmancy grommet press for this, so putting them in was pretty painless. The boning was made from jumbo zip ties whose ends I smoothed out with a dremel tool. The binding on the front side was machine sewn, then folded over to the lining side and whip stitched in place.

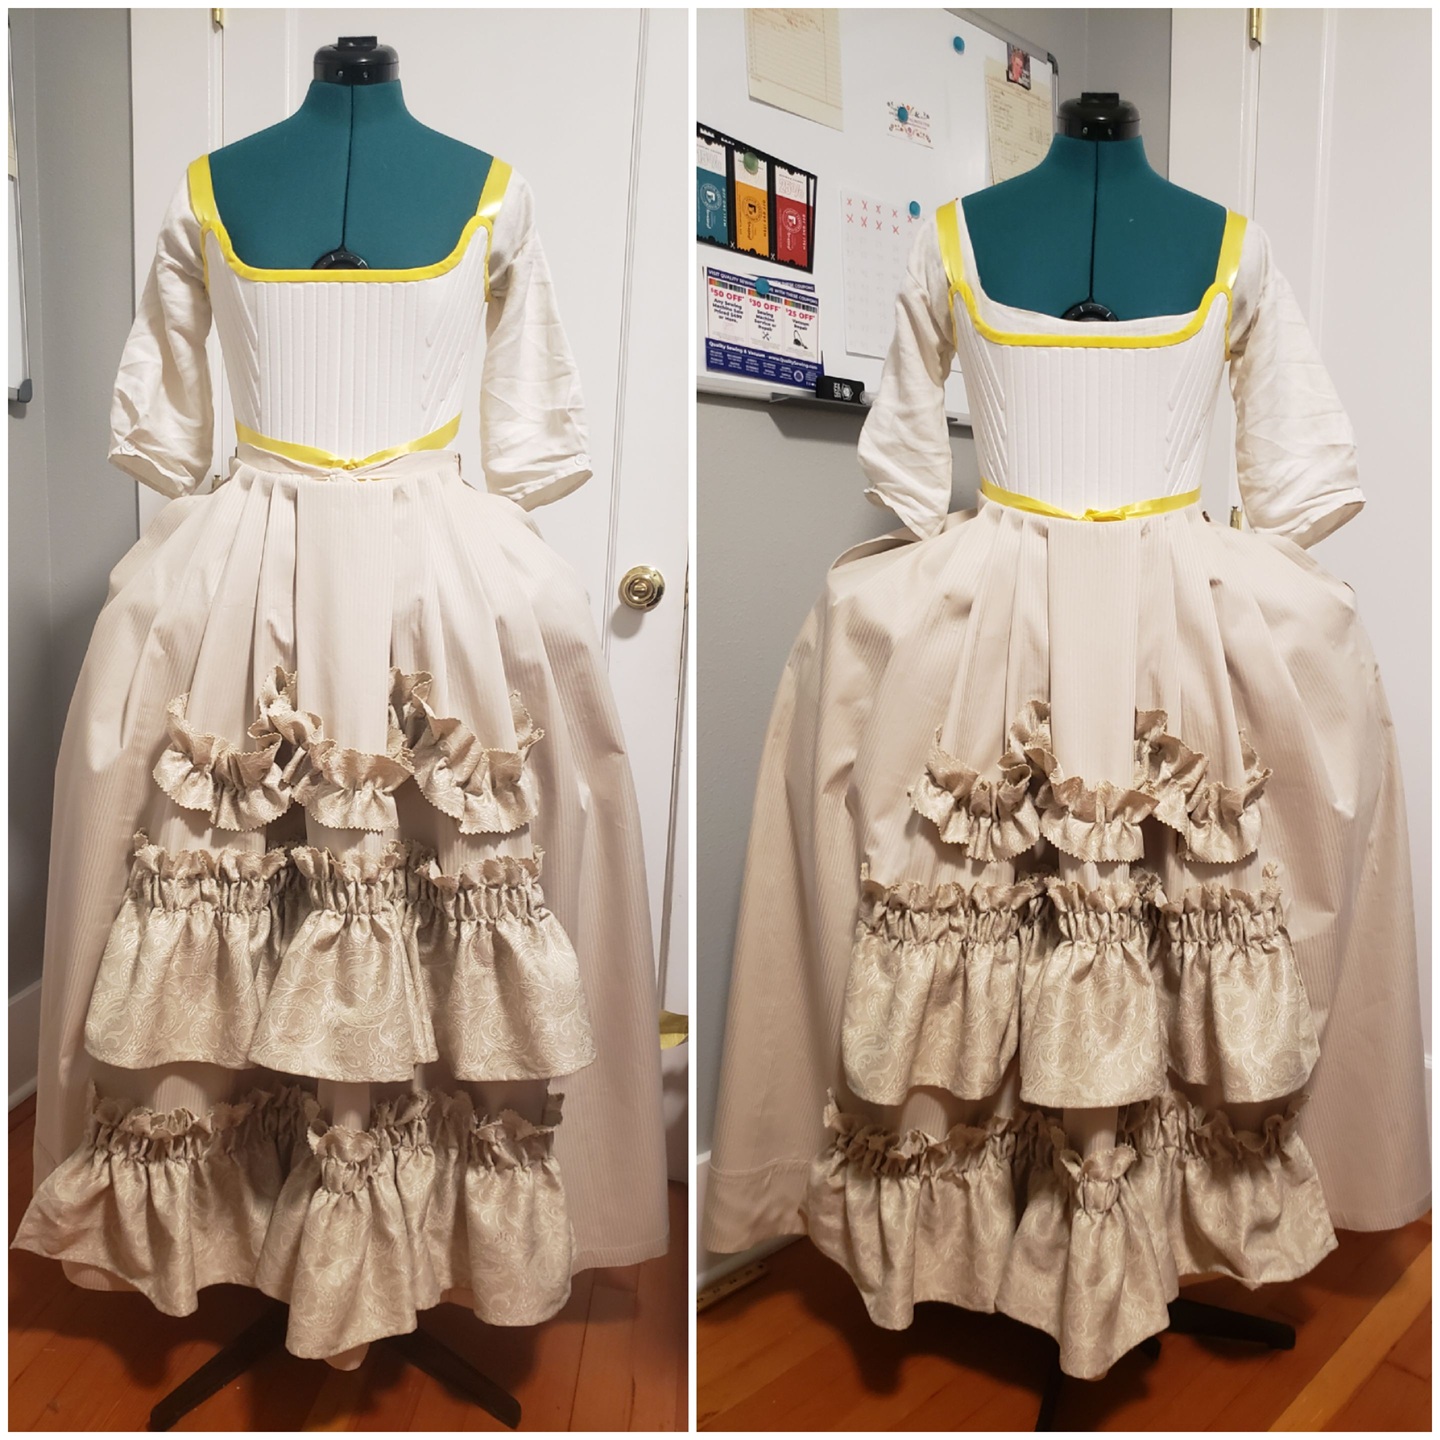
Decorative Petticoat
The petticoat was more of a struggle for me than I care to admit. I was using old bedsheets I picked up from goodwill, plus its matching bedskirt. To determine the length of the skirt, you measure both the center front and over the panniers down to where you would like the hem to fall. When cutting my fabric I thought "ooo I'll measure up from the bottom of the sheet to get the length I need, and then use that trick where you pull a single thread for a nice straight line to cut along!" Smart, right? Wrong! I was not taking into account that the hem of the bedsheet was not also perfectly folded along the grain. So one end was significantly shorter than the other. I had to even it out, which is why the petticoat ended up shorter than I intended.
I know these dresses are often made up in silk taffeta, and so in order to achieve that Crispy Löök, I applied sheer weight fusible interfacing to each skirt pannel. Pleating was also a bit of a struggle because the instructions said "pleat along the curved waist as though it were cut on the straight." I couldn't figure out if that meant to create parallel pleats, and essentially create a waist that looks like a parabola, or to pleat along the curve so that the waist band was straight across. I tried the former first and that didn't seem right, so I eventually settled on the latter, and I think that was the right decision. The ruffled trim is also a bit messy. I used the decorative brocade fabric from the bedskirt and used pinking shears to cut scallop shapes along the fabric edge. I wish I had pleated it instead of using a gathering stitch because the fabric was too thick for the latter. Oh well! You live and you learn!
Over Dress
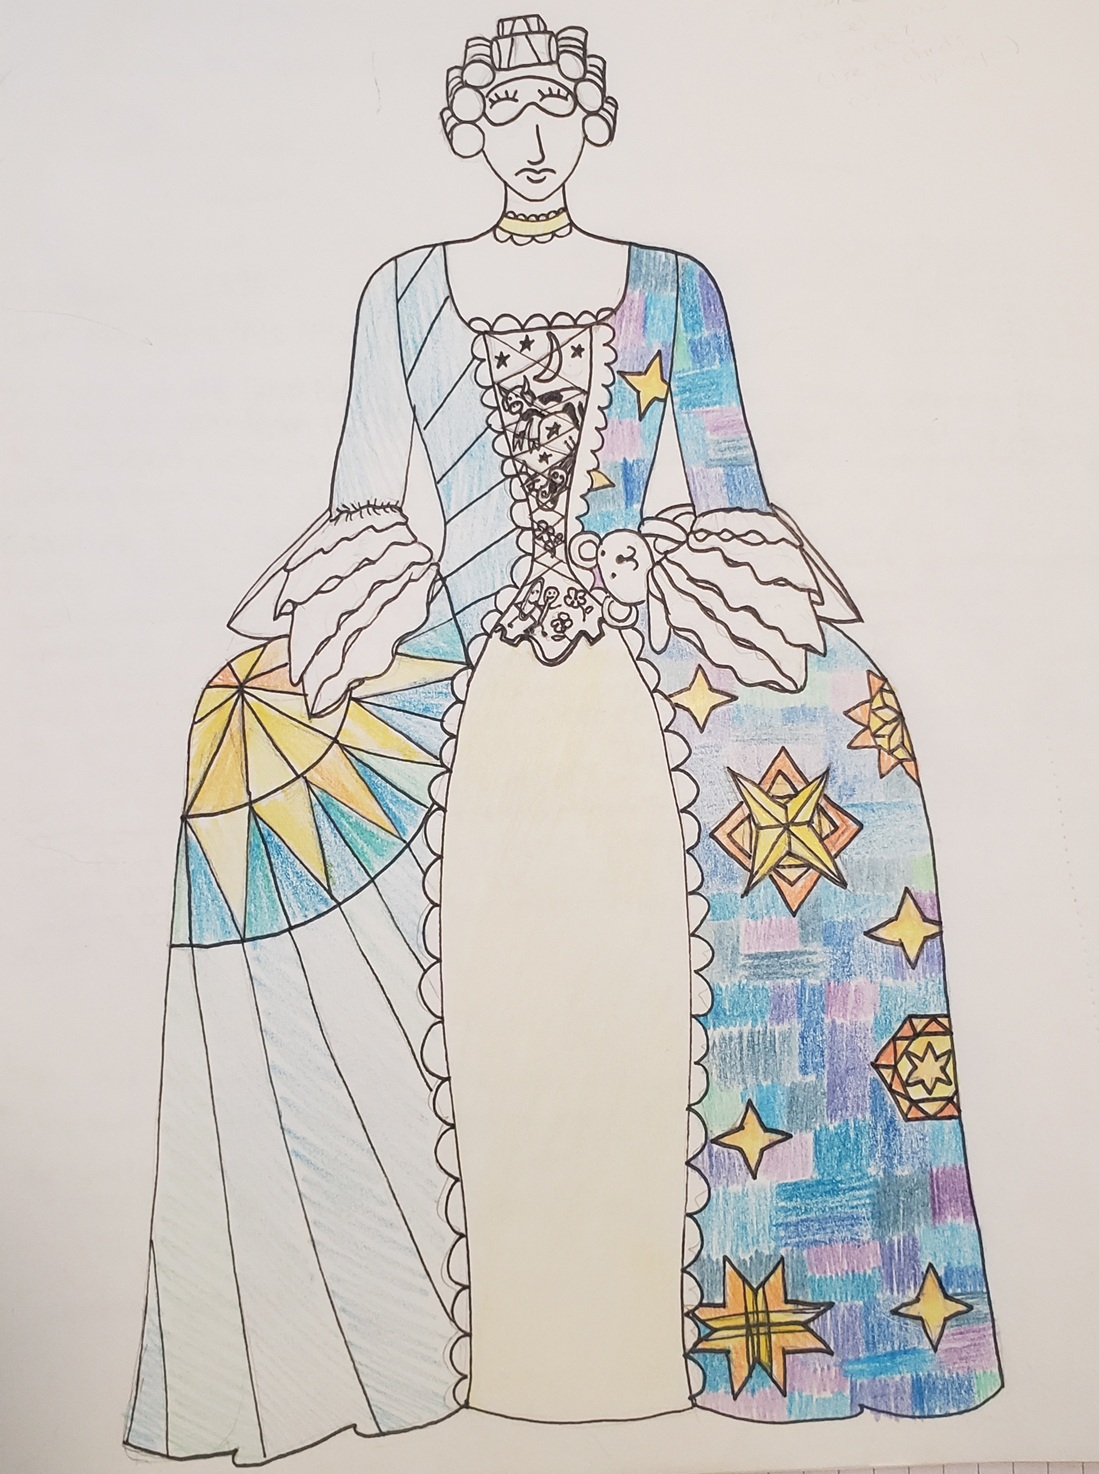
Bodice
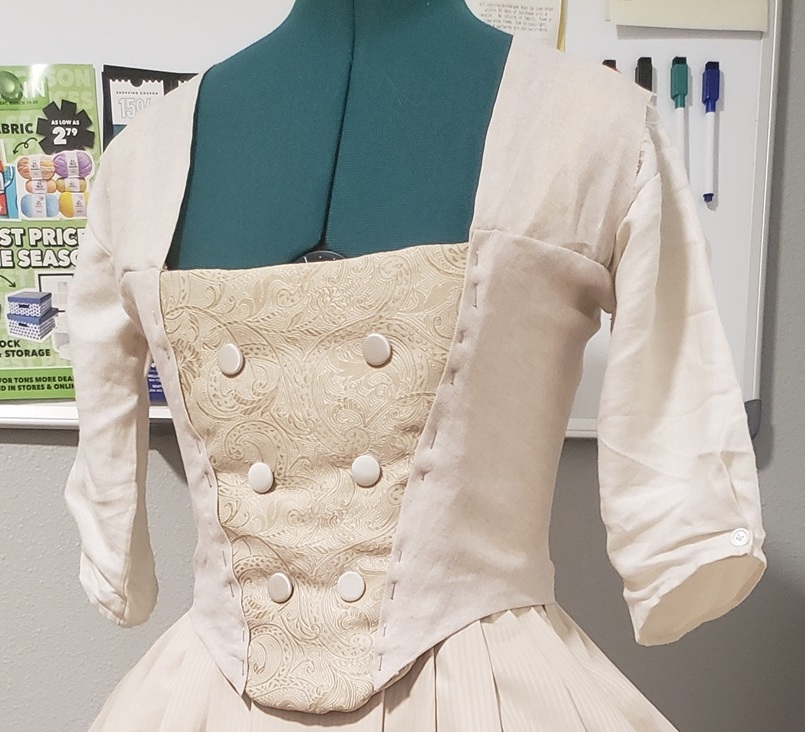
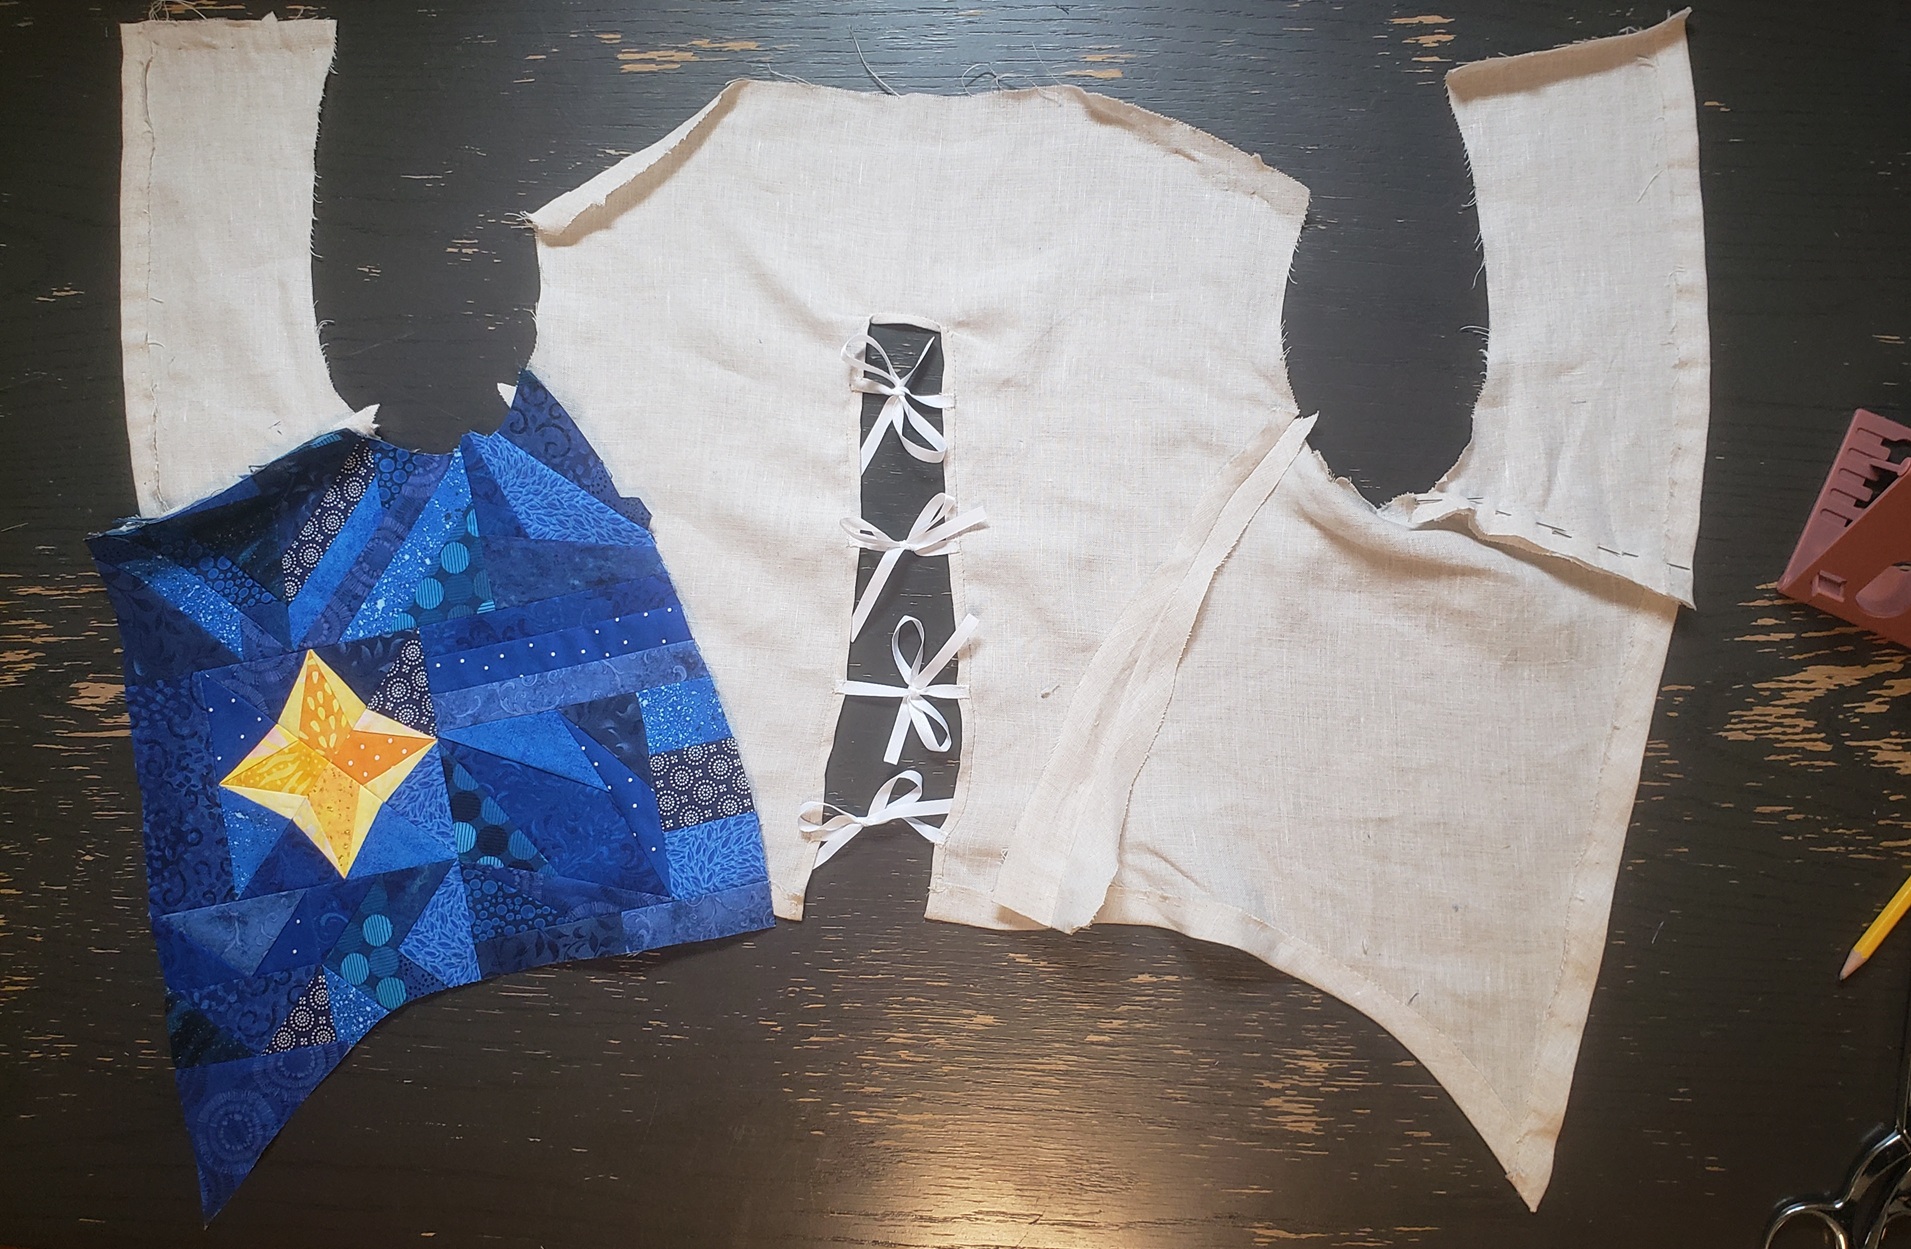
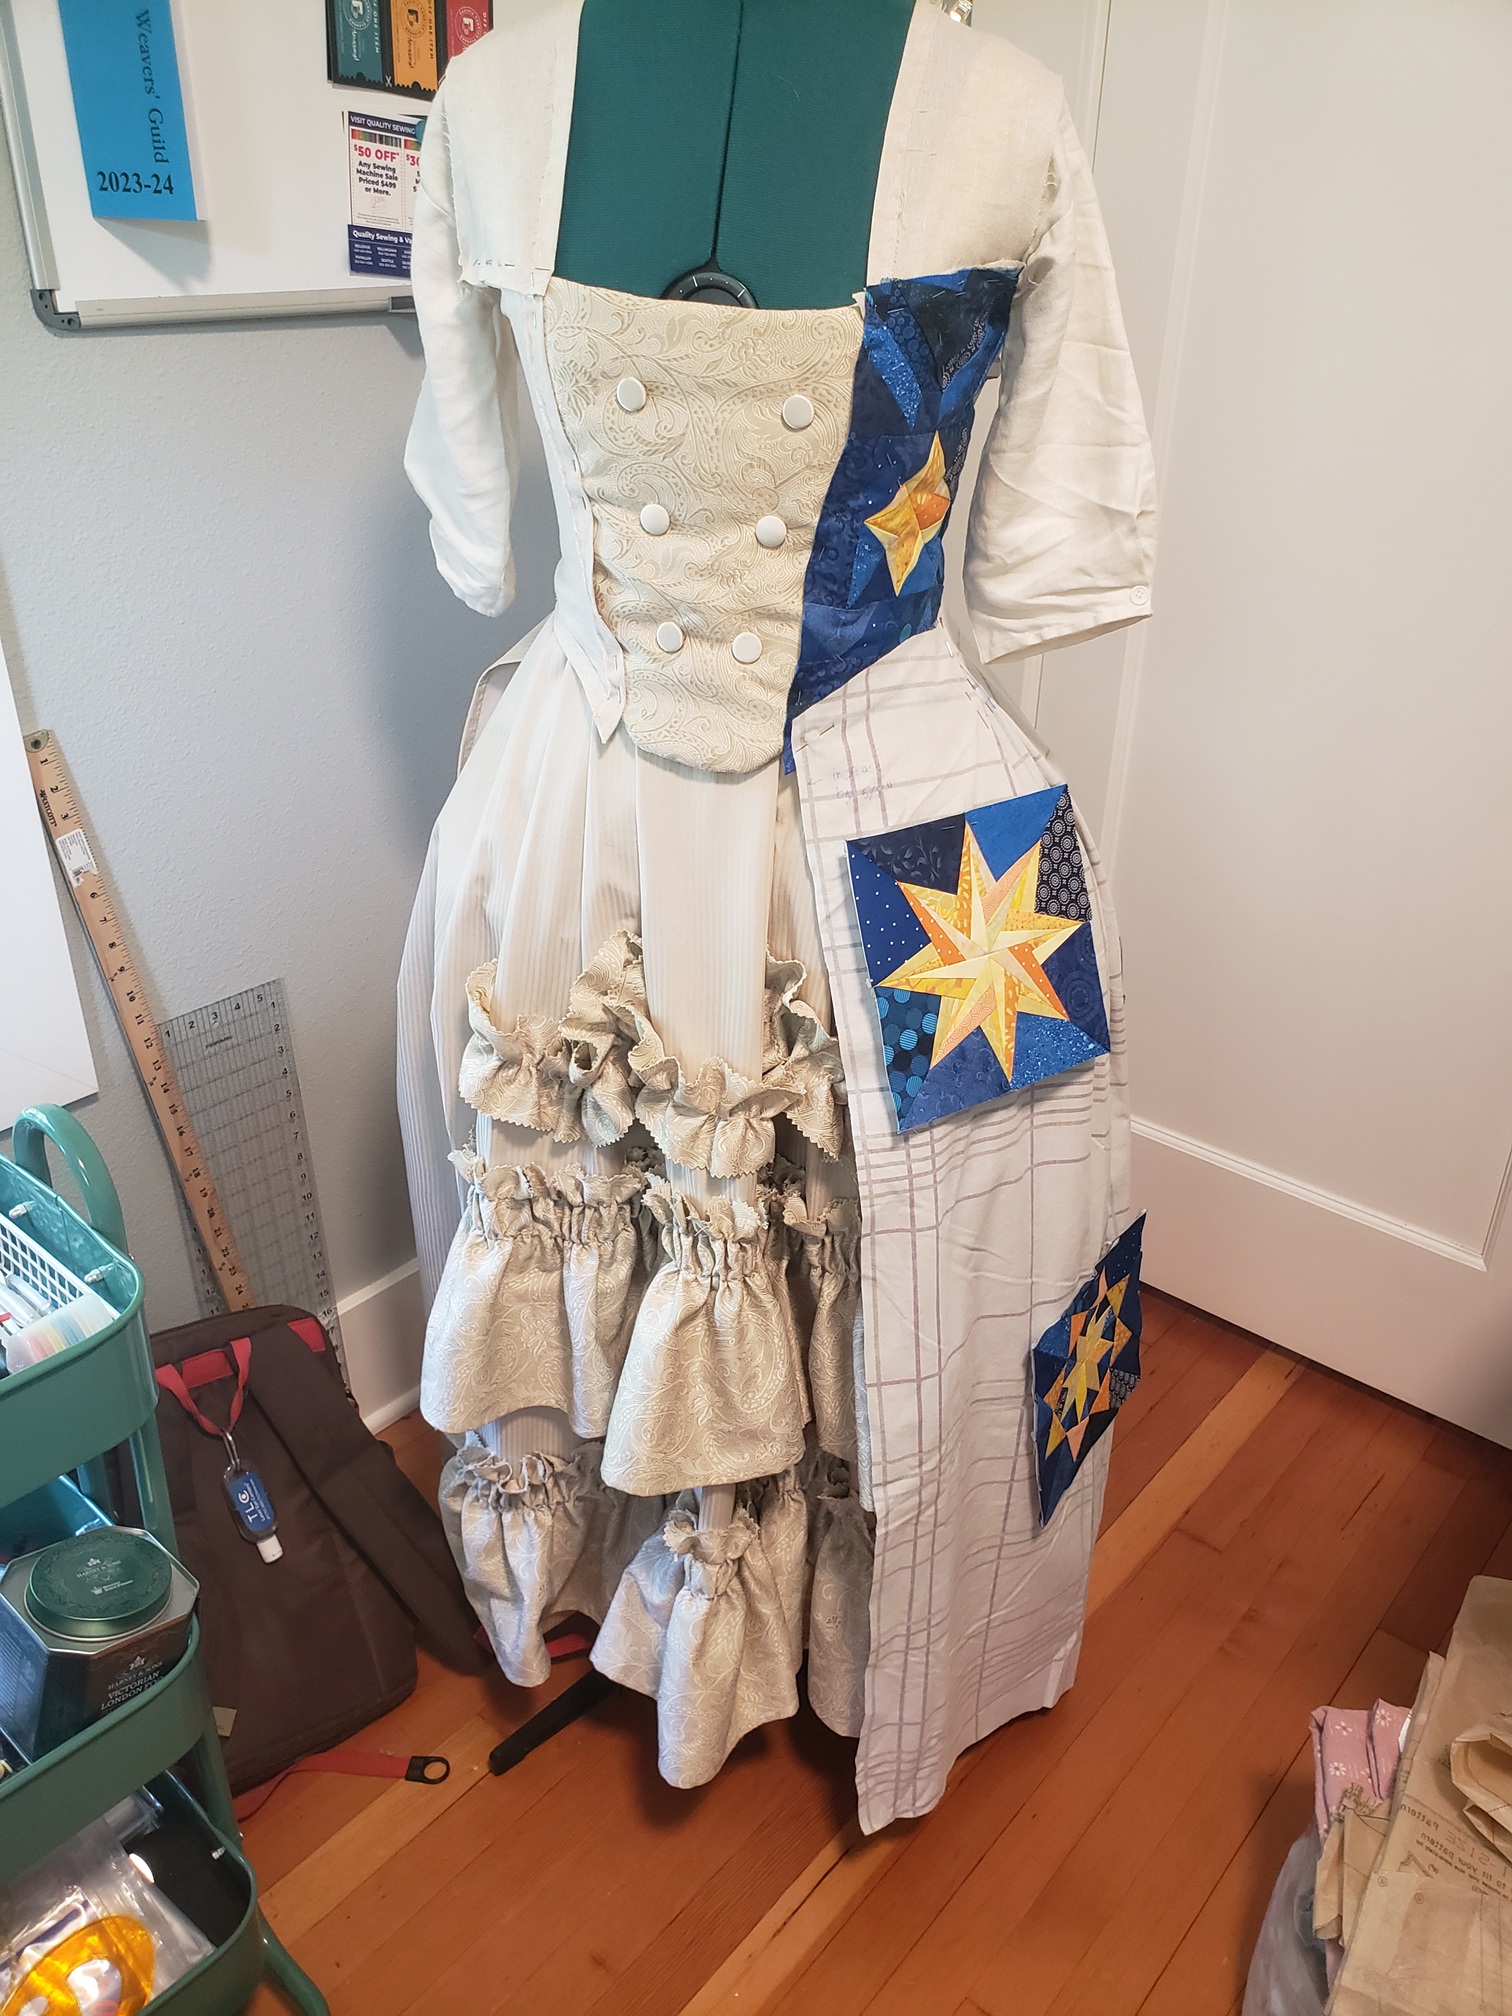
The stomacher is made from a layer of regular linen, linen buckram, cotton batting, and a piece of the thrifted bedskirt that I also used for the trim on the petticoat. I sewed fabric covered buttons to mimic a double breasted coat, and to give it a tufted, pillowy look. It seems a bit bulky at the moment, but hopefully it will make more sense visually when I finish the quilted over dress.
For most 18th century dresses, a bodice lining is fitted to the wearer, and then the rest of the dress is draped and attached to it. I had my partner help with smoothing and pinning the bodice while I wore it, and I'm honestly so pleased with how it's laying. I adjusted the original pattern a little so that the points at the front extended a bit further toward the center. I suspect it's because my waist and bust measurements are not very different from each other (which is a more technical way of saying, I have small boobs).
After the lining was sewn, I started the long process of creating the patchwork night sky which I'll talk more about later. I chose a small star and decided where I wanted it to lay on the bodice piece, then surrounded it with random patchwork until it covered the front of the left bodice. I put a layer of batting in between, but I'm leaving the quilting for later. I have a free motion quilting foot, but have never used it, so I have to practice with it first.

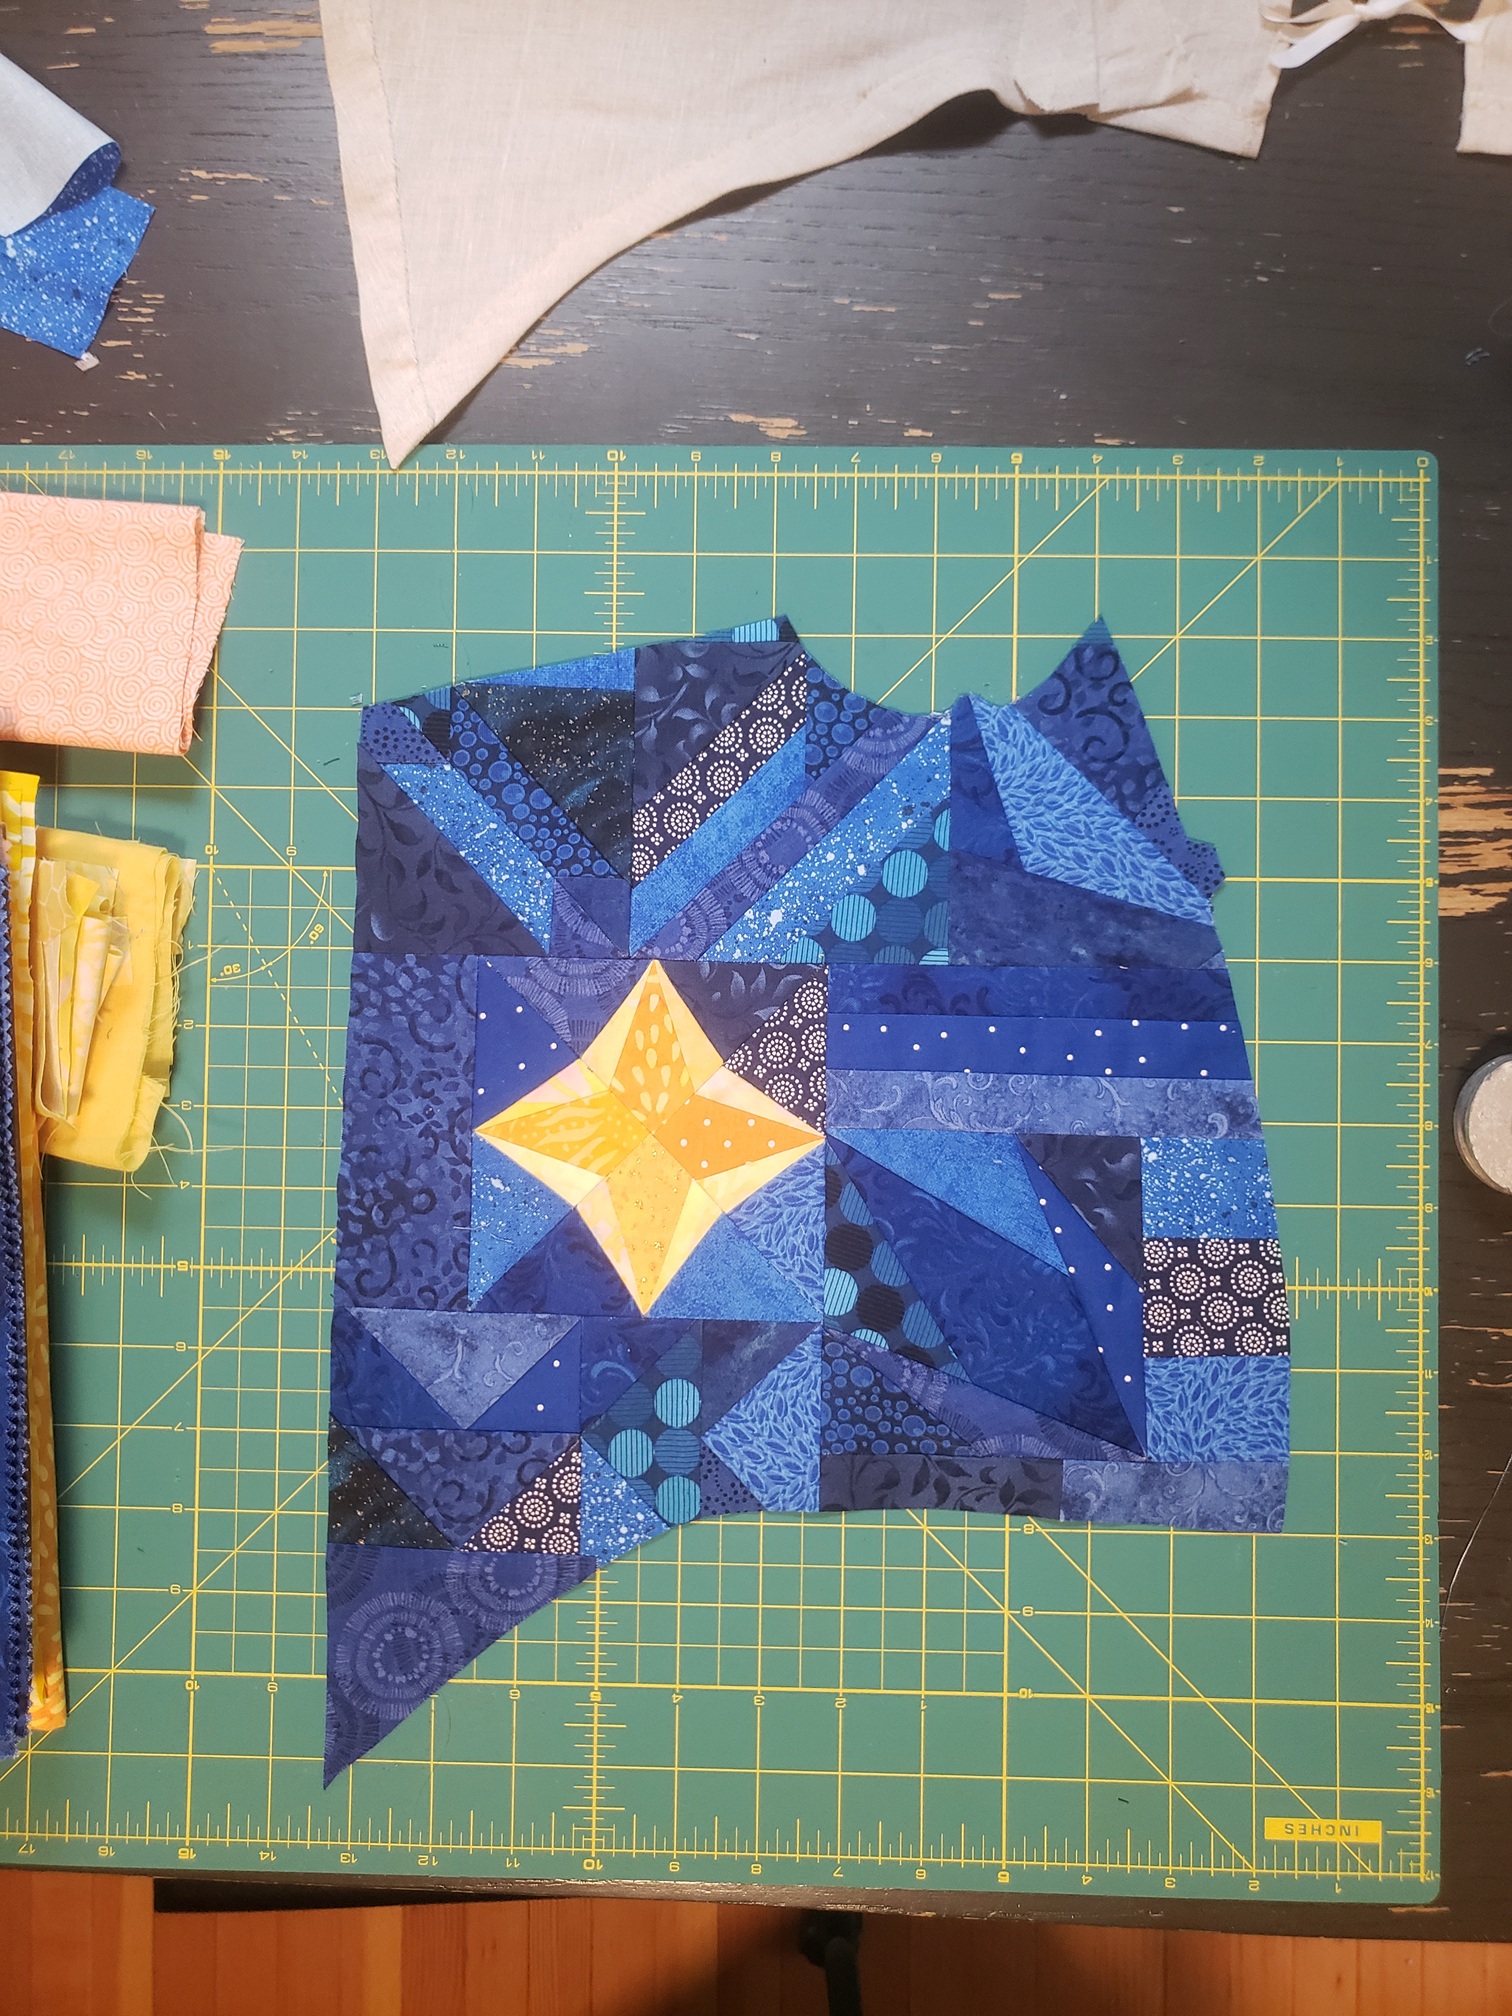


Because the back, shoulder, and sleeves are attached in a later step, I will wait to work on the patchwork for those areas.
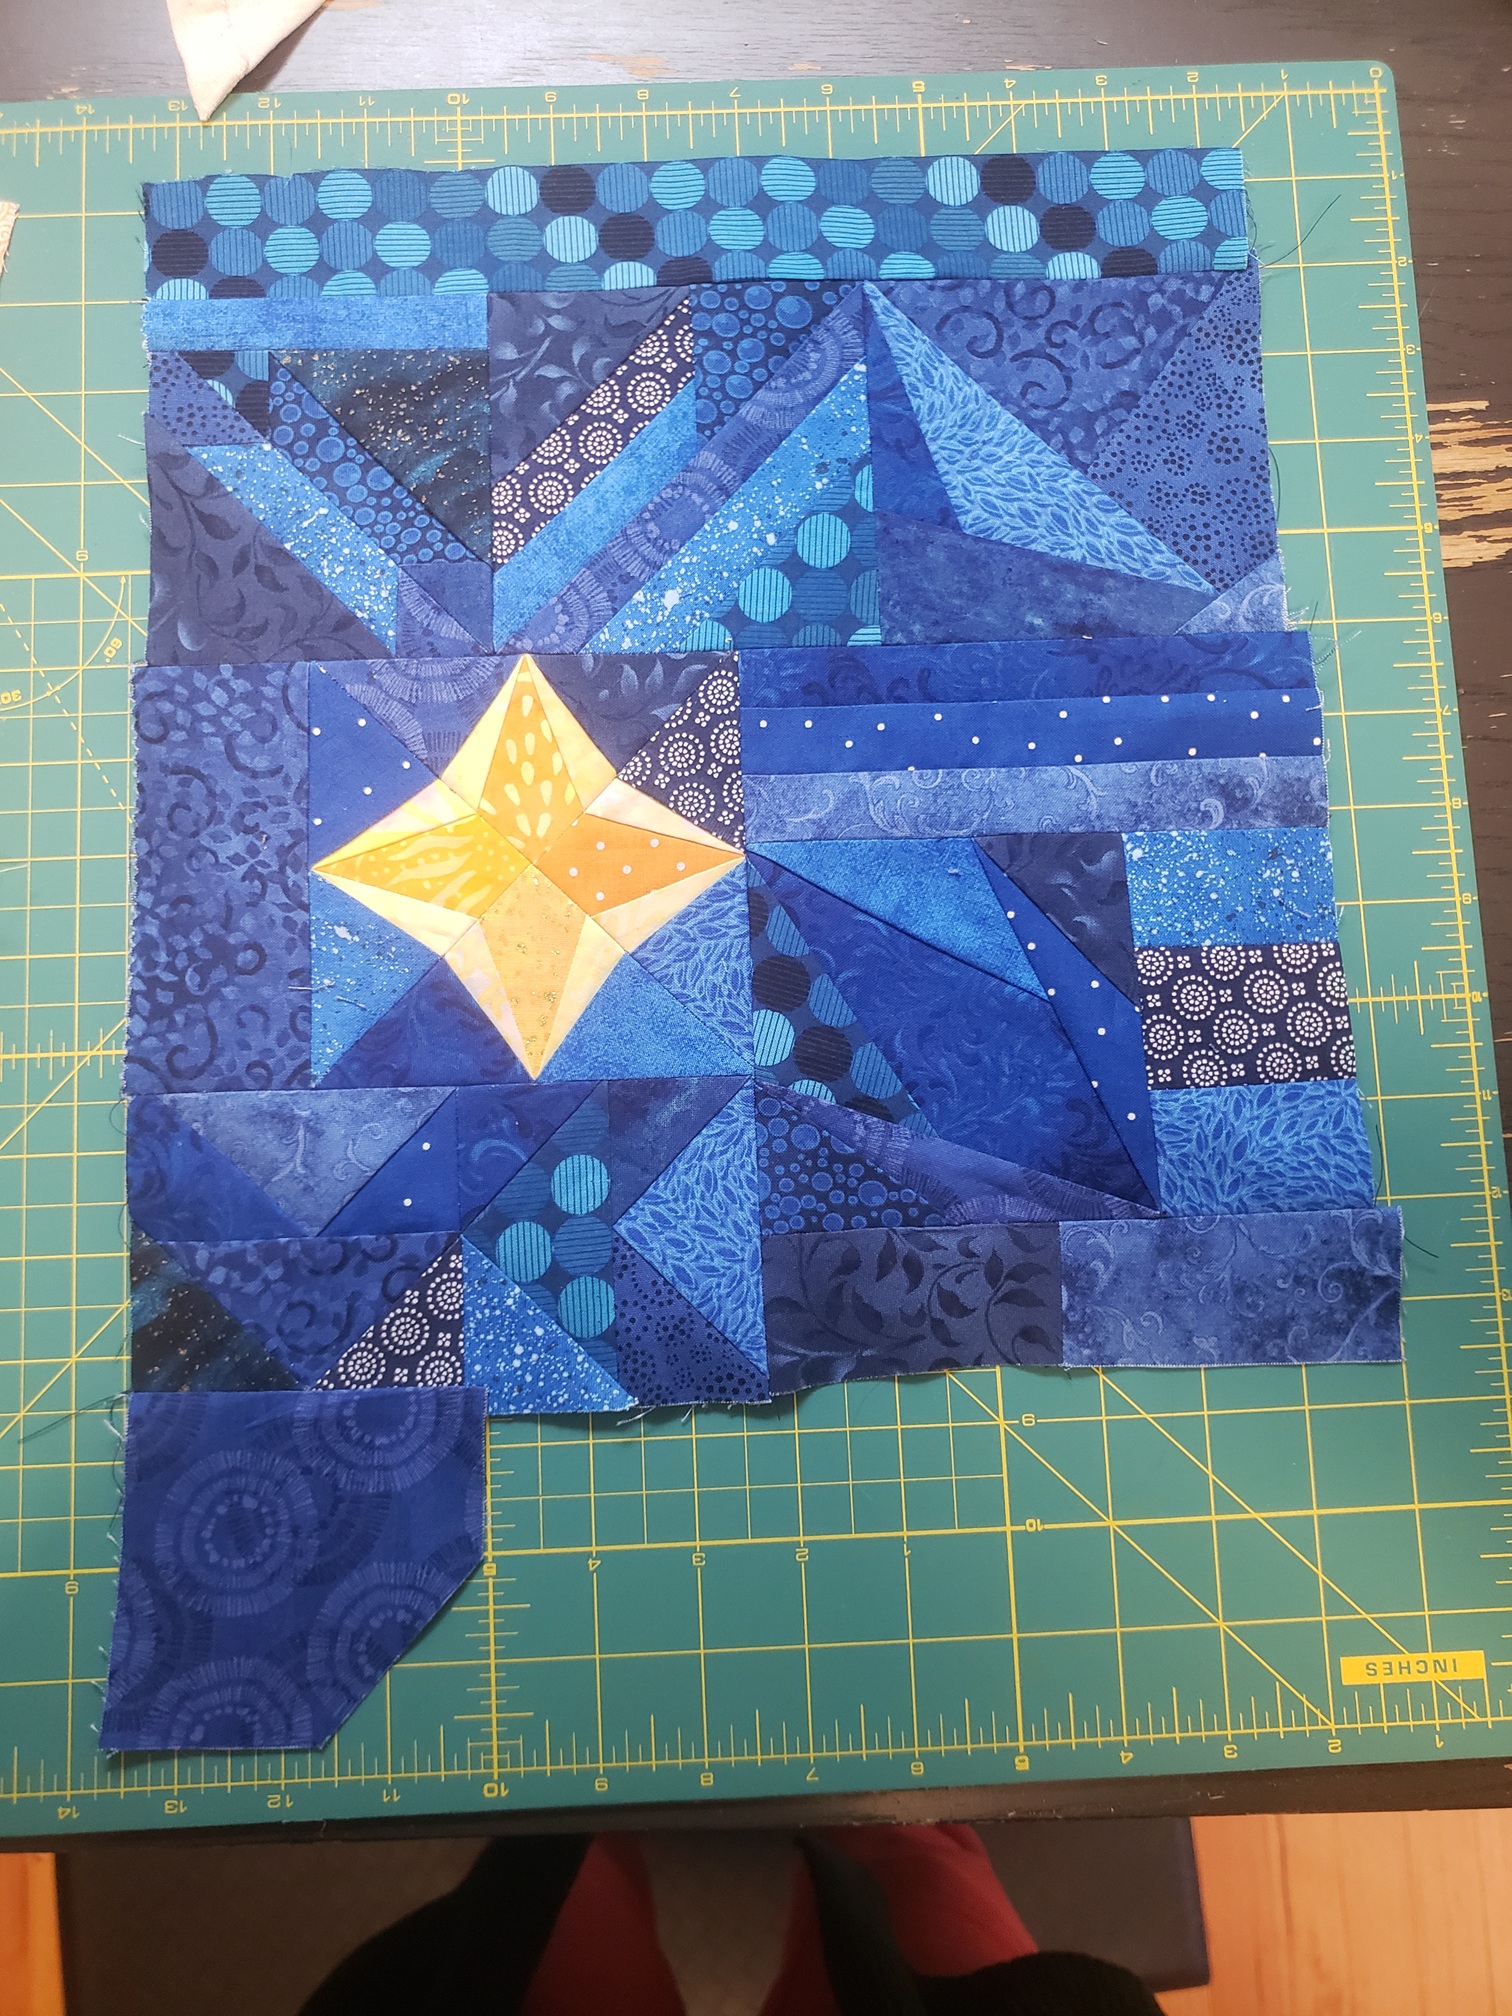
Starry Night Robe
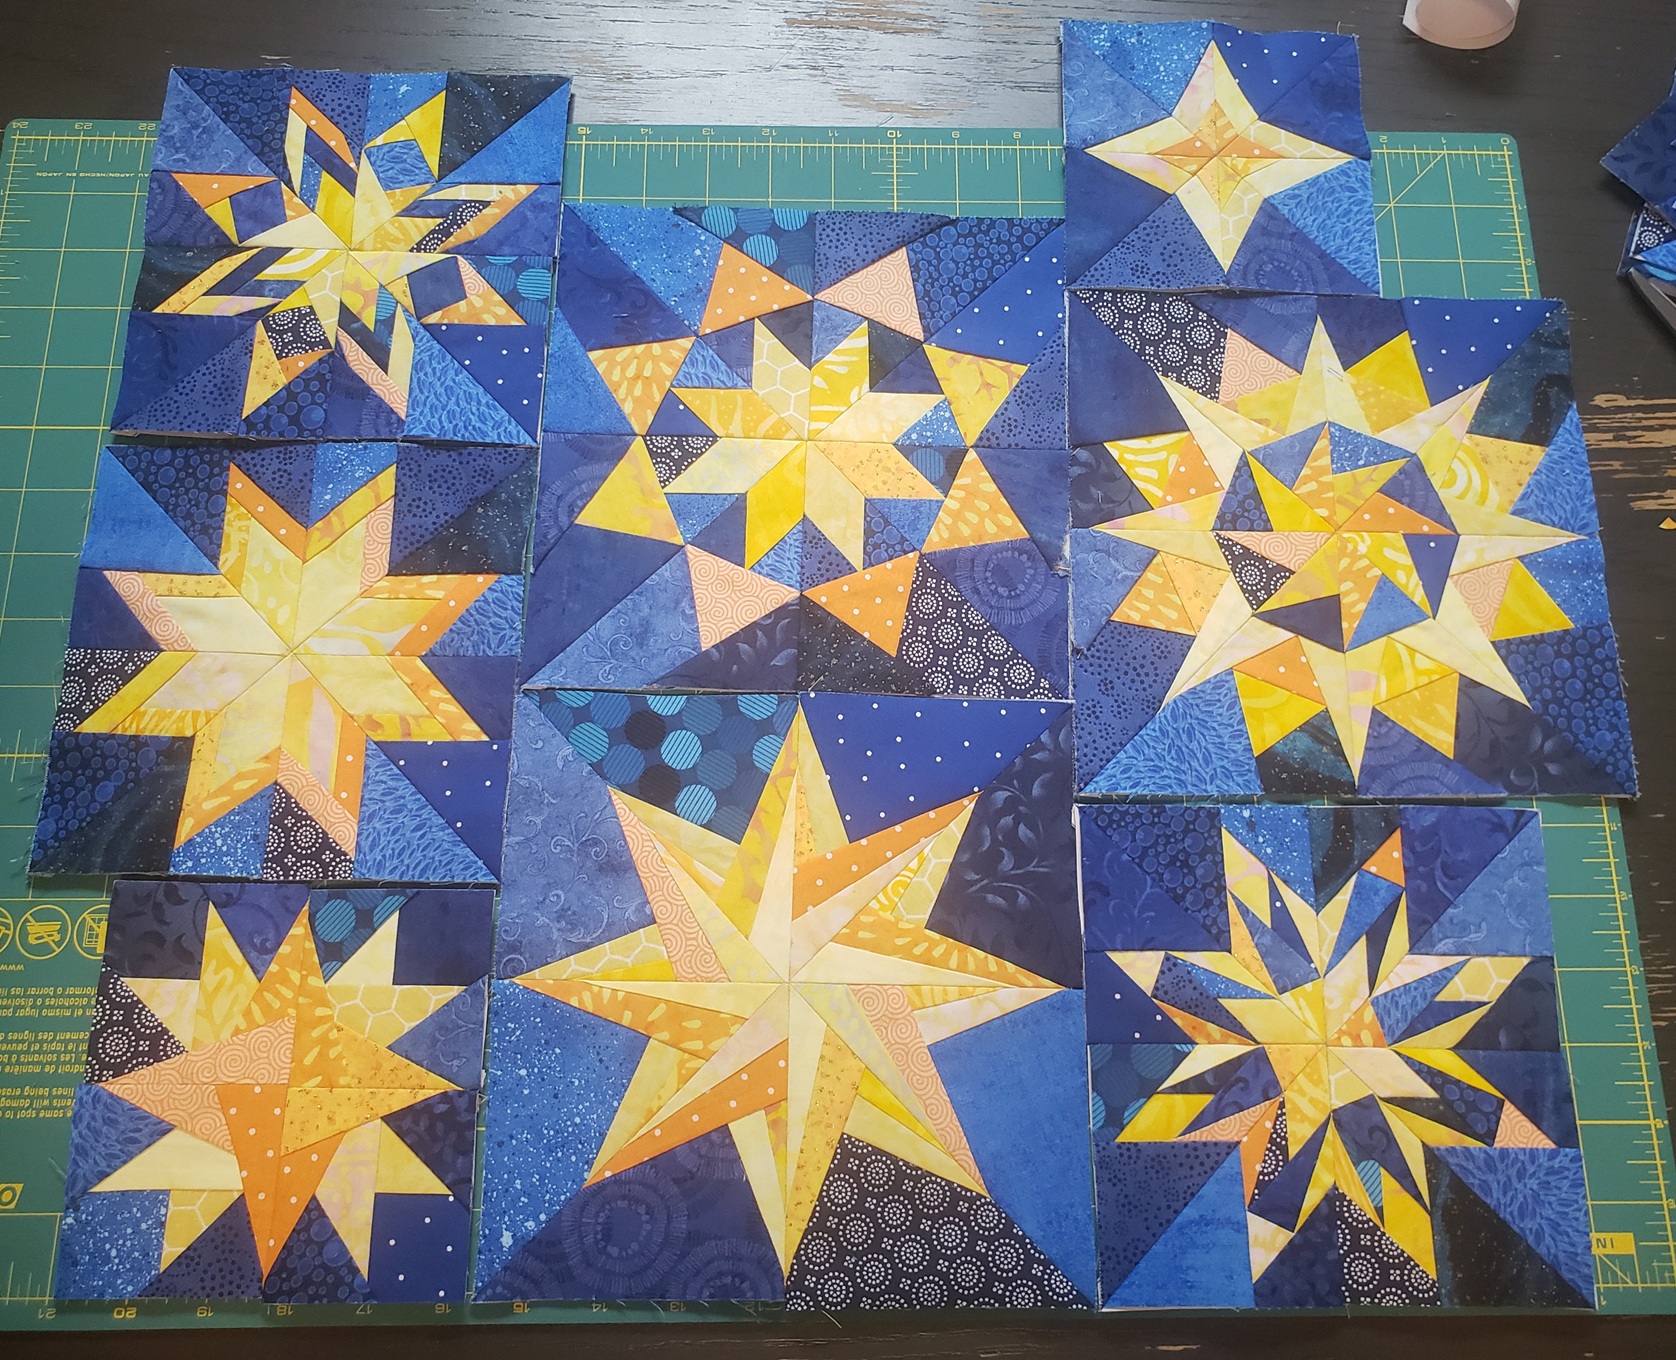
When I was first finding inspiration for this project, I ran across the Starry Night Quilt by Wombat Quilts. She shares a lot of helpful resources, including many of the free star foundation-paper-piecing patterns I am using in my dress. Maybe this is a poor excuse, but since I'm new to quilting and I wasn't confident I could come up with a design myself, I've pretty much just been copying her "Starry Night" quilt...I'm telling myself that because this is really just for me, plus I am doing something transformative, that this doesn't count as plagiarism. Copying is a form of flattery...right?
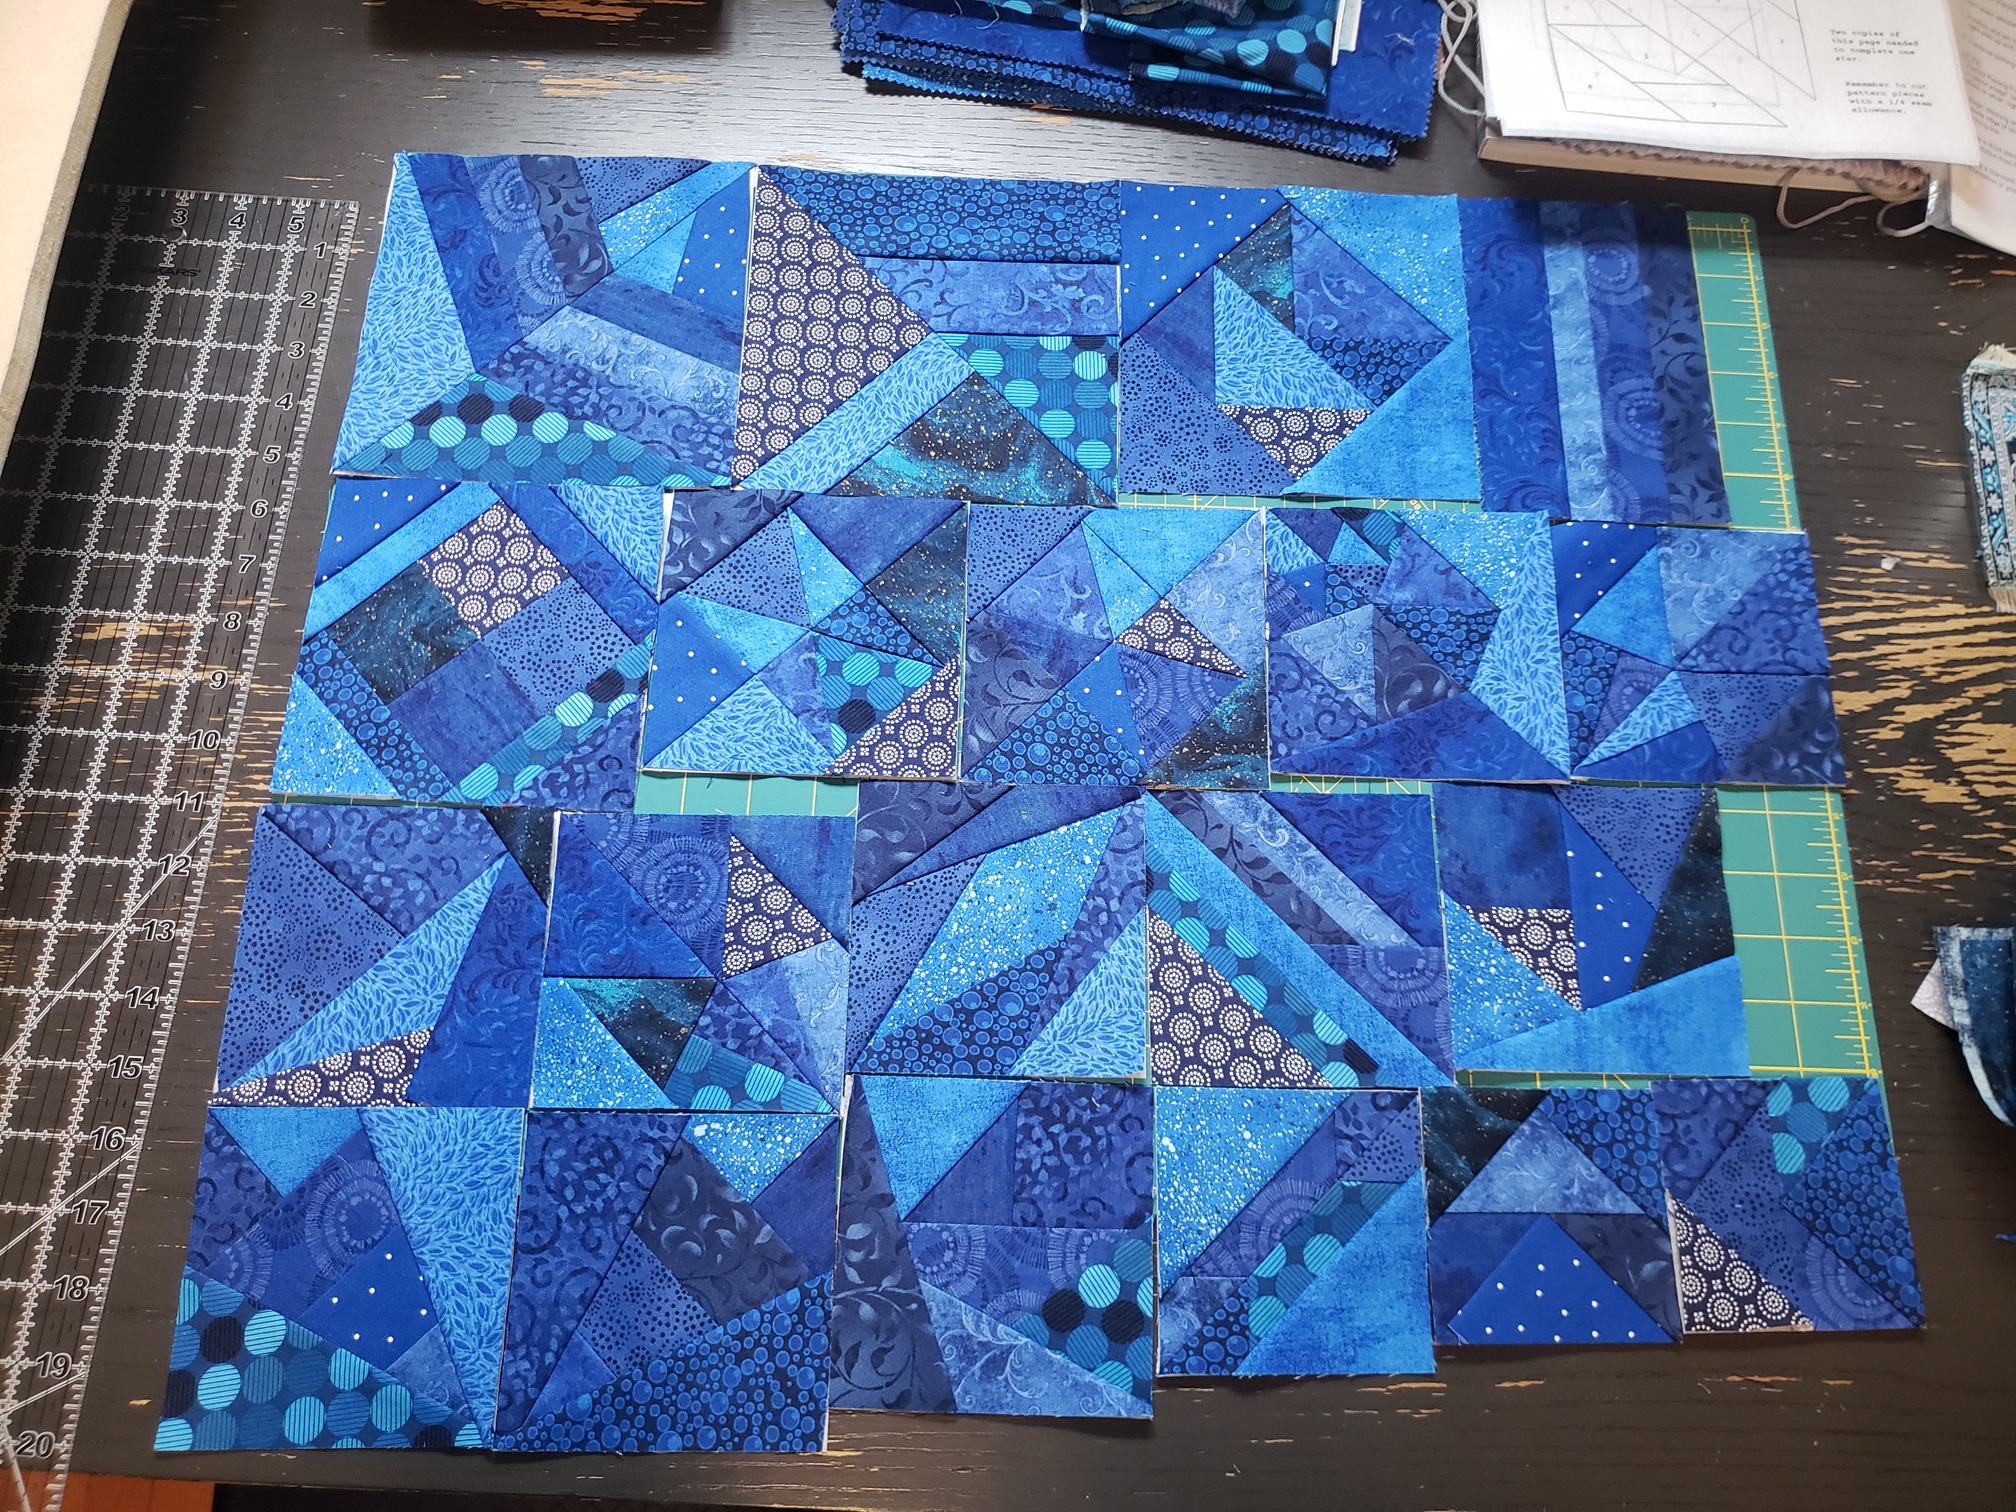
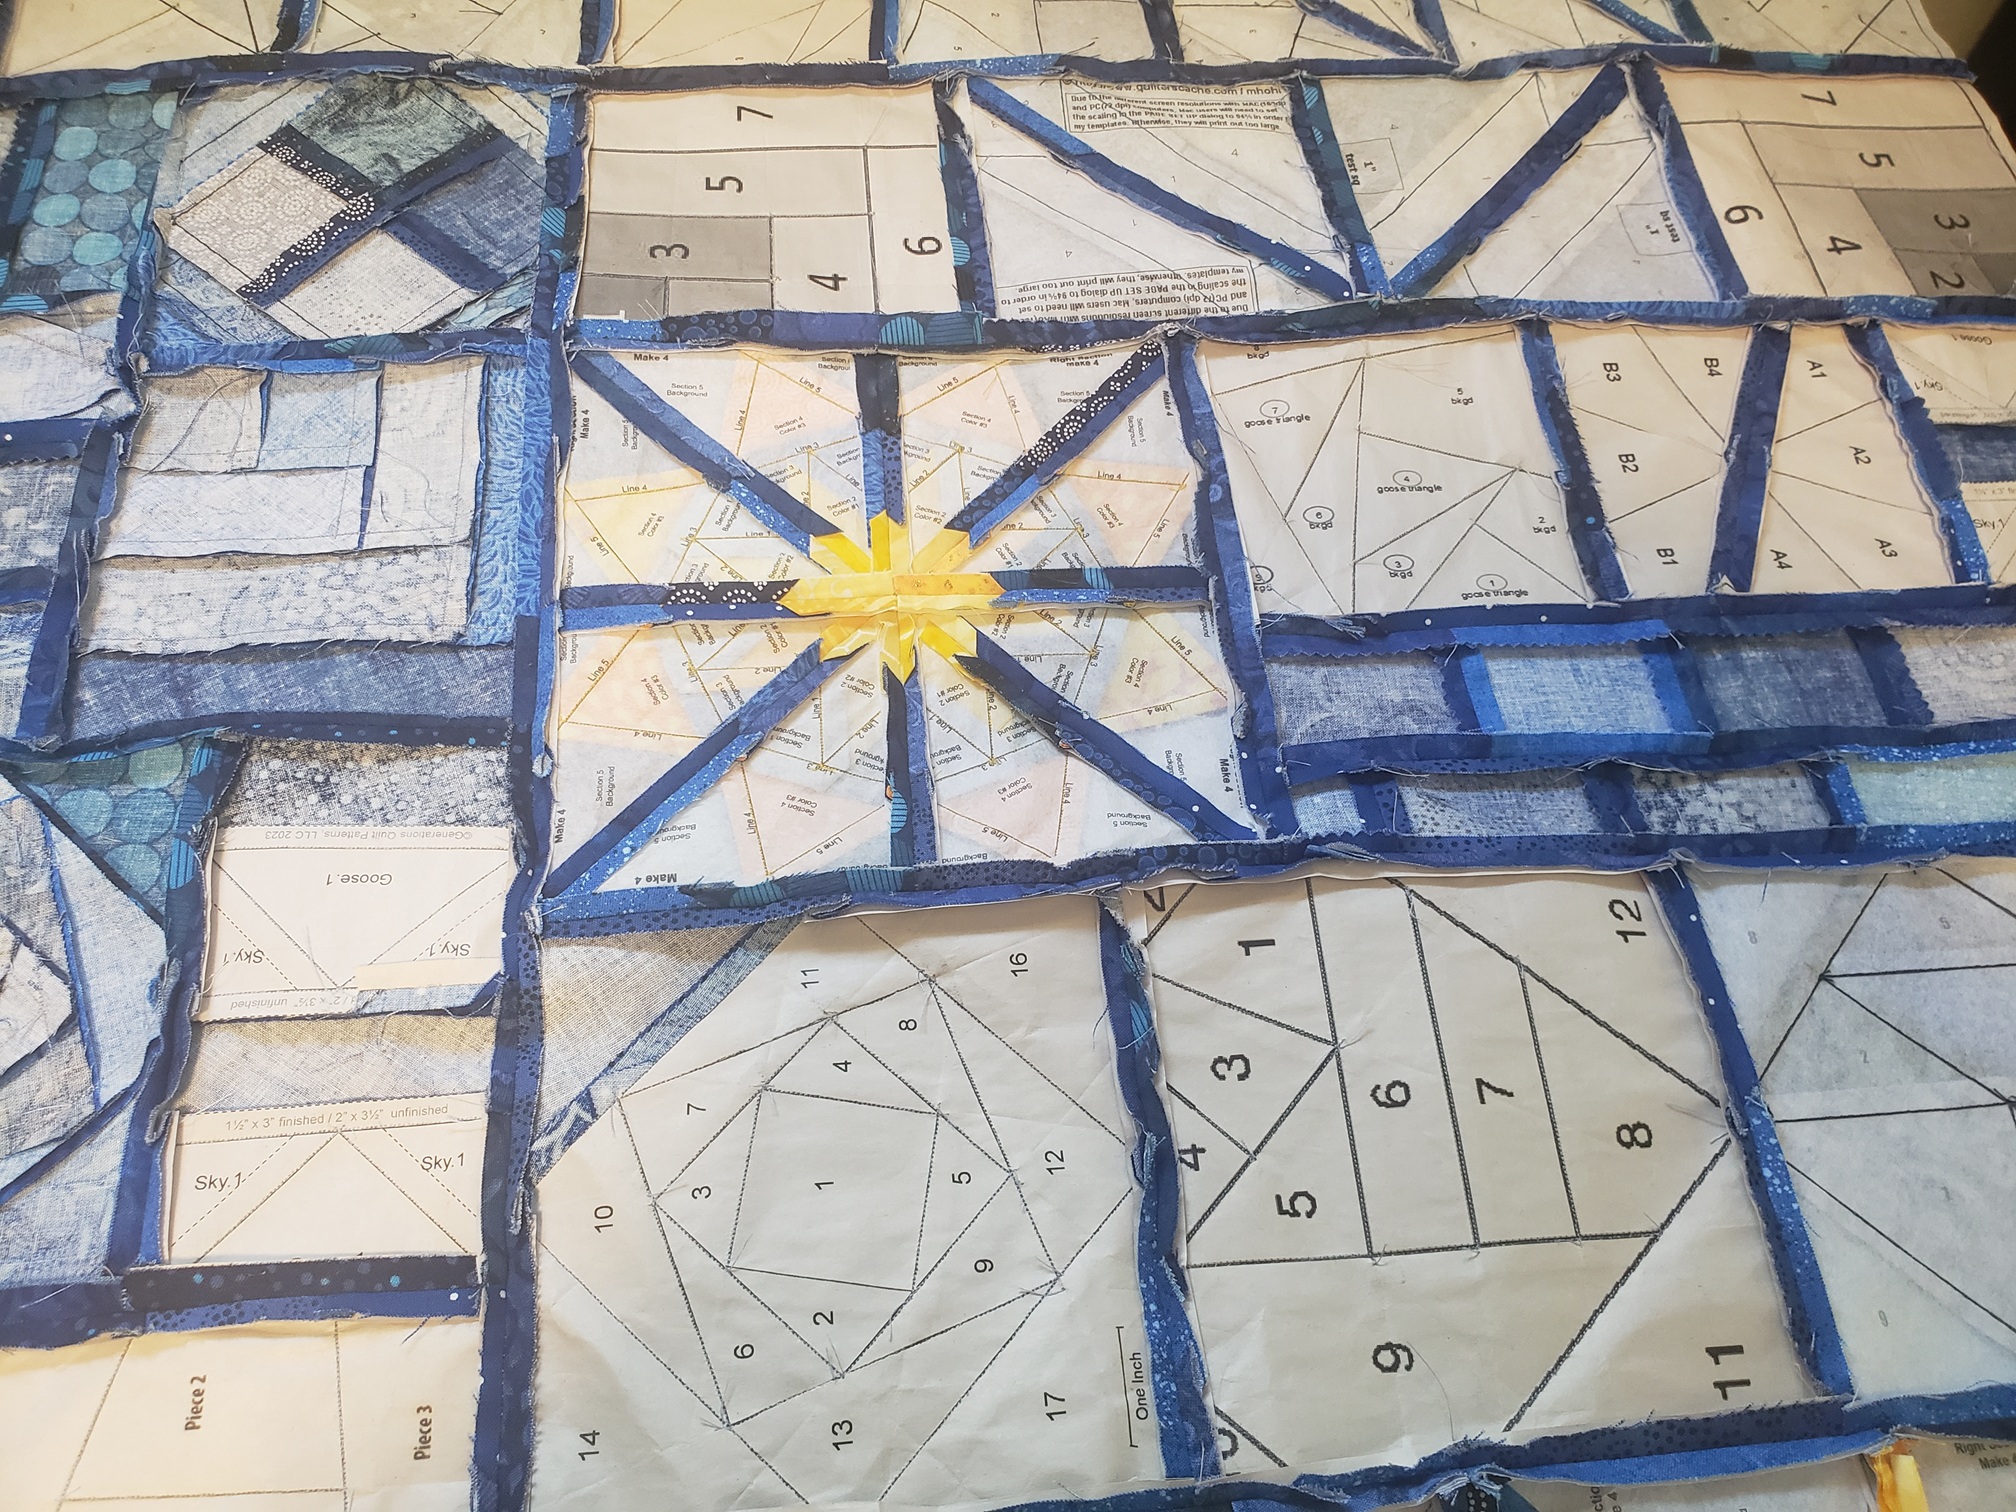
However, because of my inexperience, a lot of the blocks I used were just randomly scaled down. For example, if the original star block was 8" x 8" and I wanted it to look smaller, I would just scale it in my printer settings to 80%. Many of you who are familiar with quilting are probably cringing right now. Why? Because this leaves me with a 7.16" x 7.16" block. And when you try to but many blocks of random sizes together, it becomes an impossible task. But I'll come back to that later.
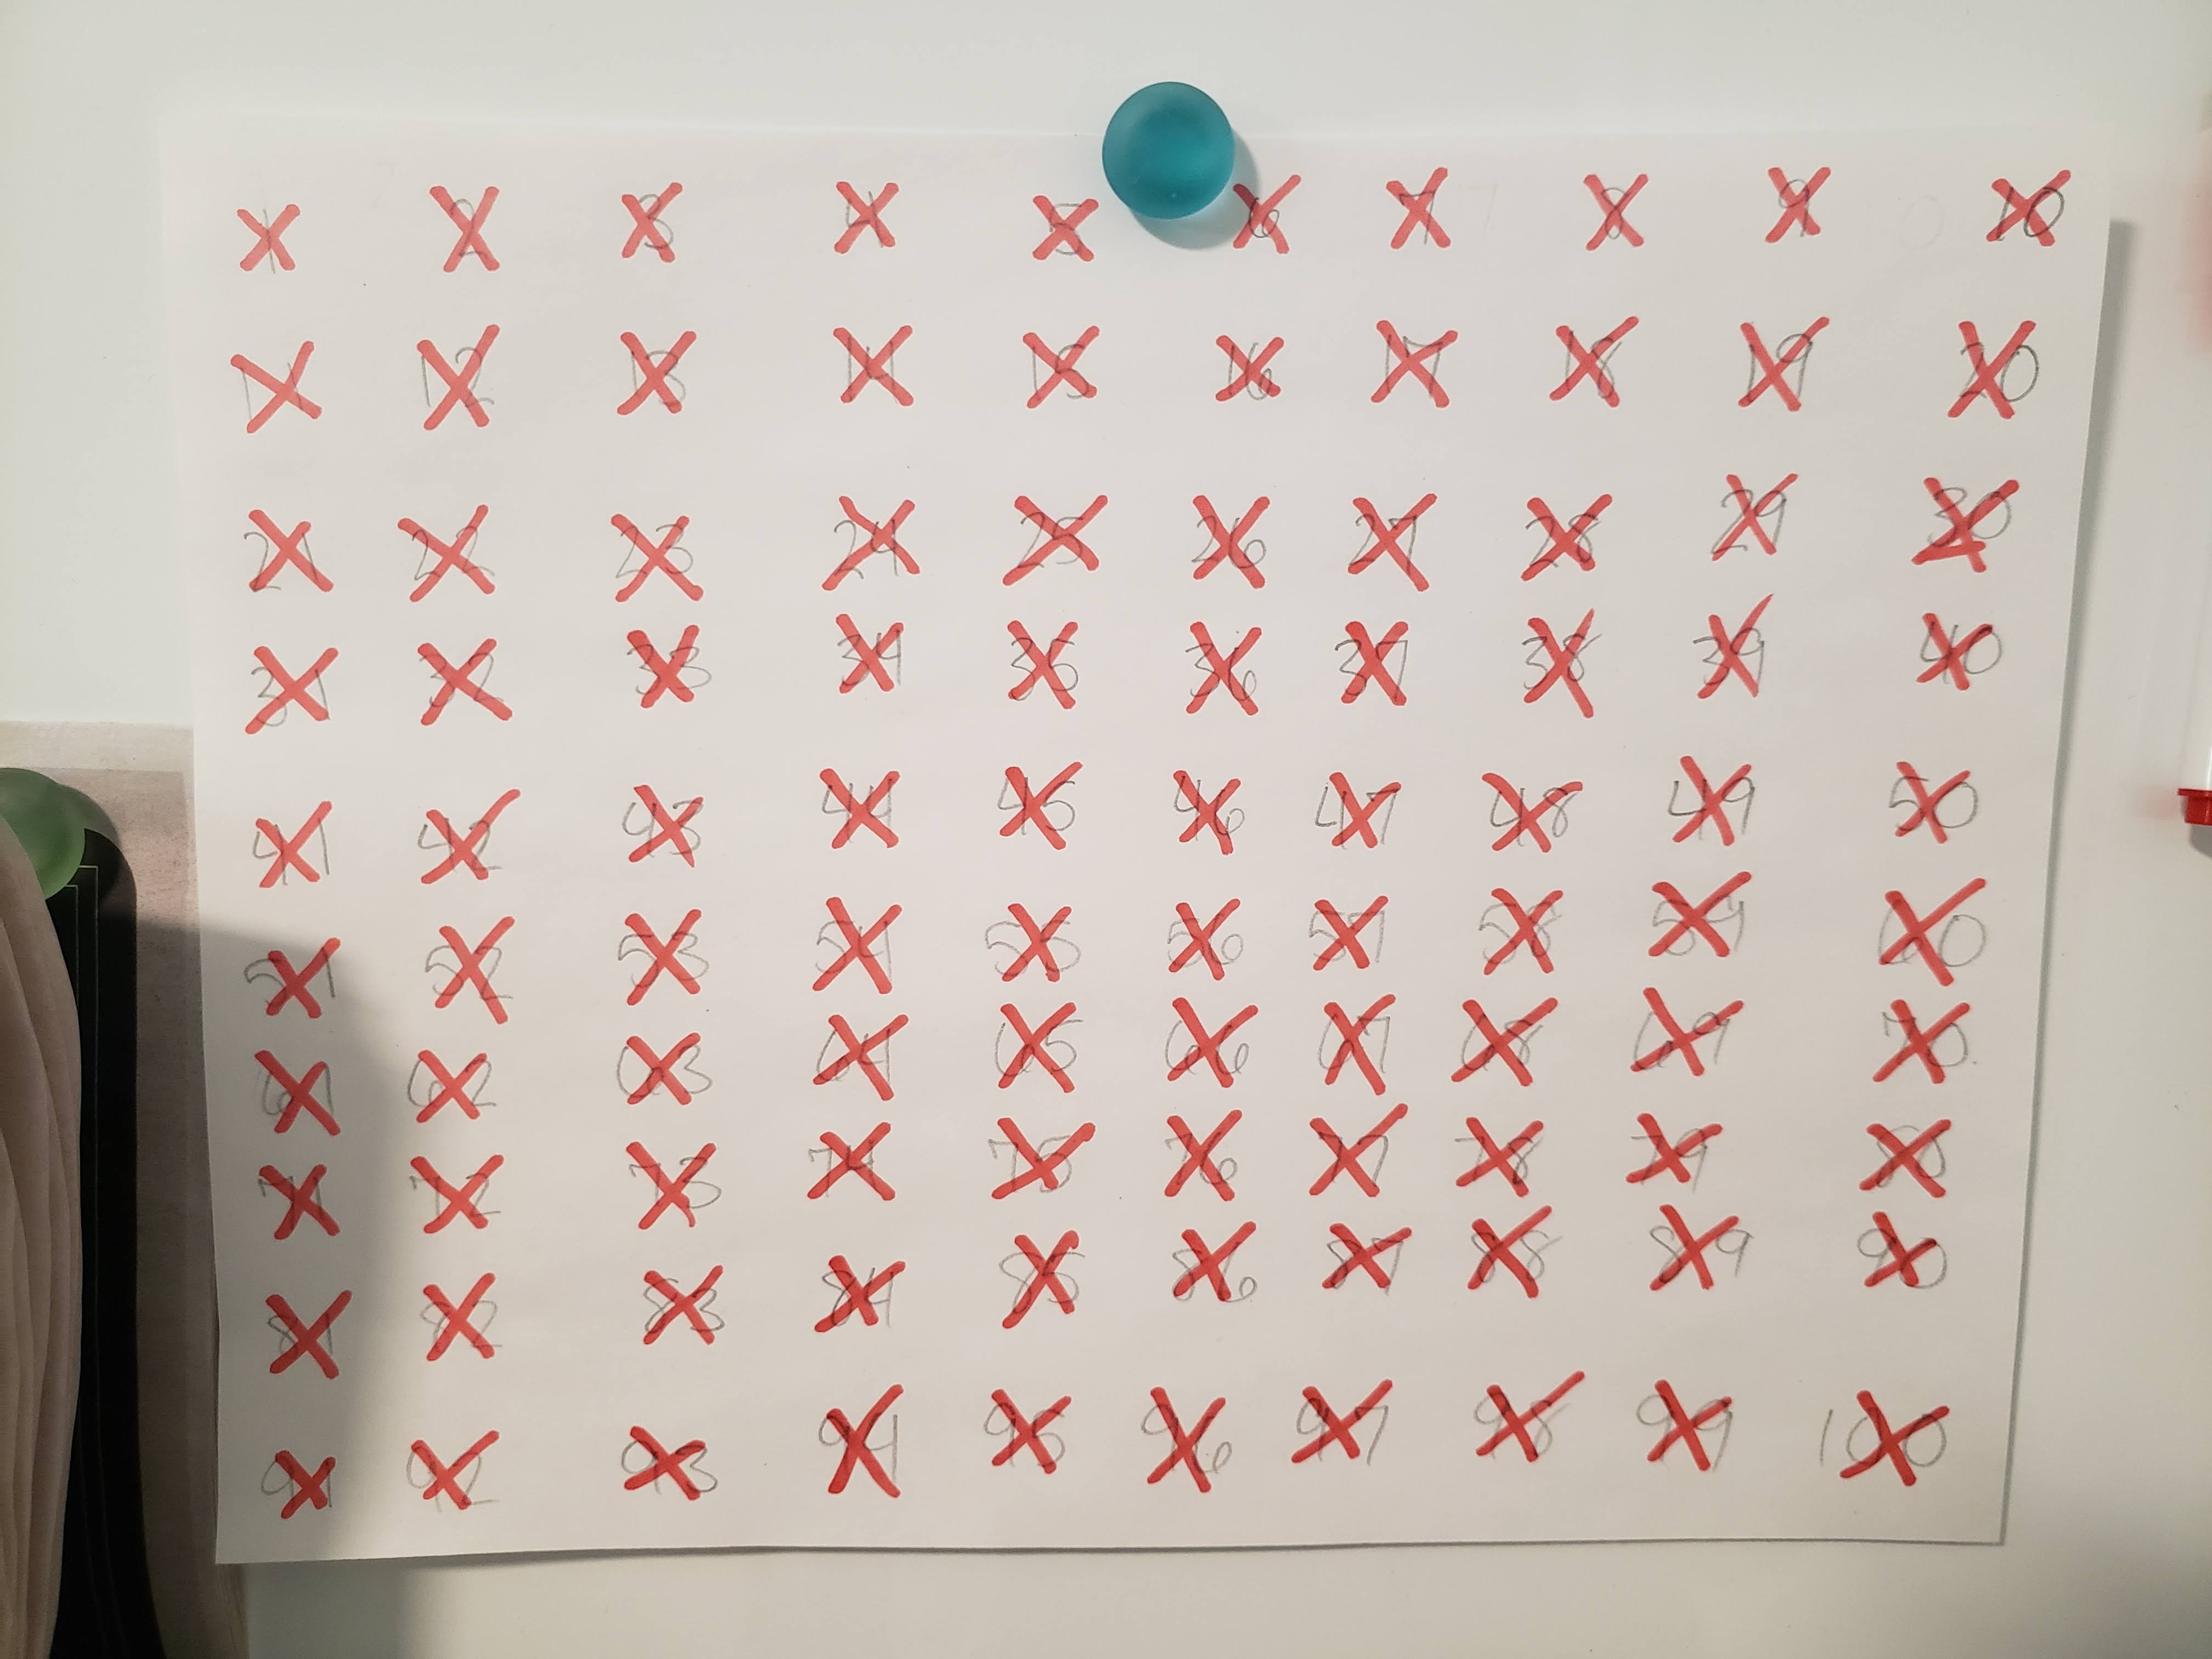
I set myself the goal of creating 100 paper-pieced blocks because that was what I guesstimated would be enough for the "Night" side of the dress. I wrote the numbers 1-100 on a piece of paper to hang in my sewing room, and crossed them out as I went. Originally, I hoped to do 10 per day. Instead, I averaged about 5. I kept swinging between enjoying the process, and being completely frustrated. Foundation paper piecing has been really helpful in making even a beginner like me look like I know what I'm doing. But I can't tell you how many times I've had to seam rip and restitch a section because when I go to press a new section open, I realize the fabric doesn't completely cover the area it needs to. When I finally finished, I was OVER THE MOON ;)
...Not for long, though.
To decide the general layout of my skirt, I first created a mockup out of plaid bedsheets, both to check the fit, and to determine the placement of the star blocks. I didn't want any stars to be completely hidden by pleating.
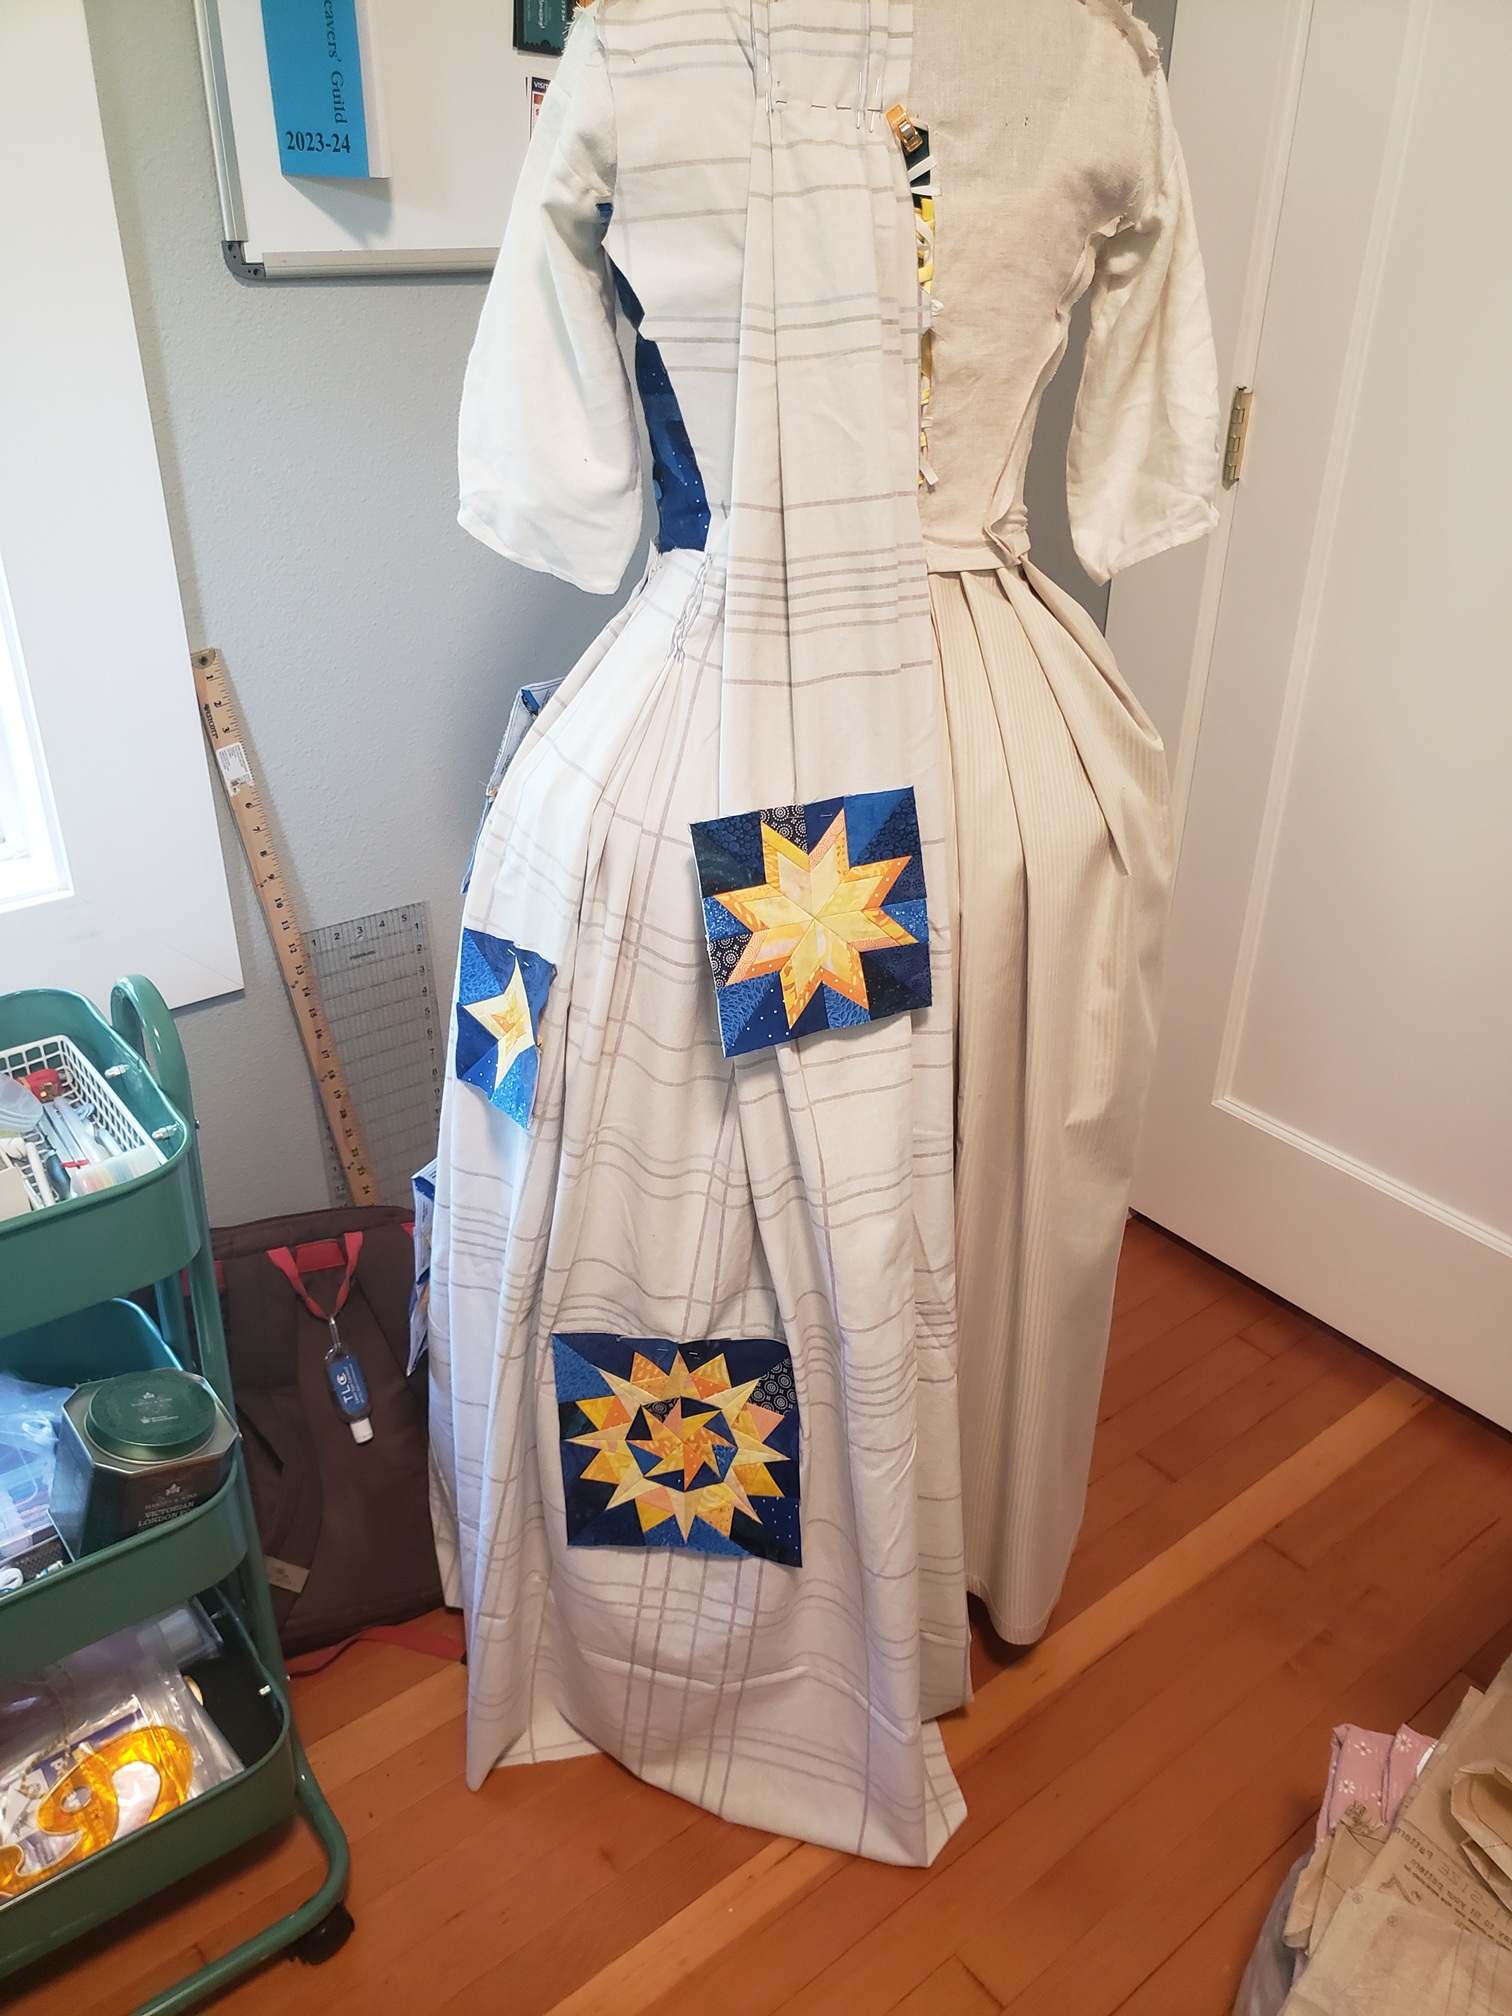
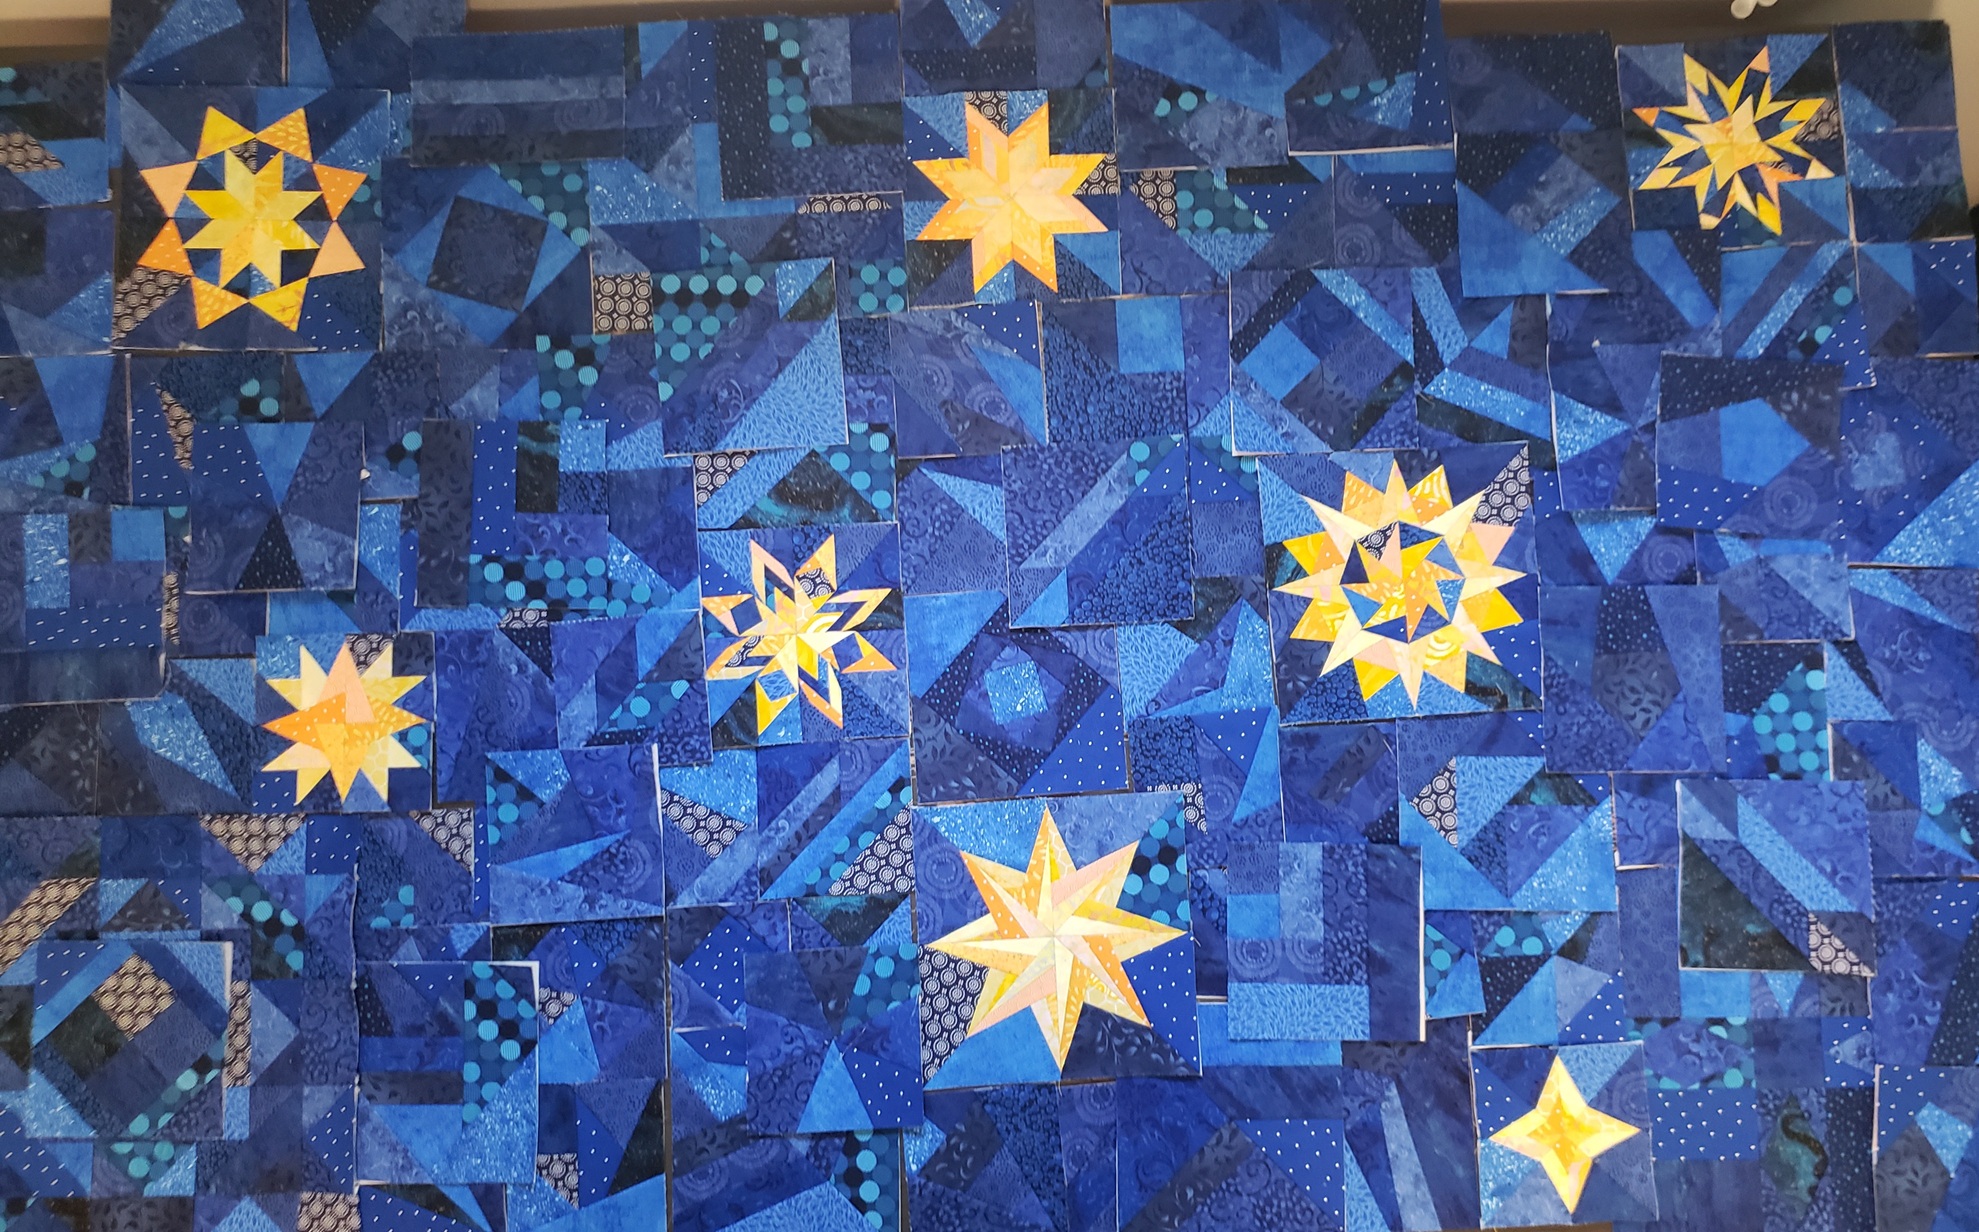
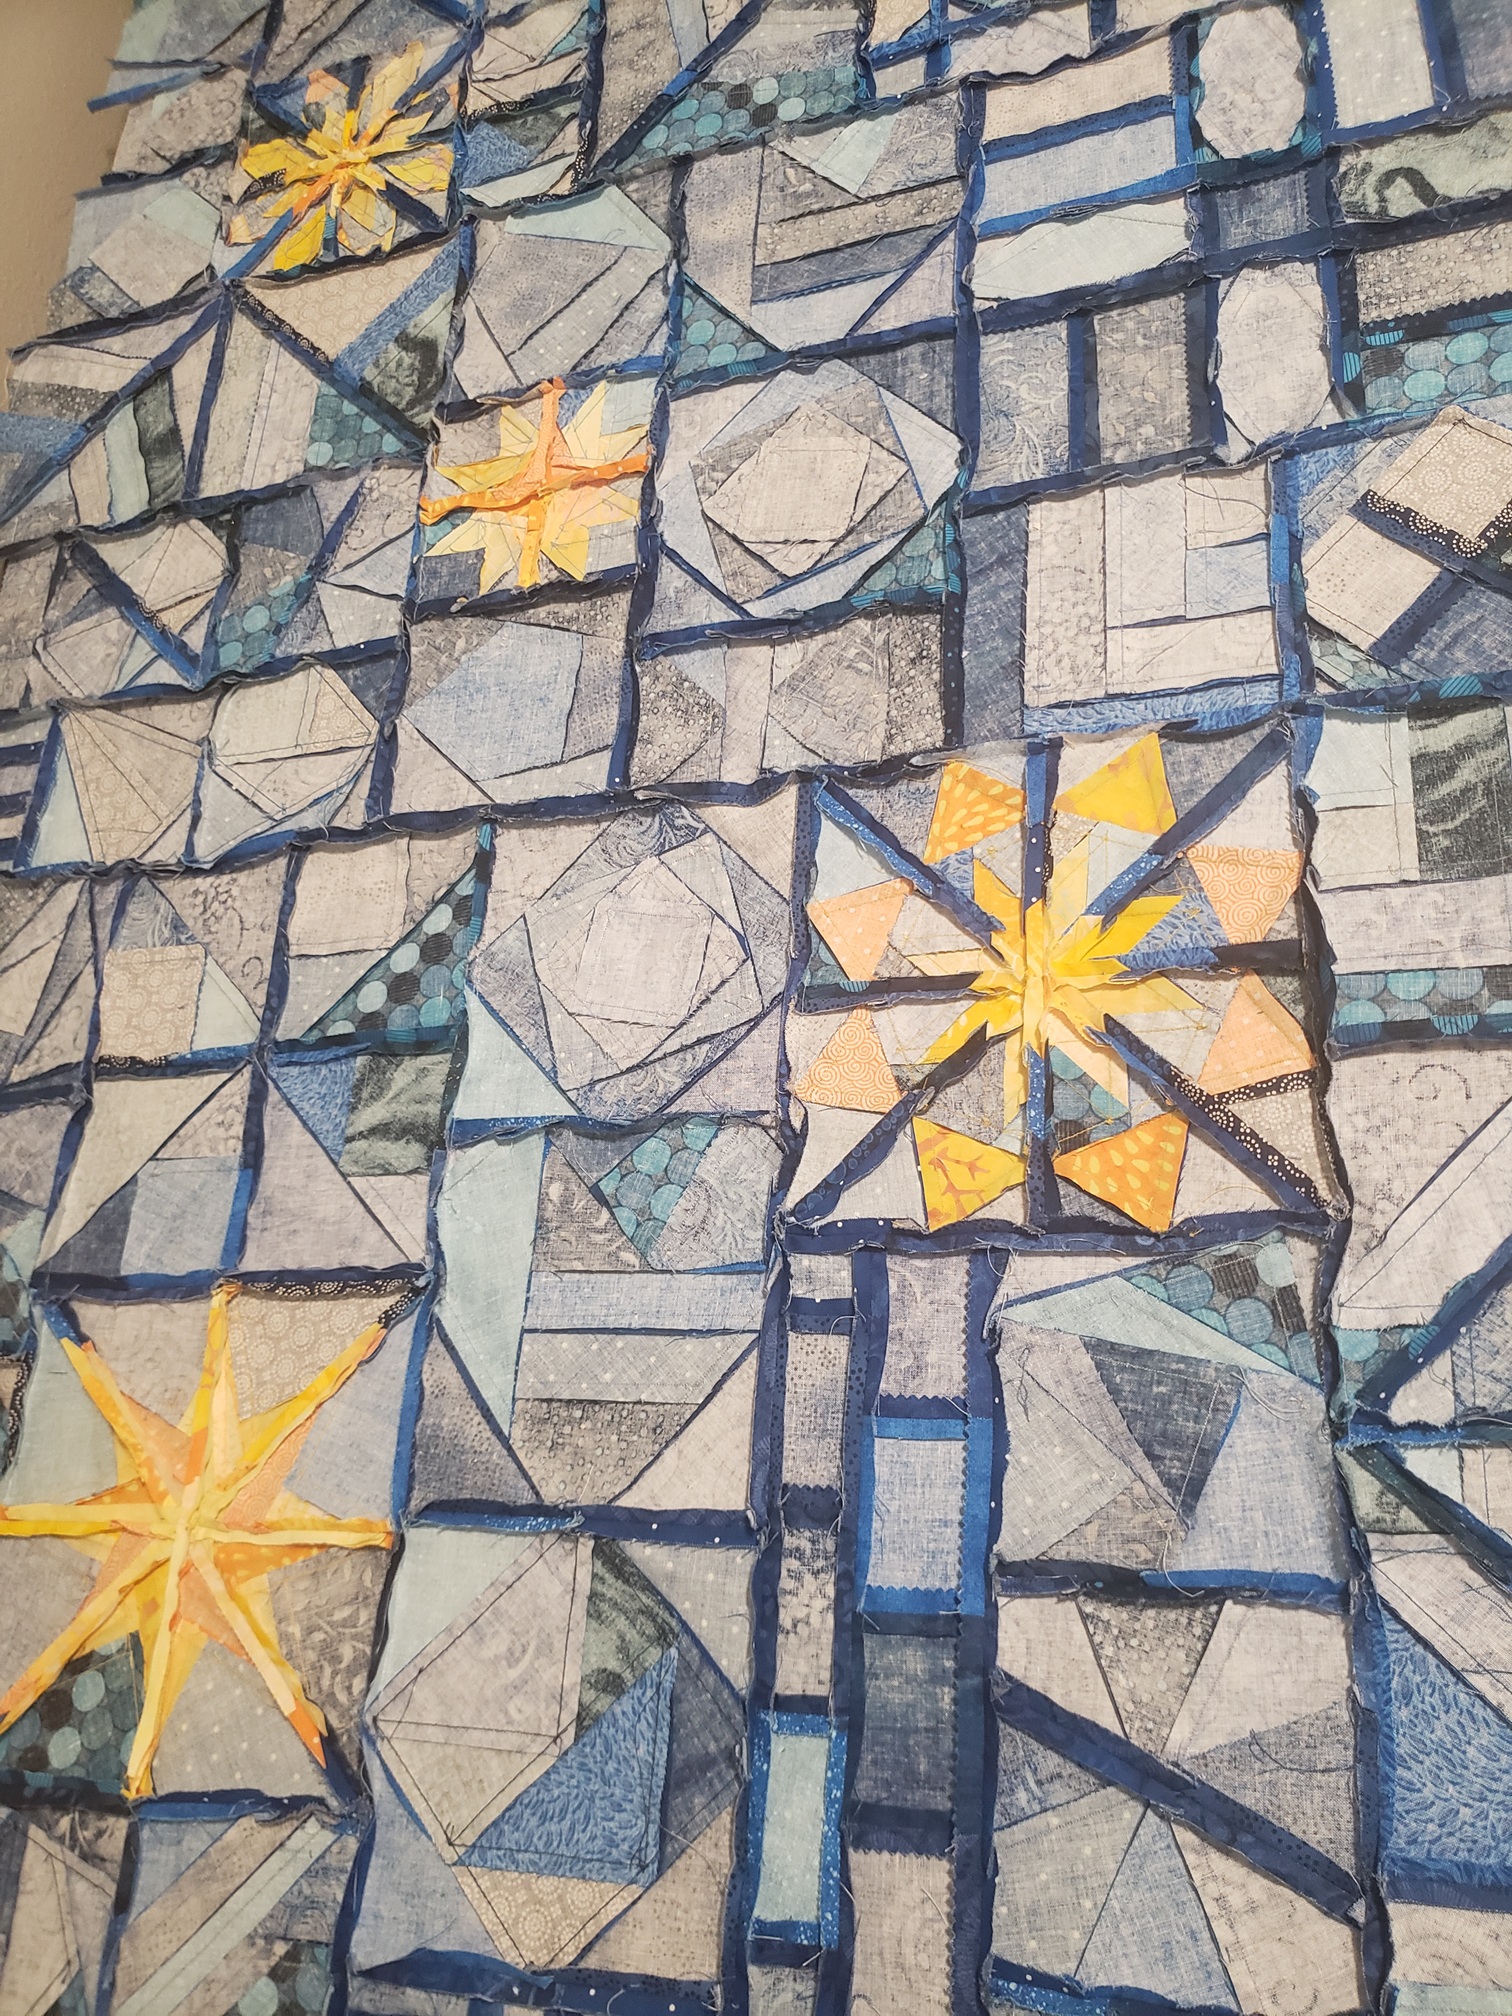
Once placement was decided, I need to fill the gaps in-between with sky blocks. As I mentioned before, many of the squares were non-standard sizes, so I had to add random pieces to fill gaps, or trim blocks to fit, making some of the corners where things should line up look "off." It was also excrutiating trying to resist the urge to remove the paper backing before everything was attached, but I knew it would ultimately make things easier due to added stability and marked seam allowances.
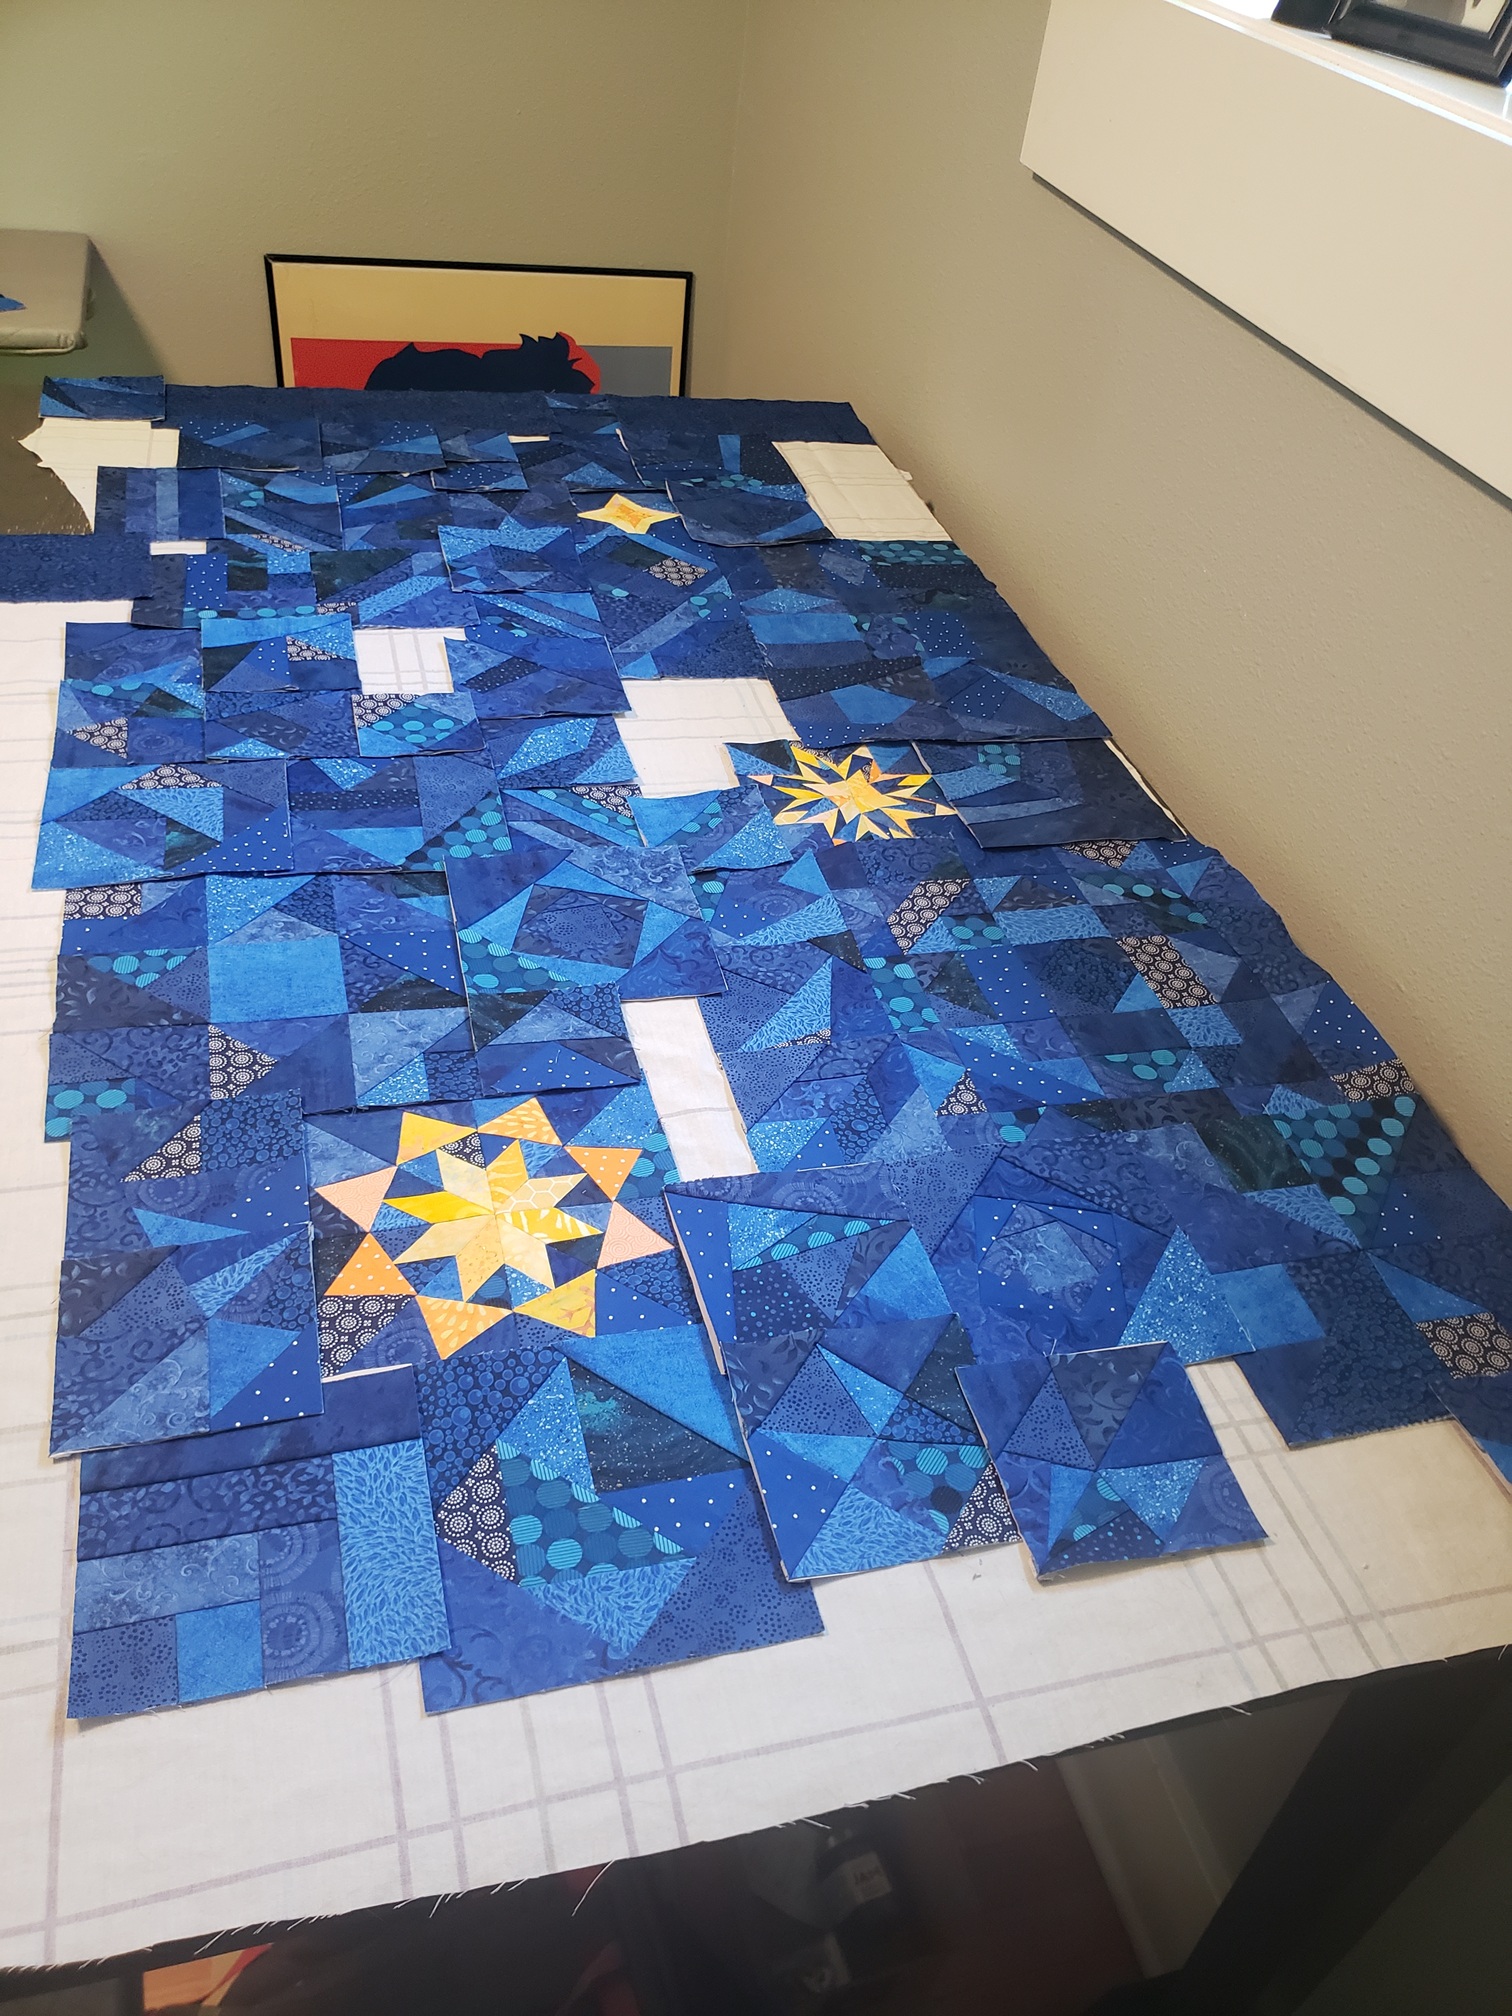
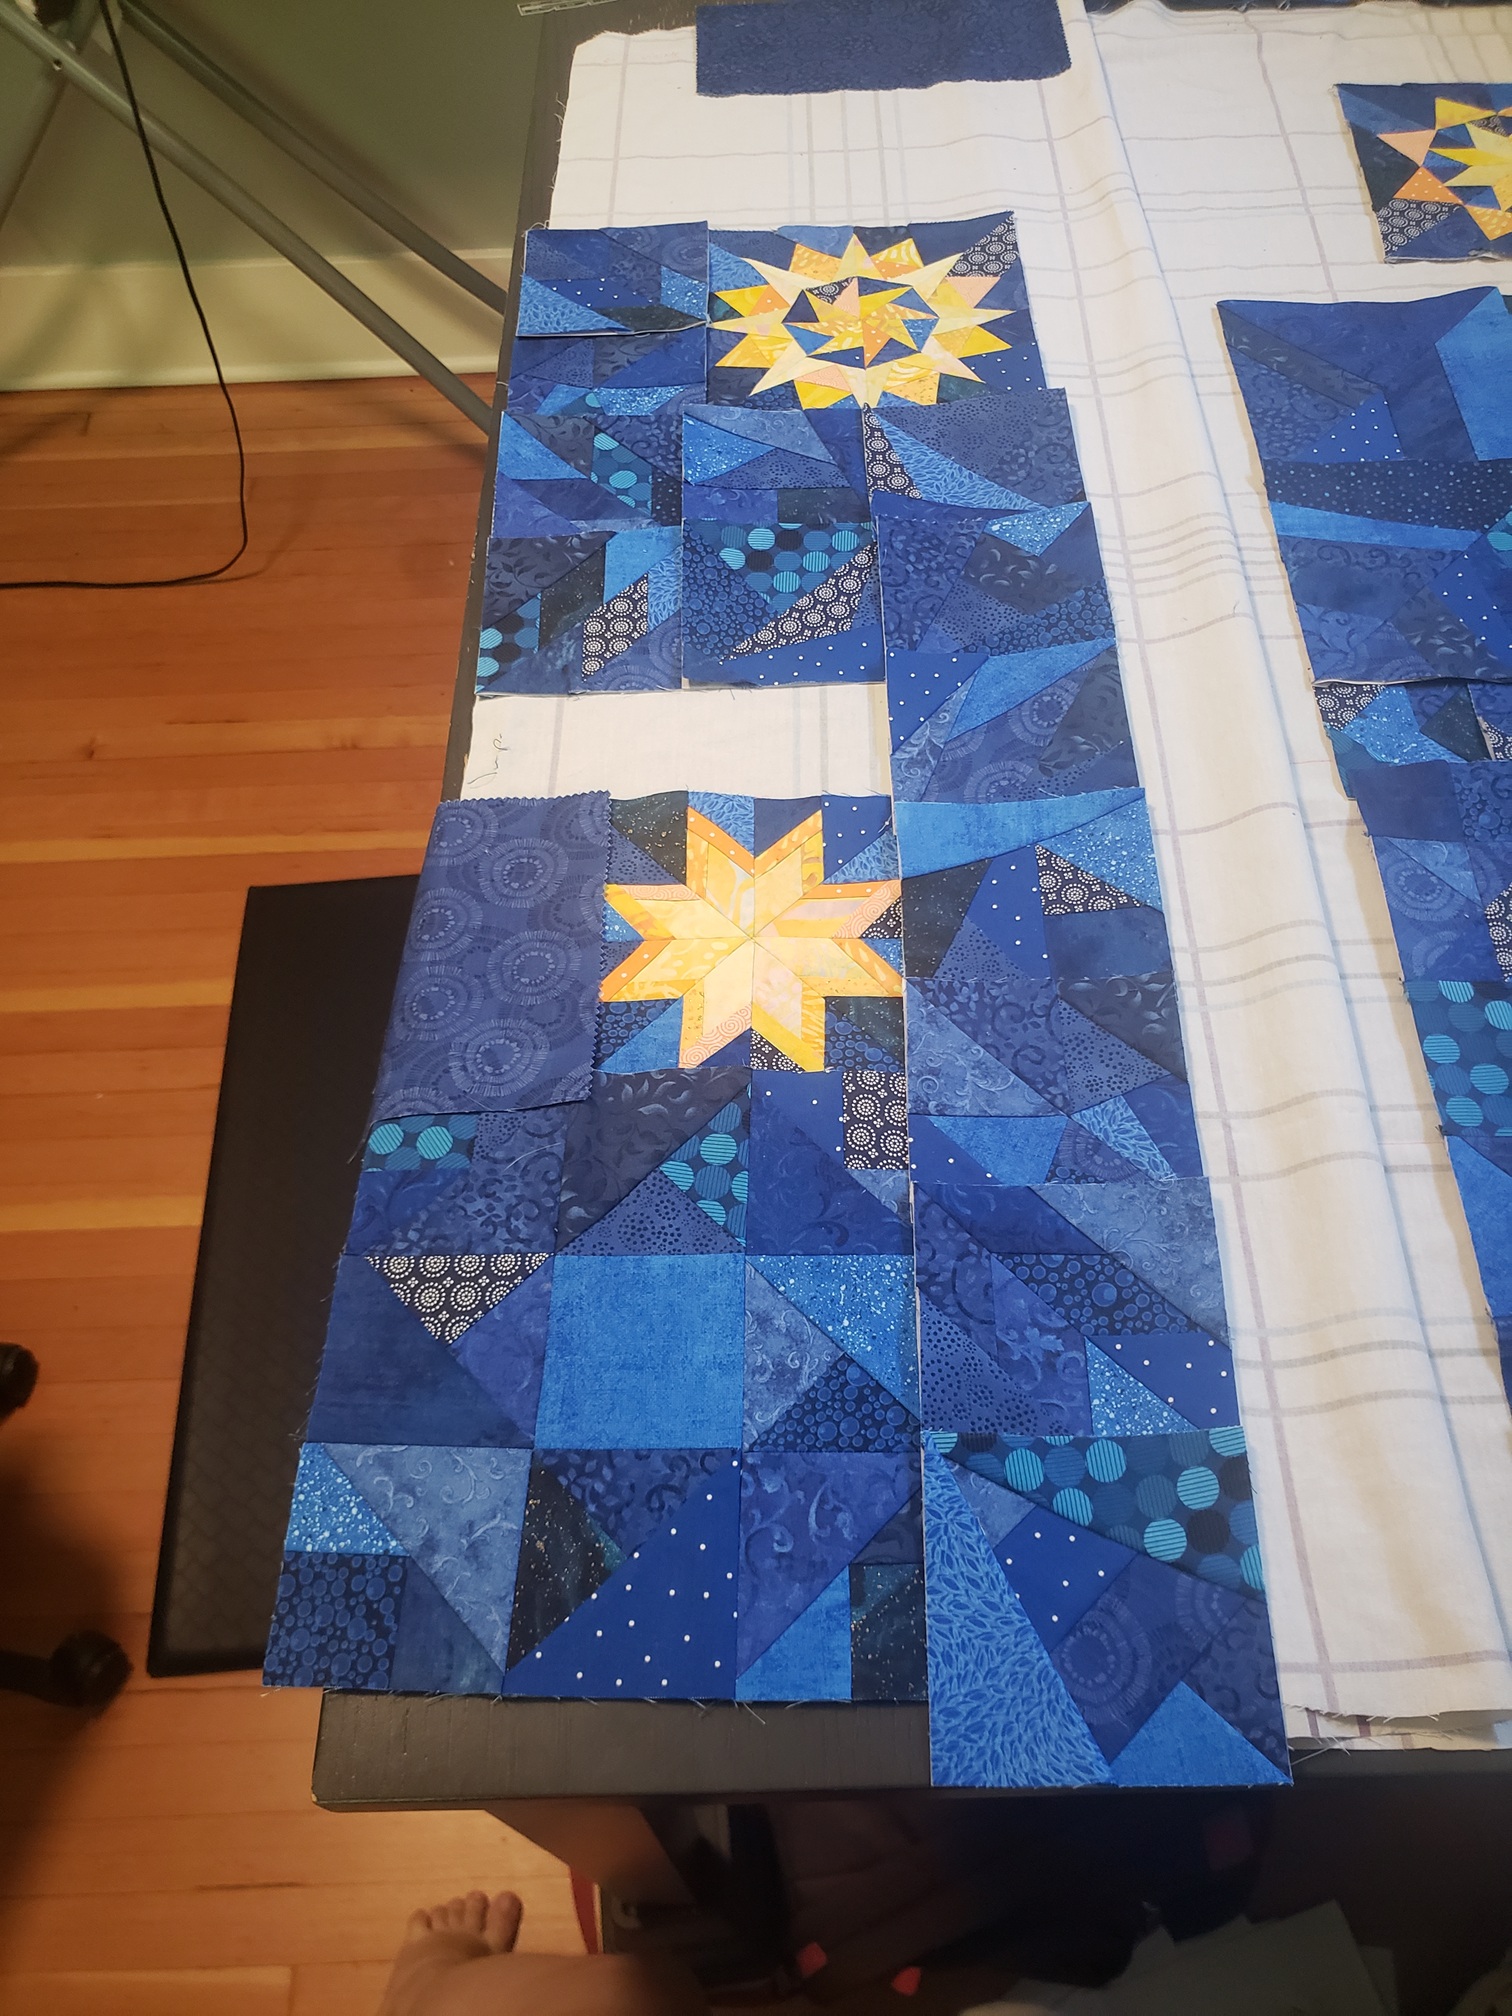
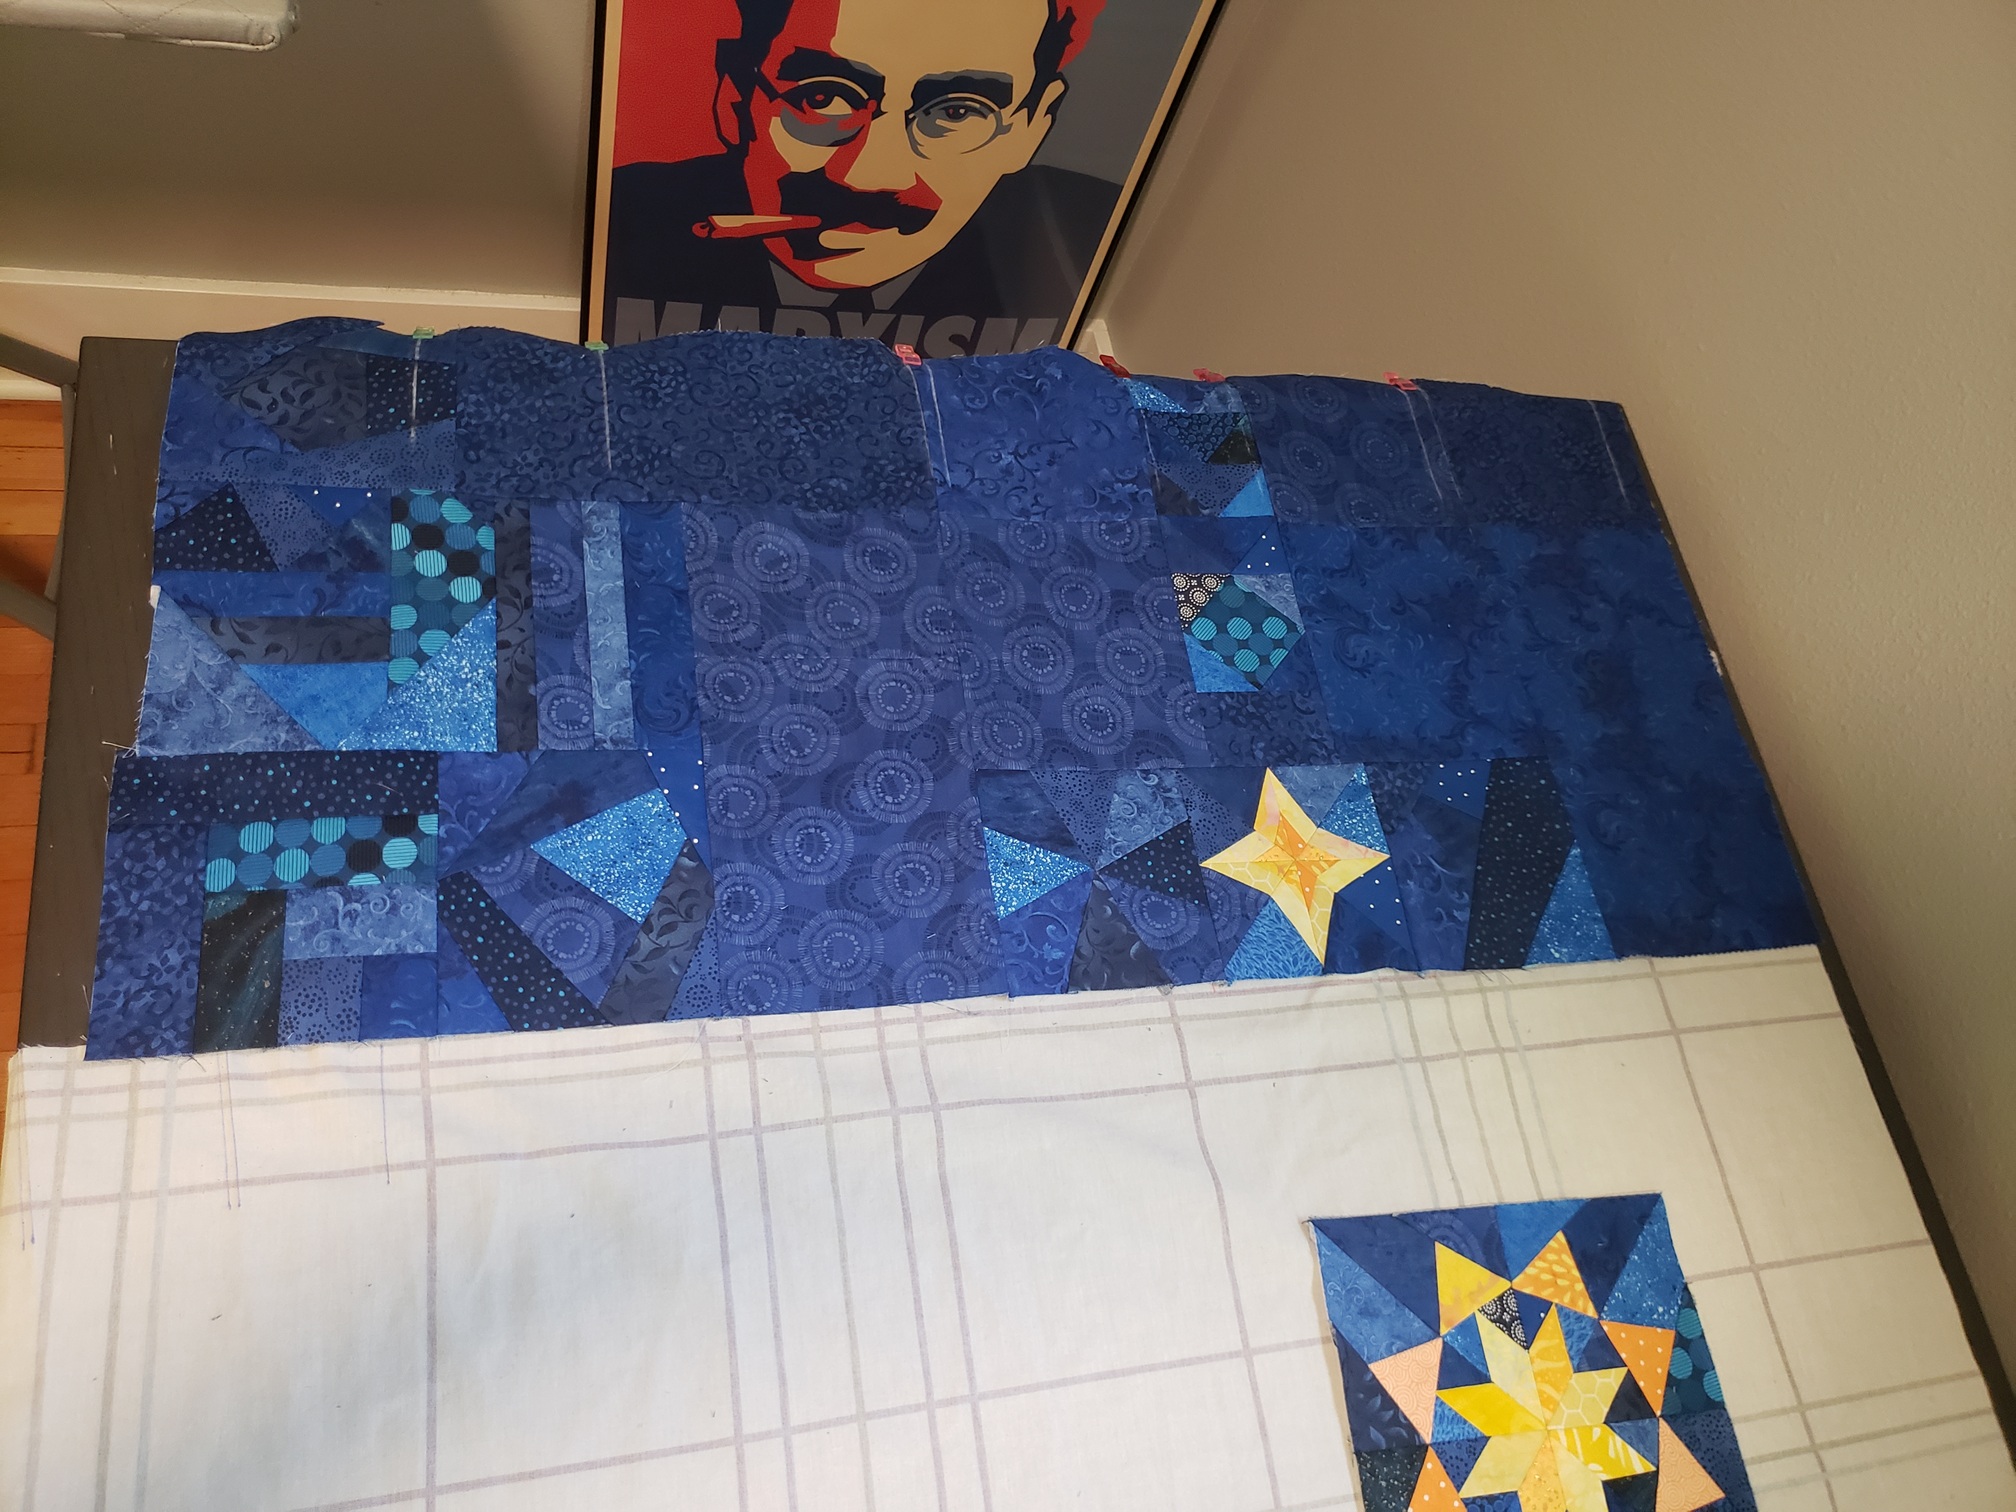

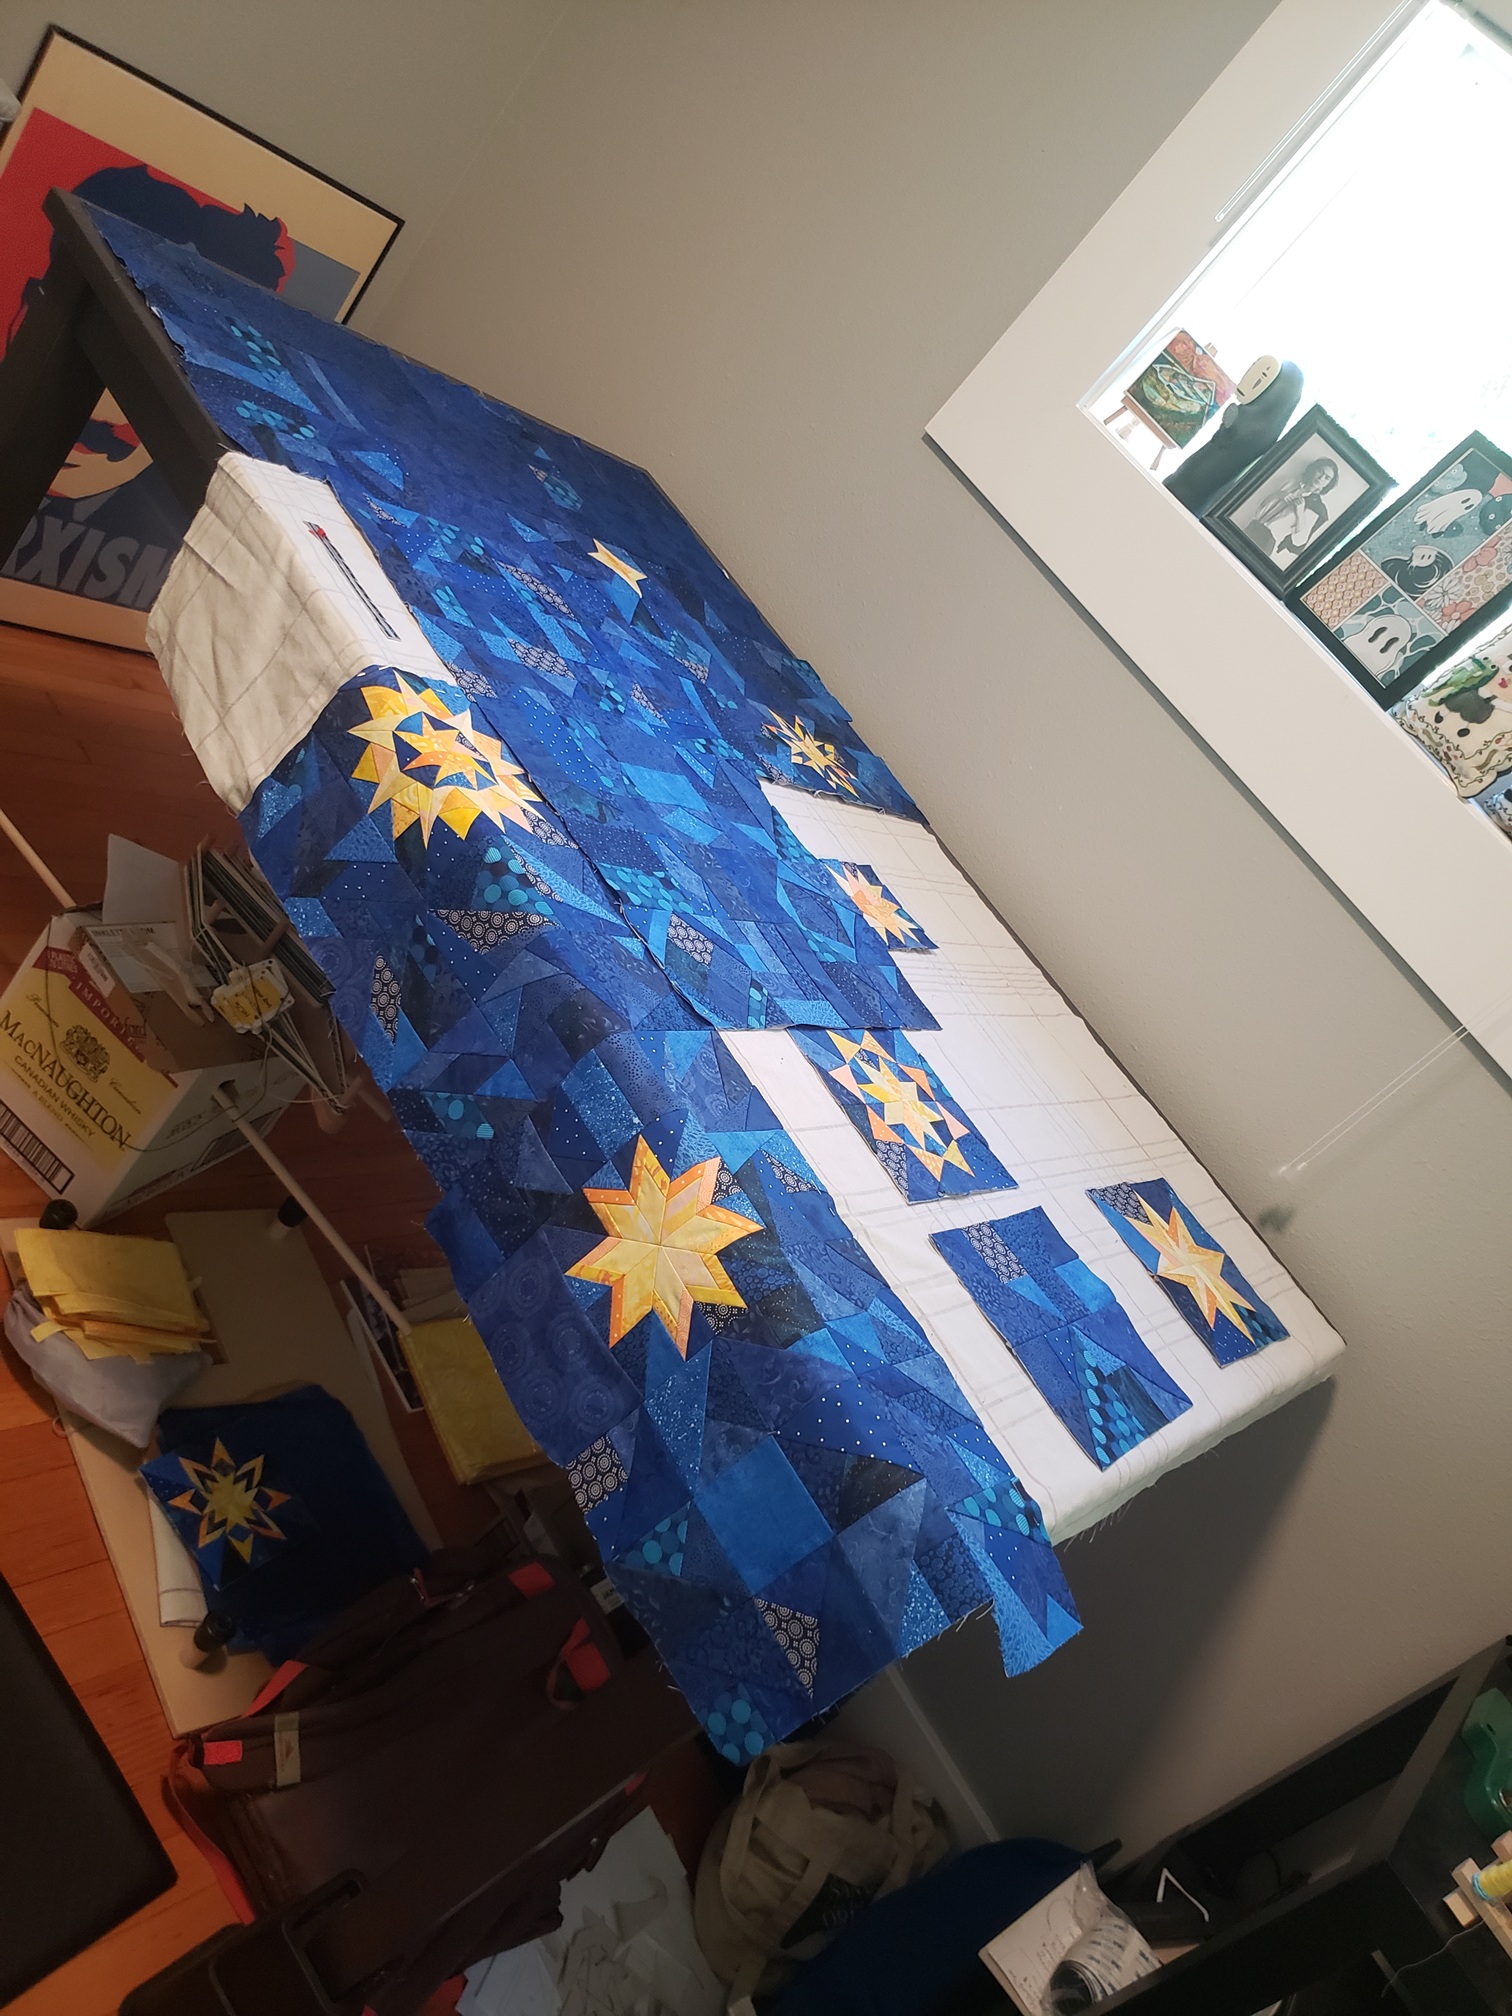
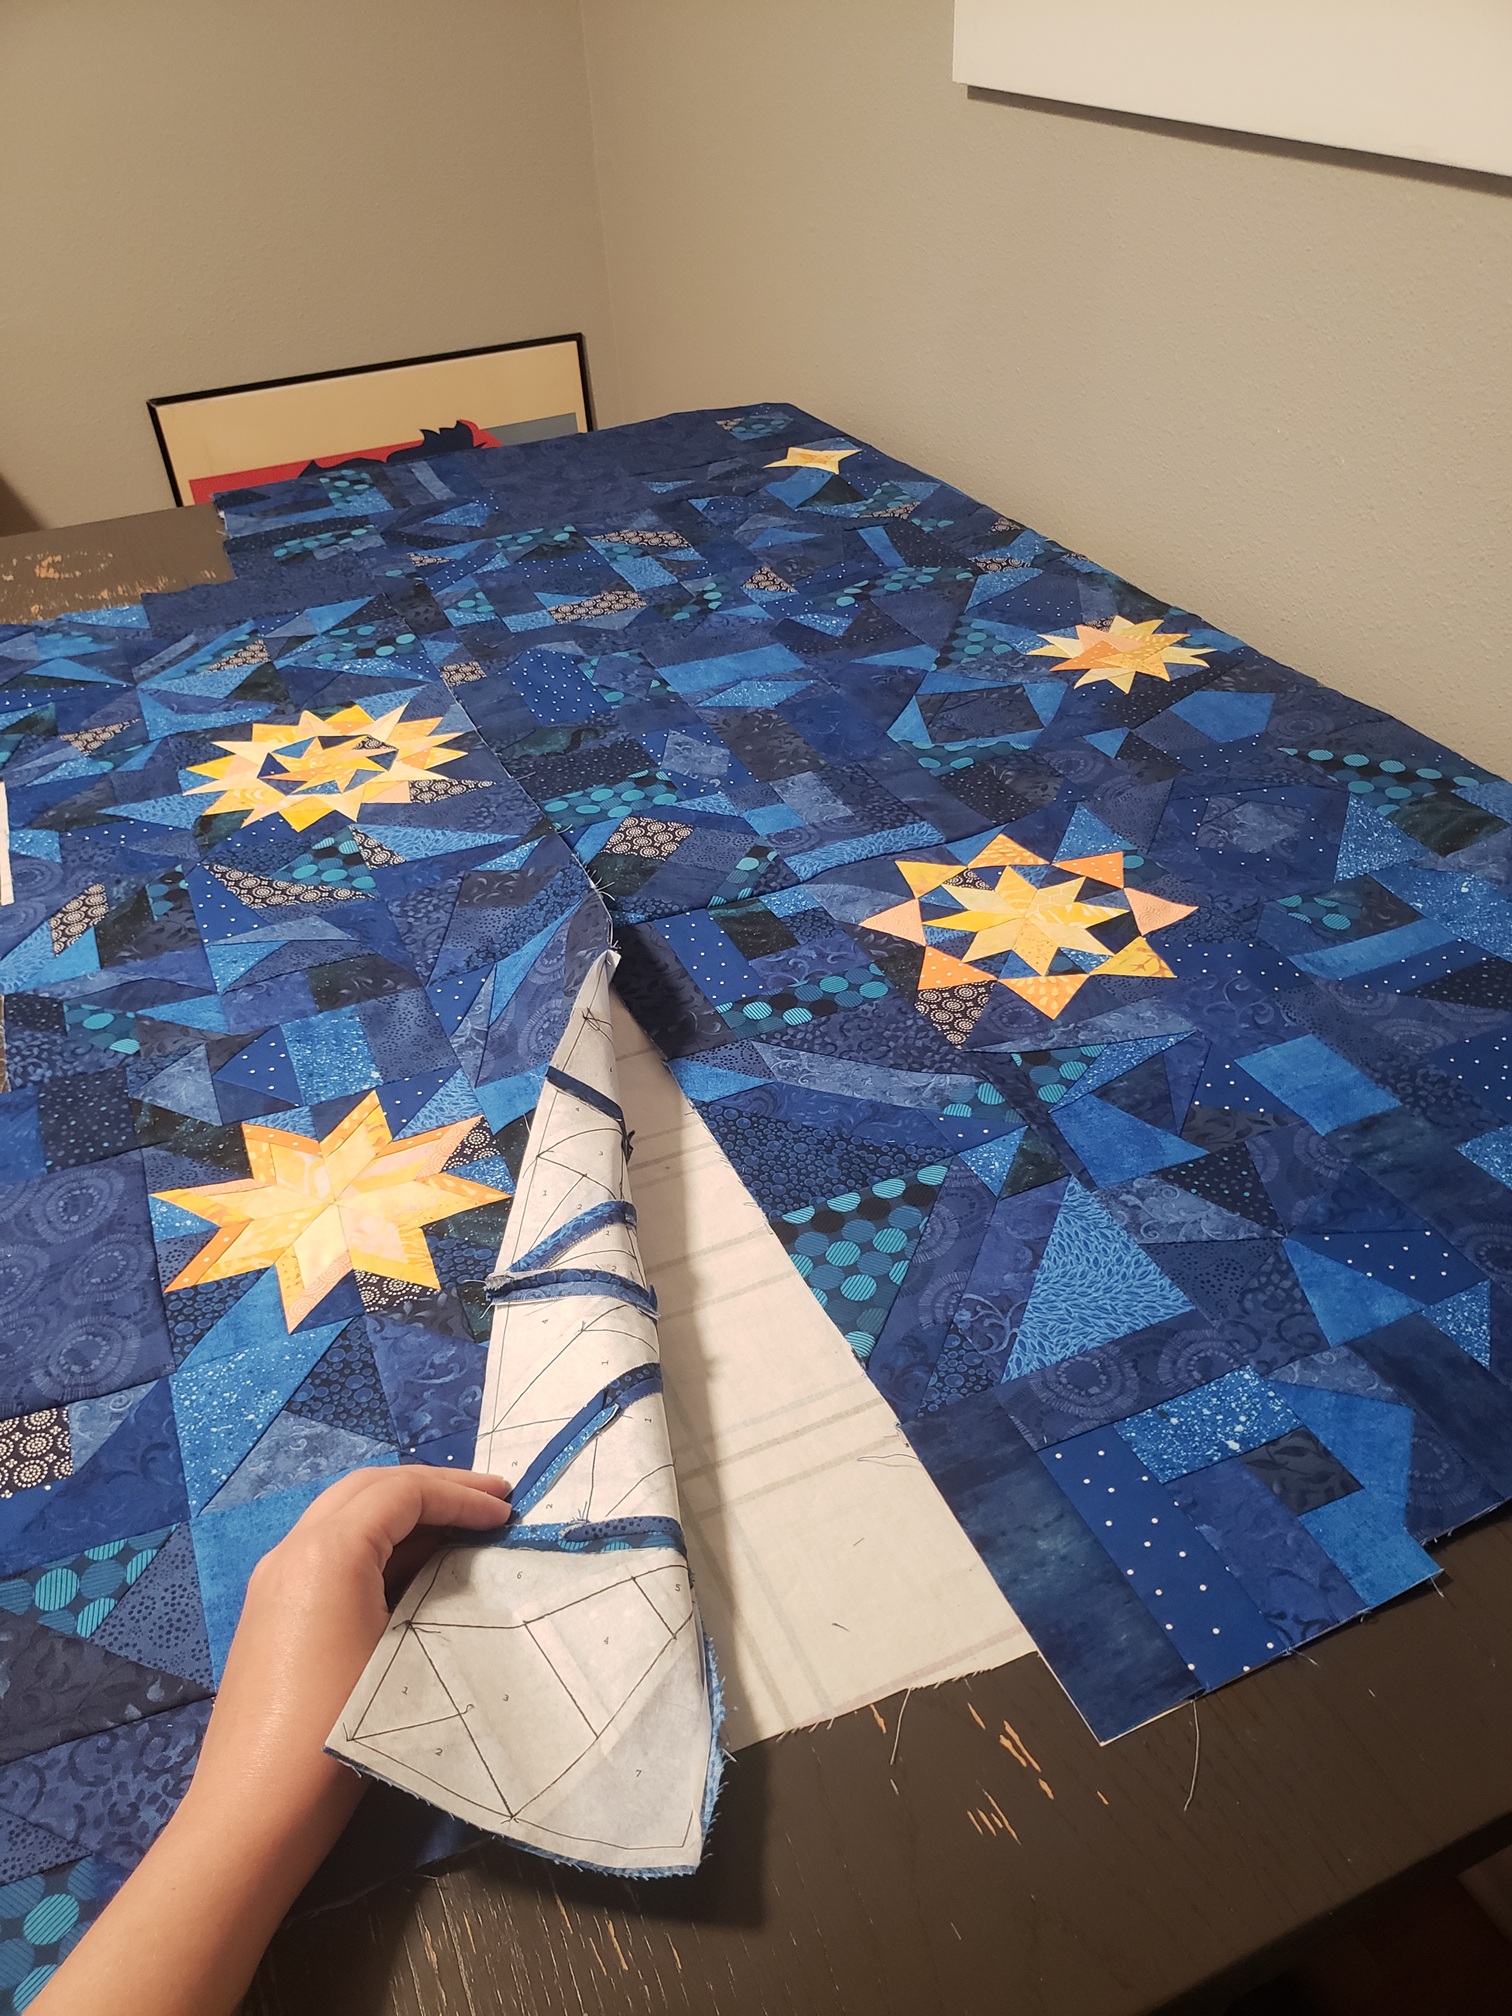
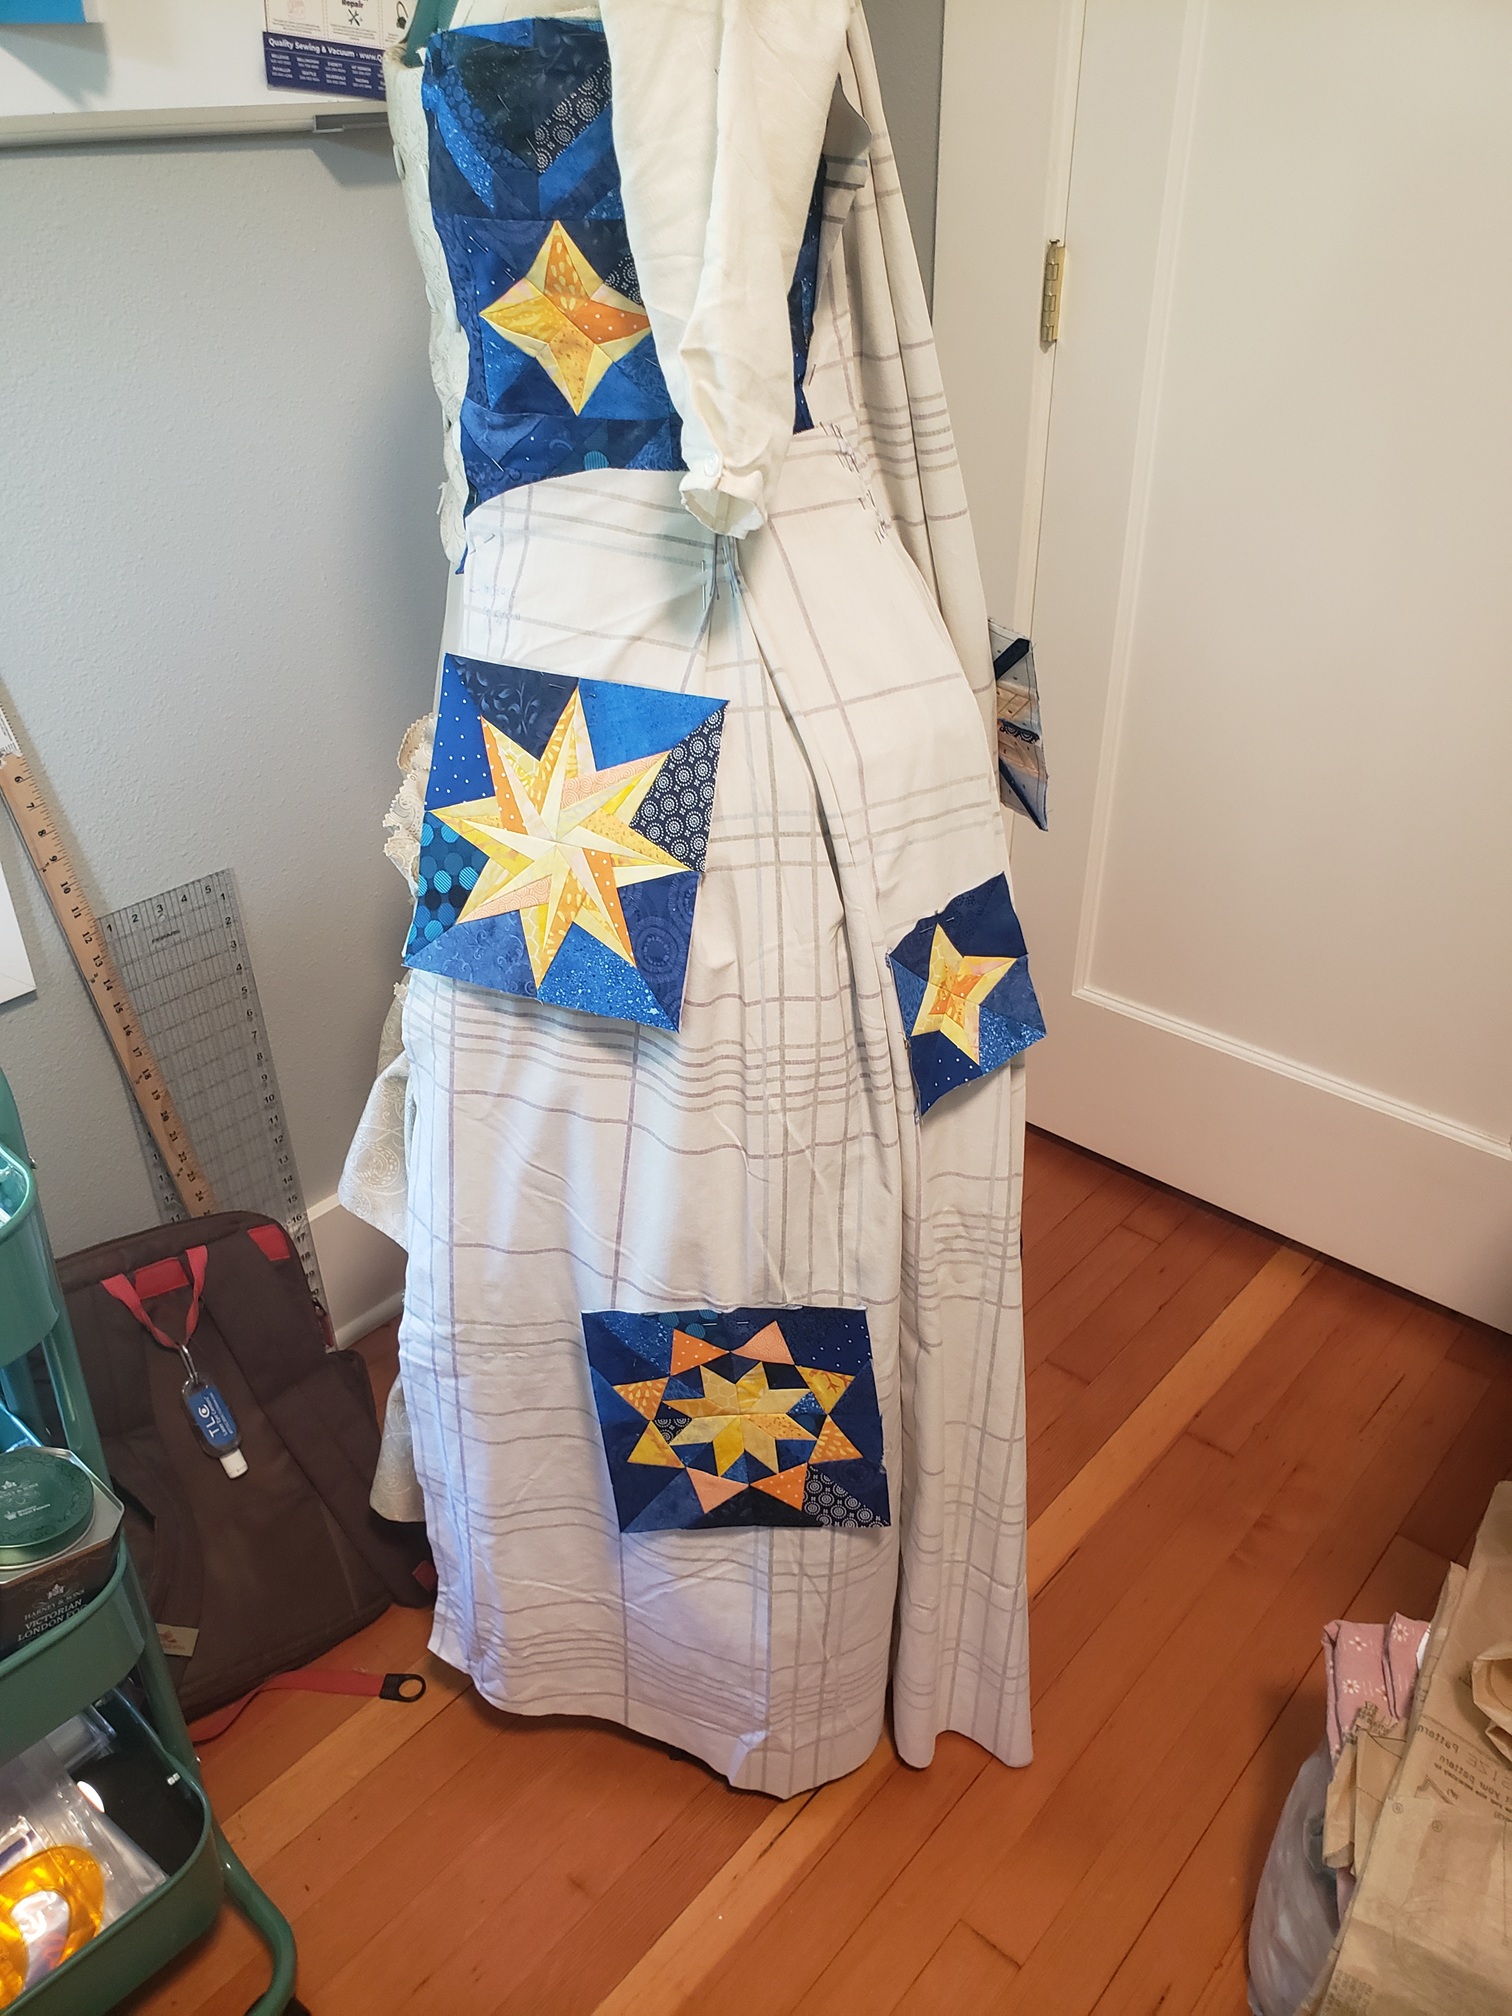
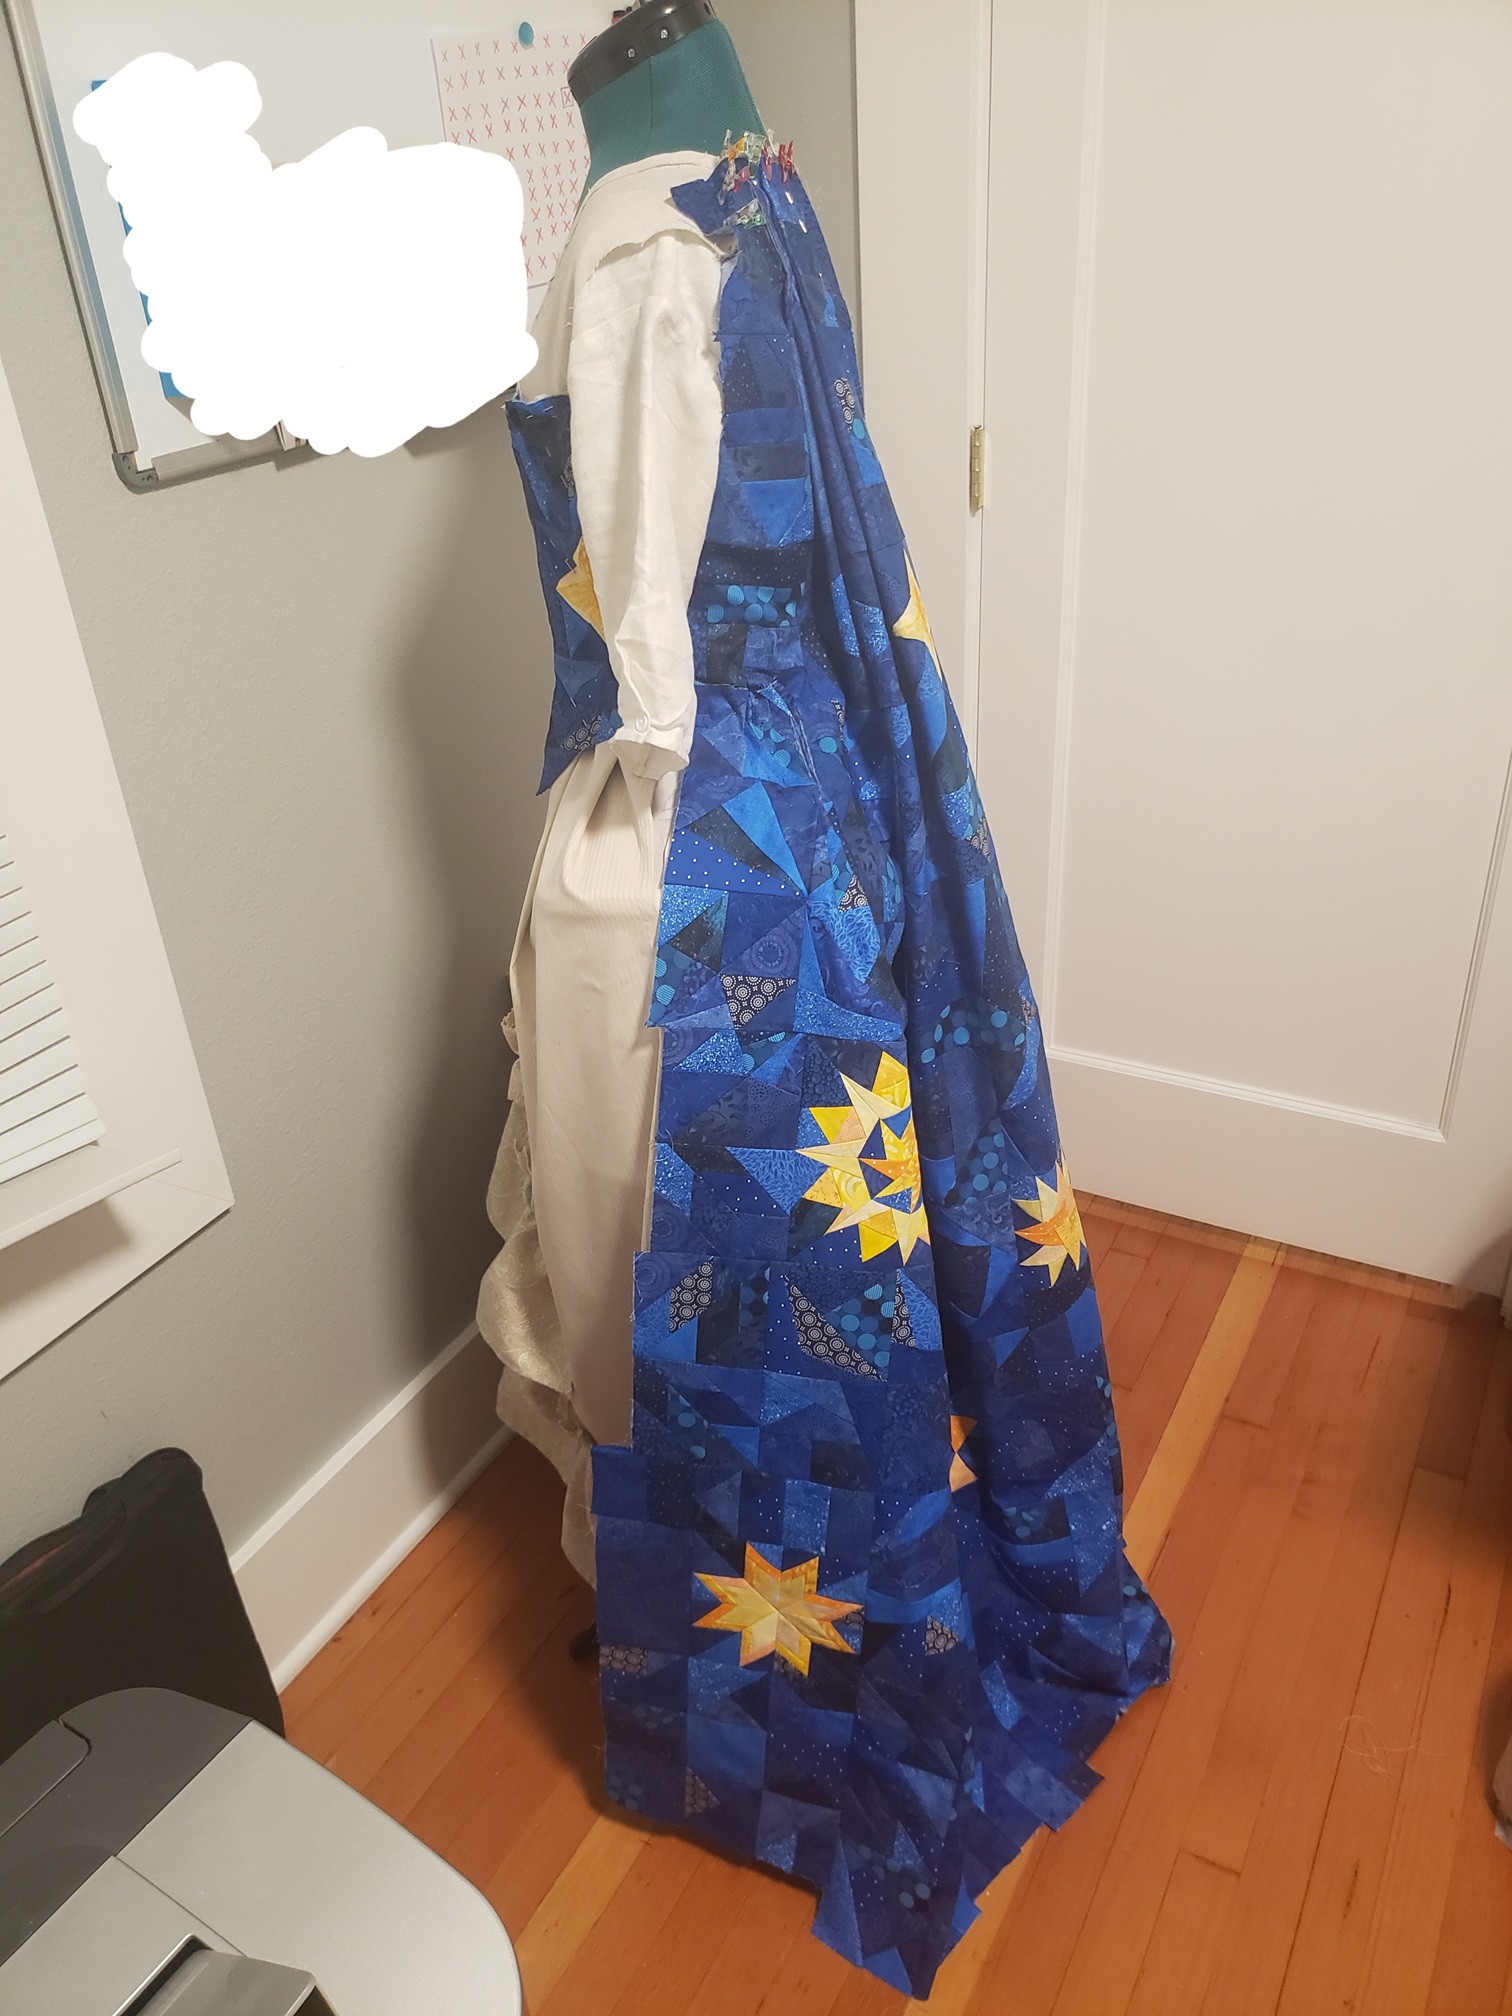
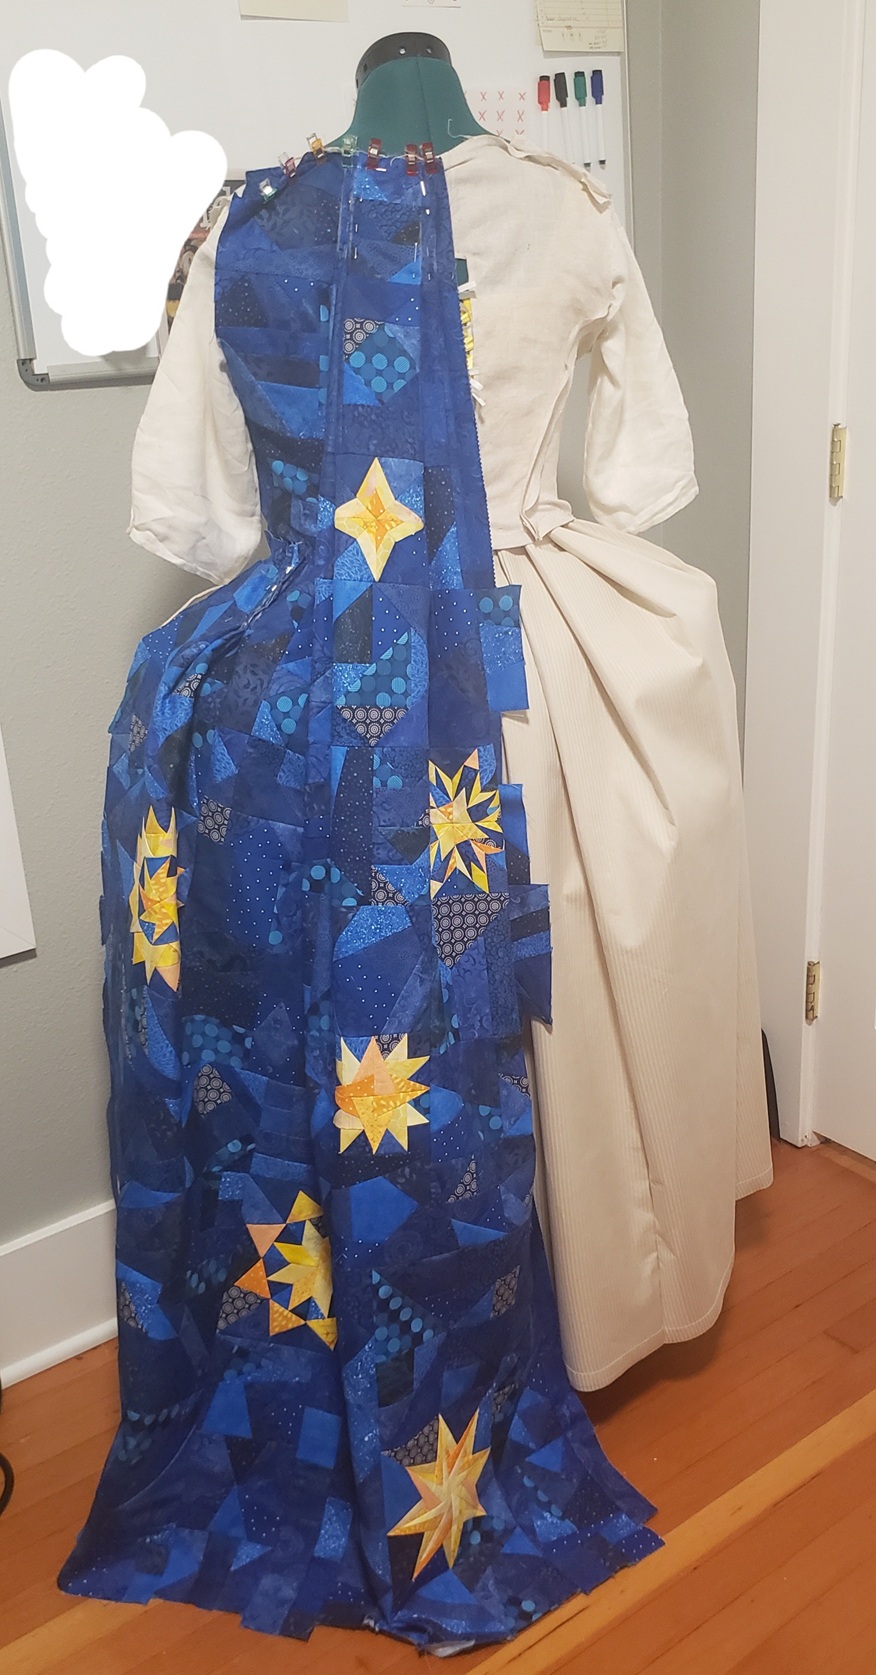
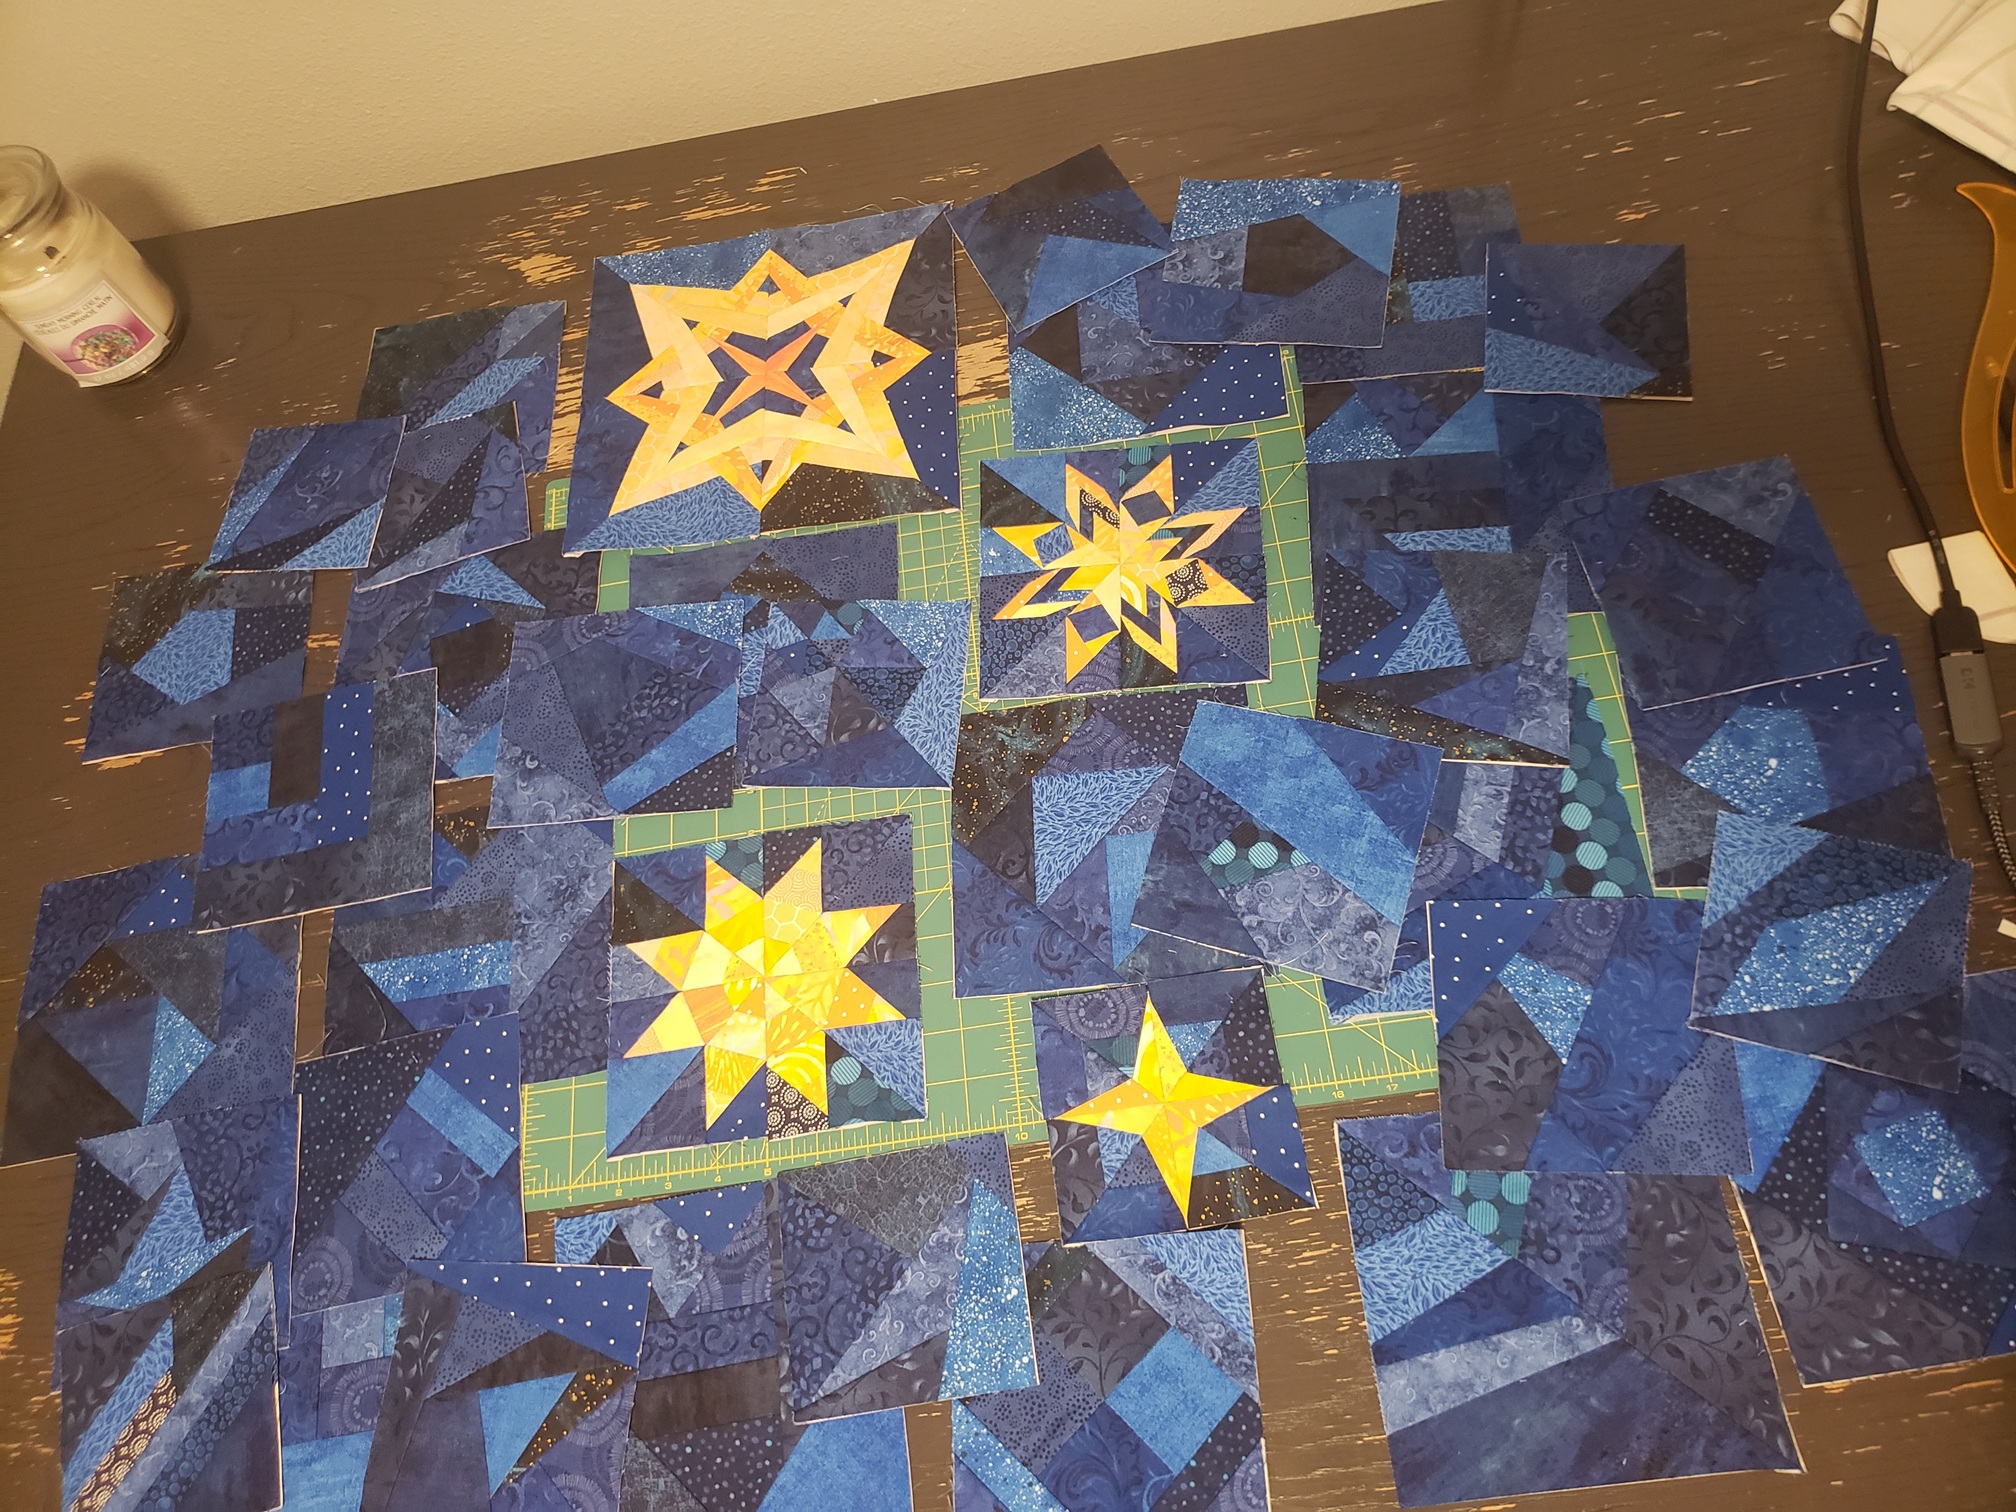
Even with all of that work, it wasn't enough. I still had the whole front panel of the dress to complete, but only 15 squares and one star left over. Even so, I had still managed to finish quite a large chunk. Here are pictures of the completed back pannel, both laid flat and pinned to the mannequin:
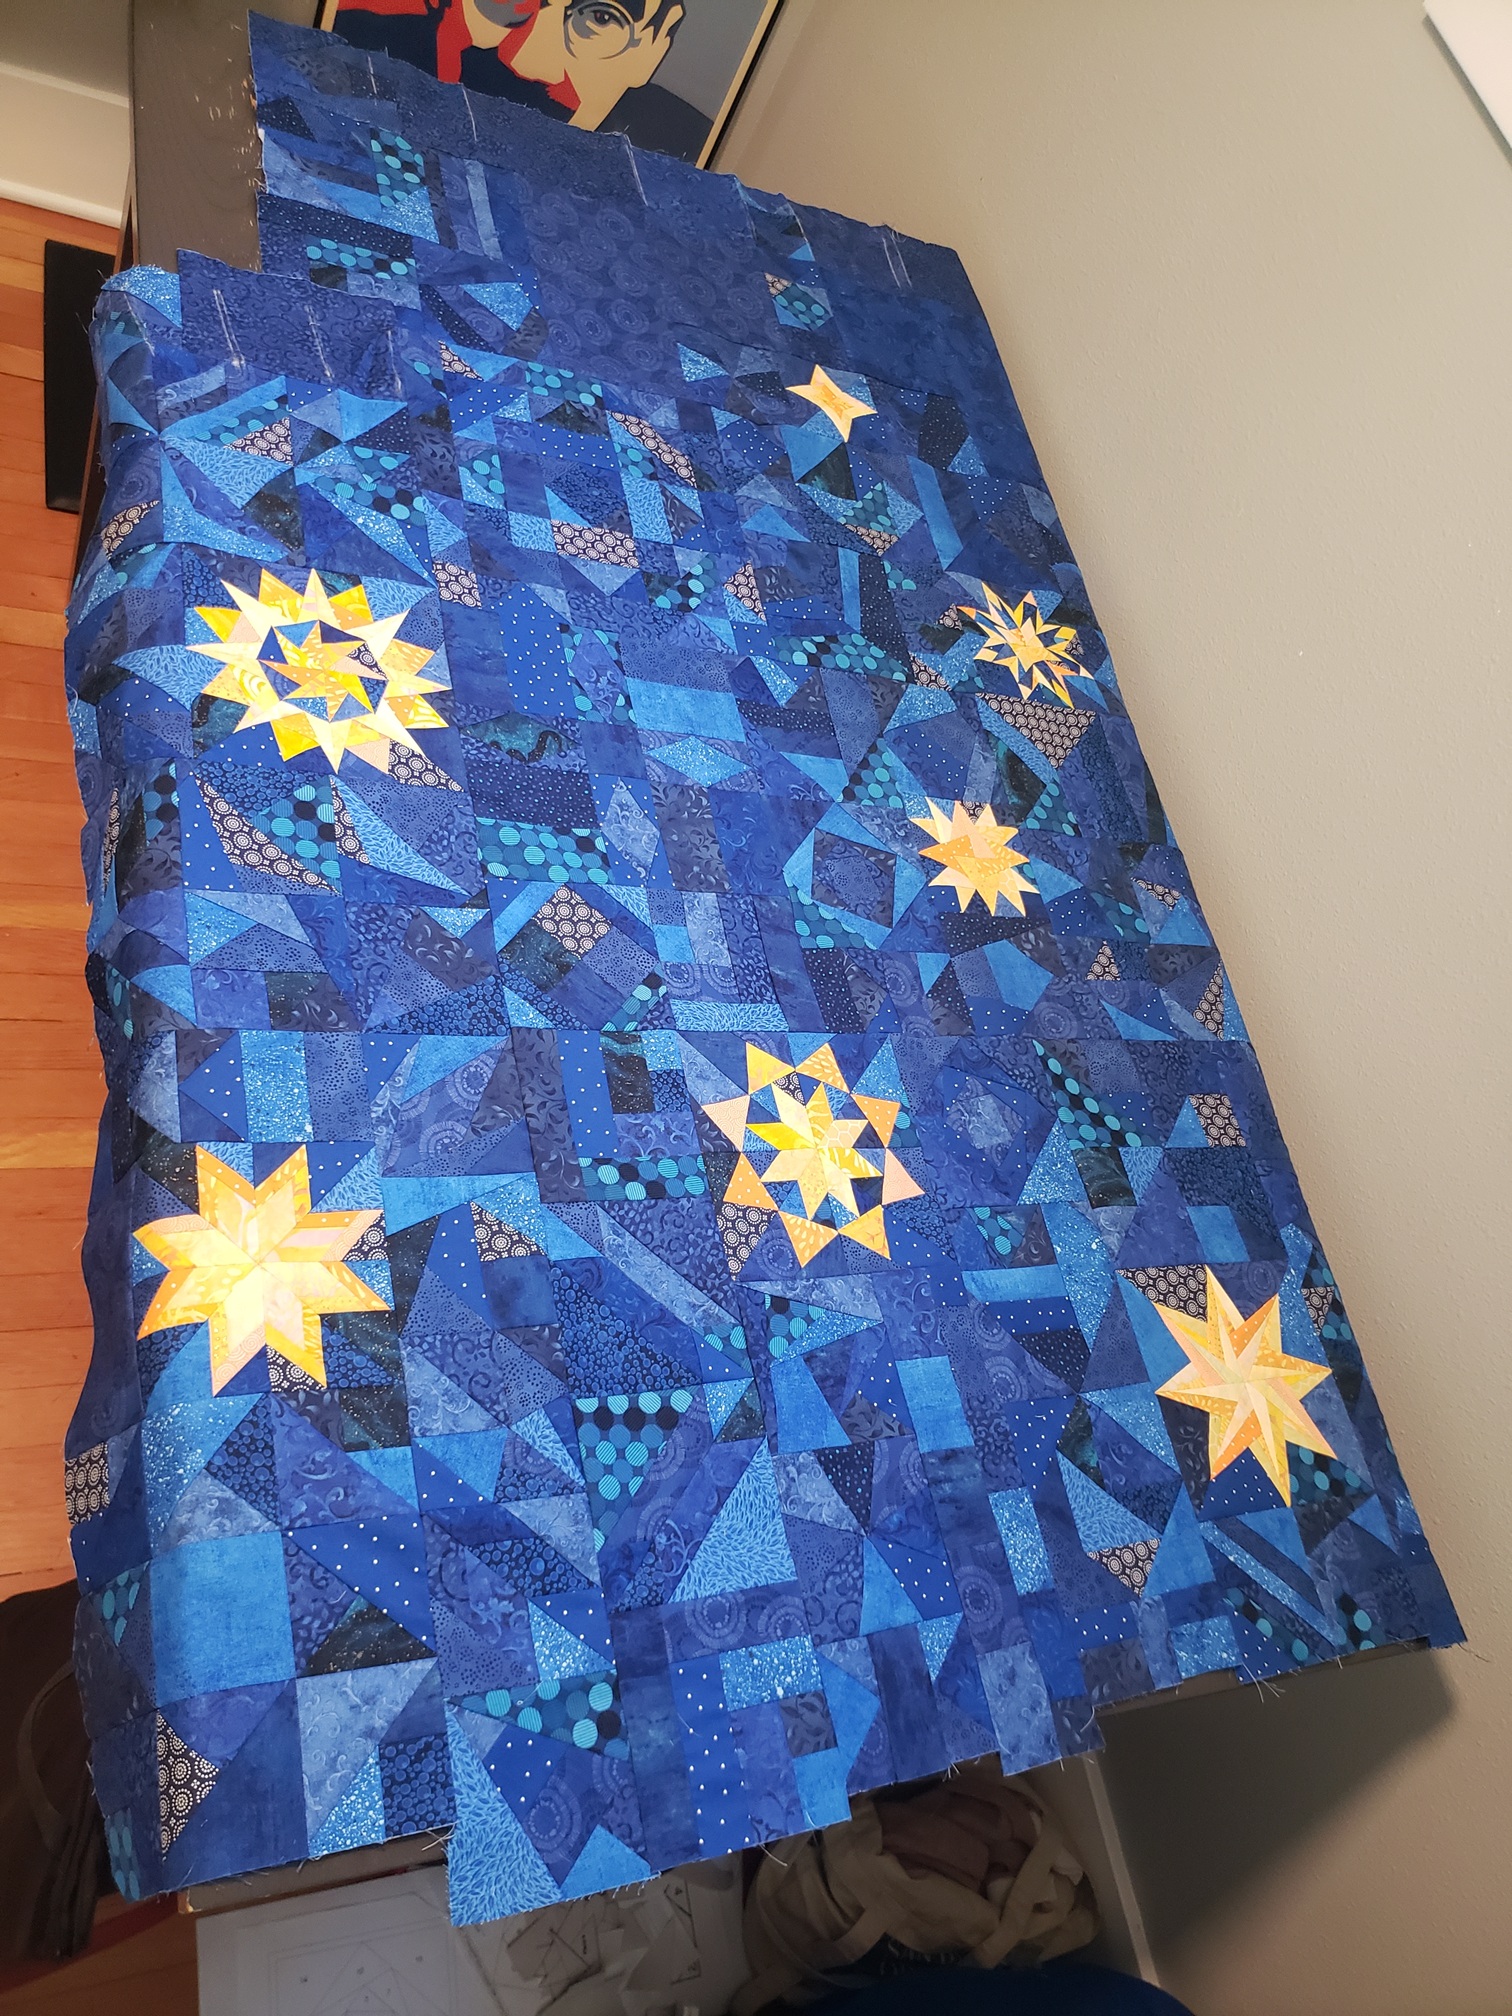
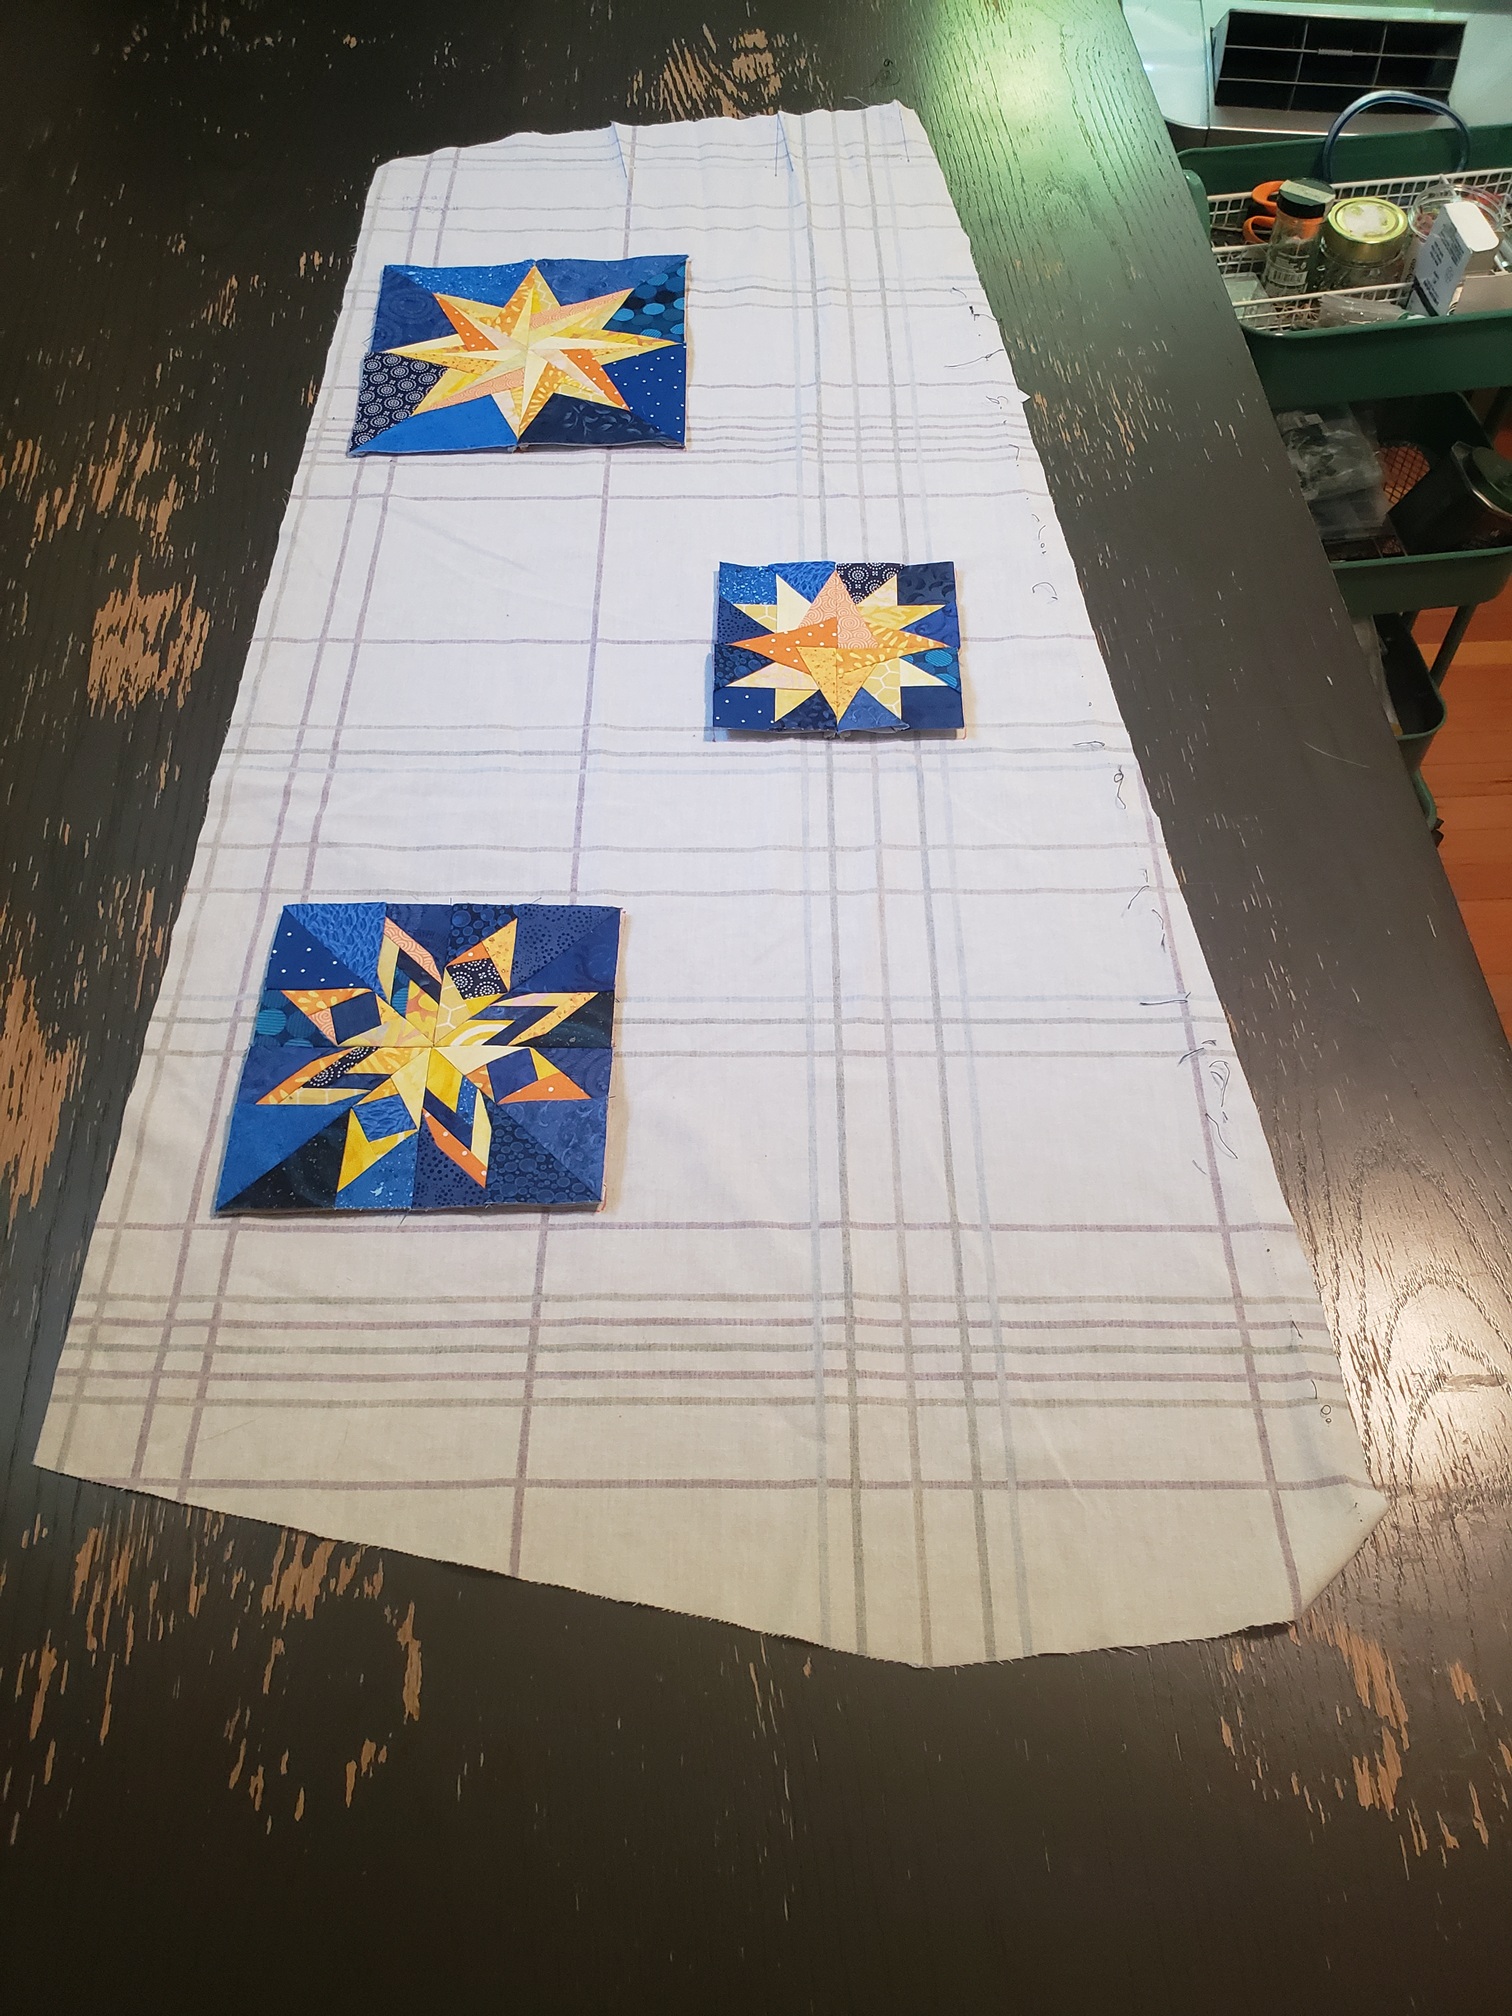
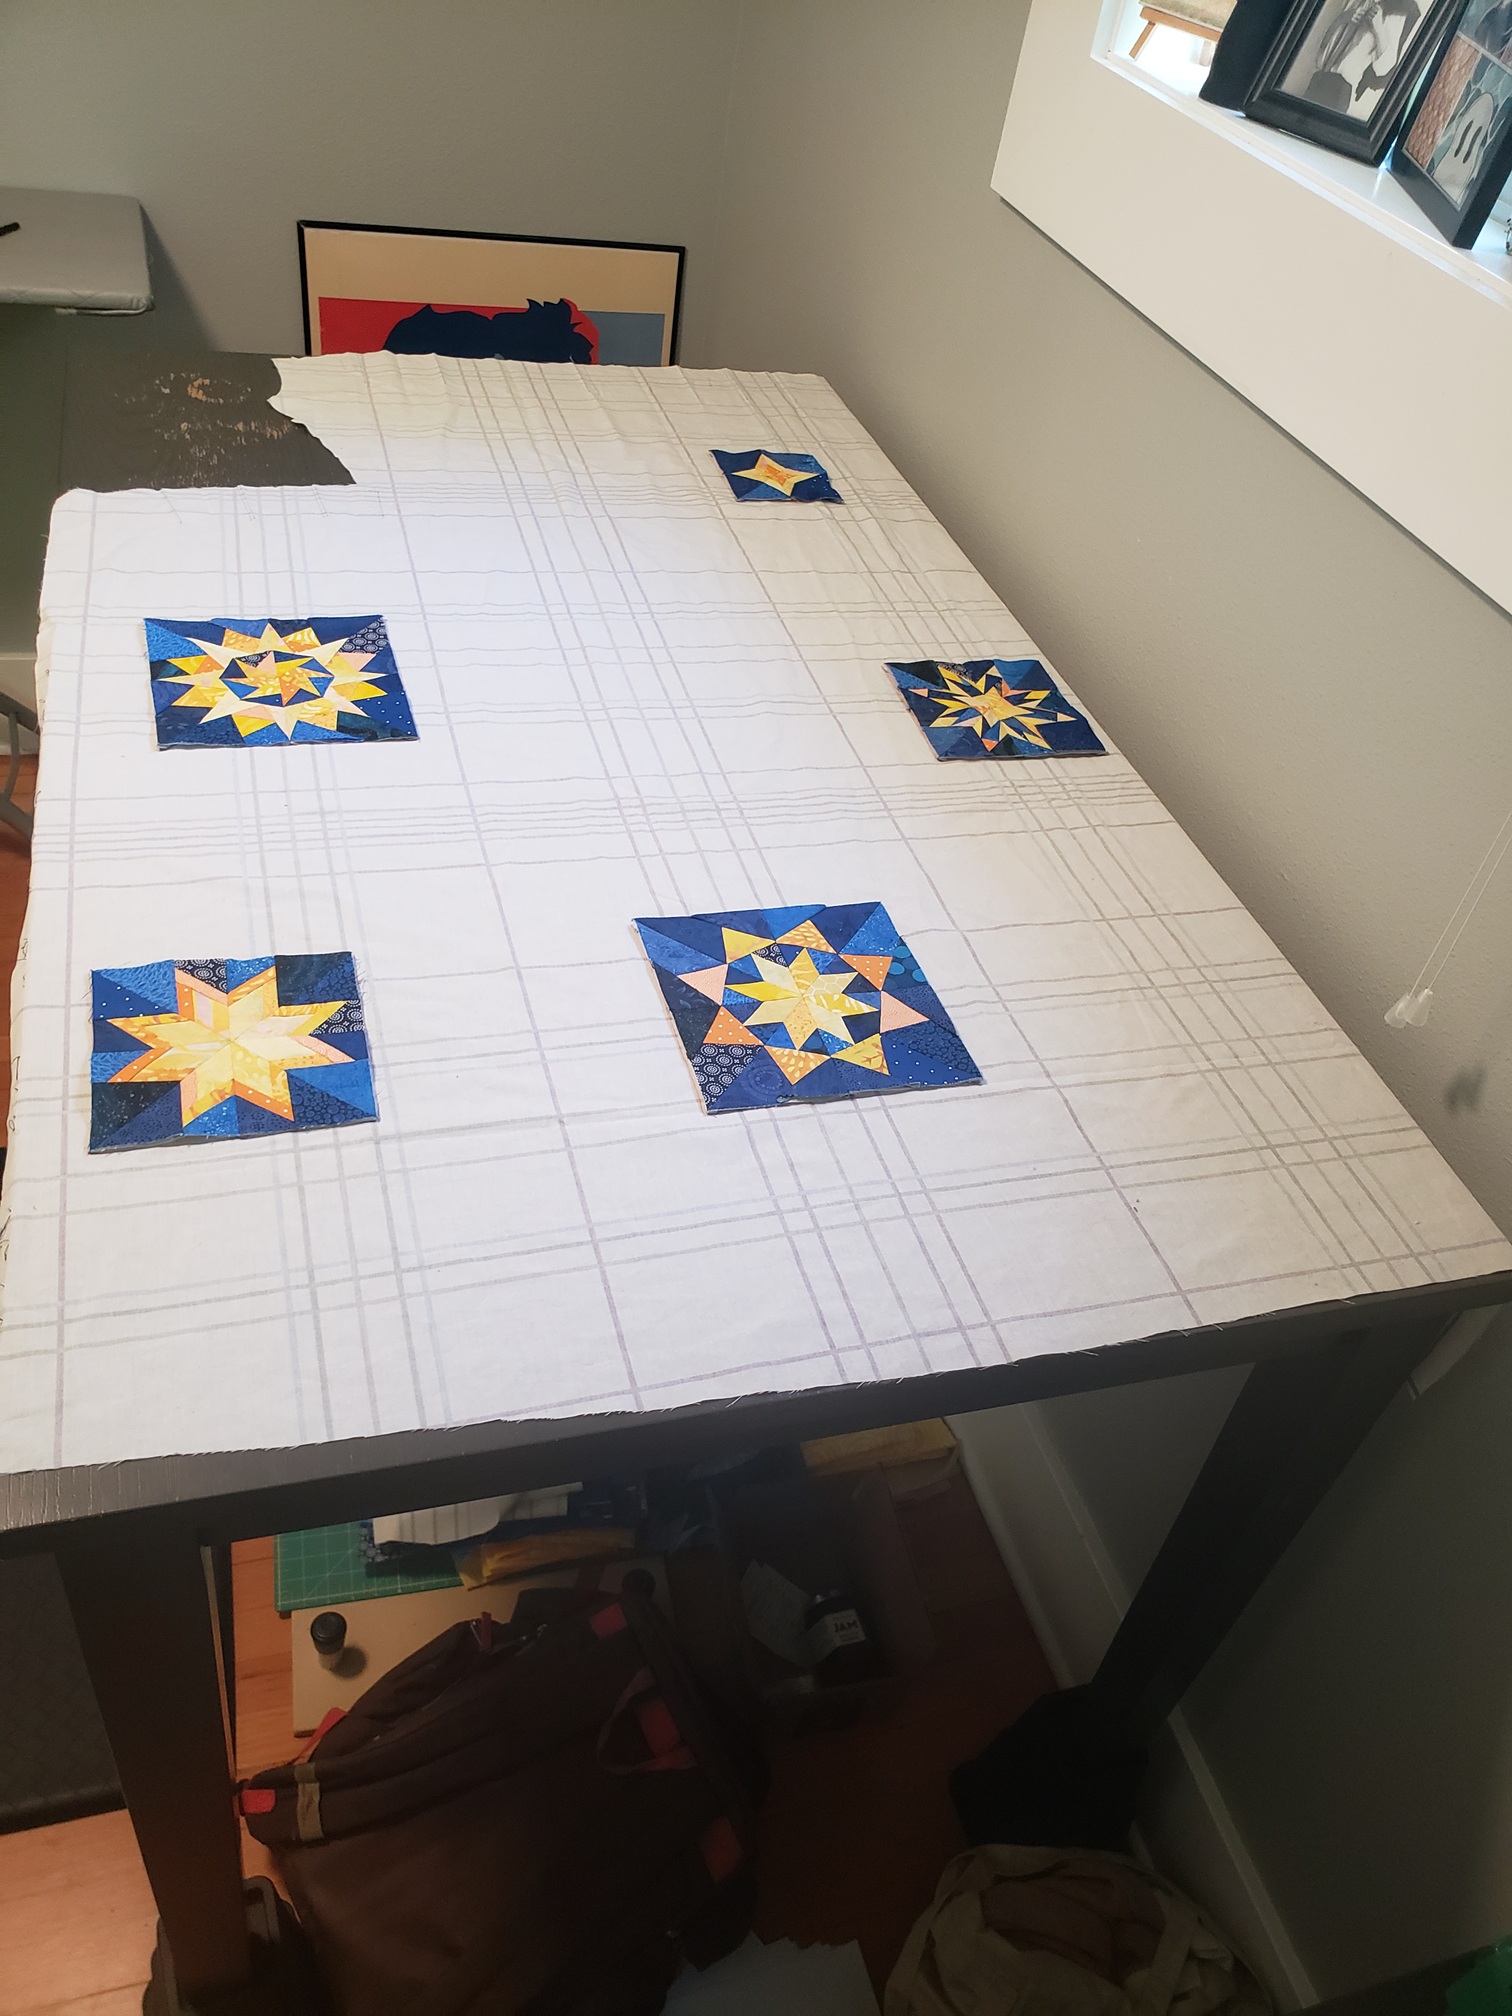
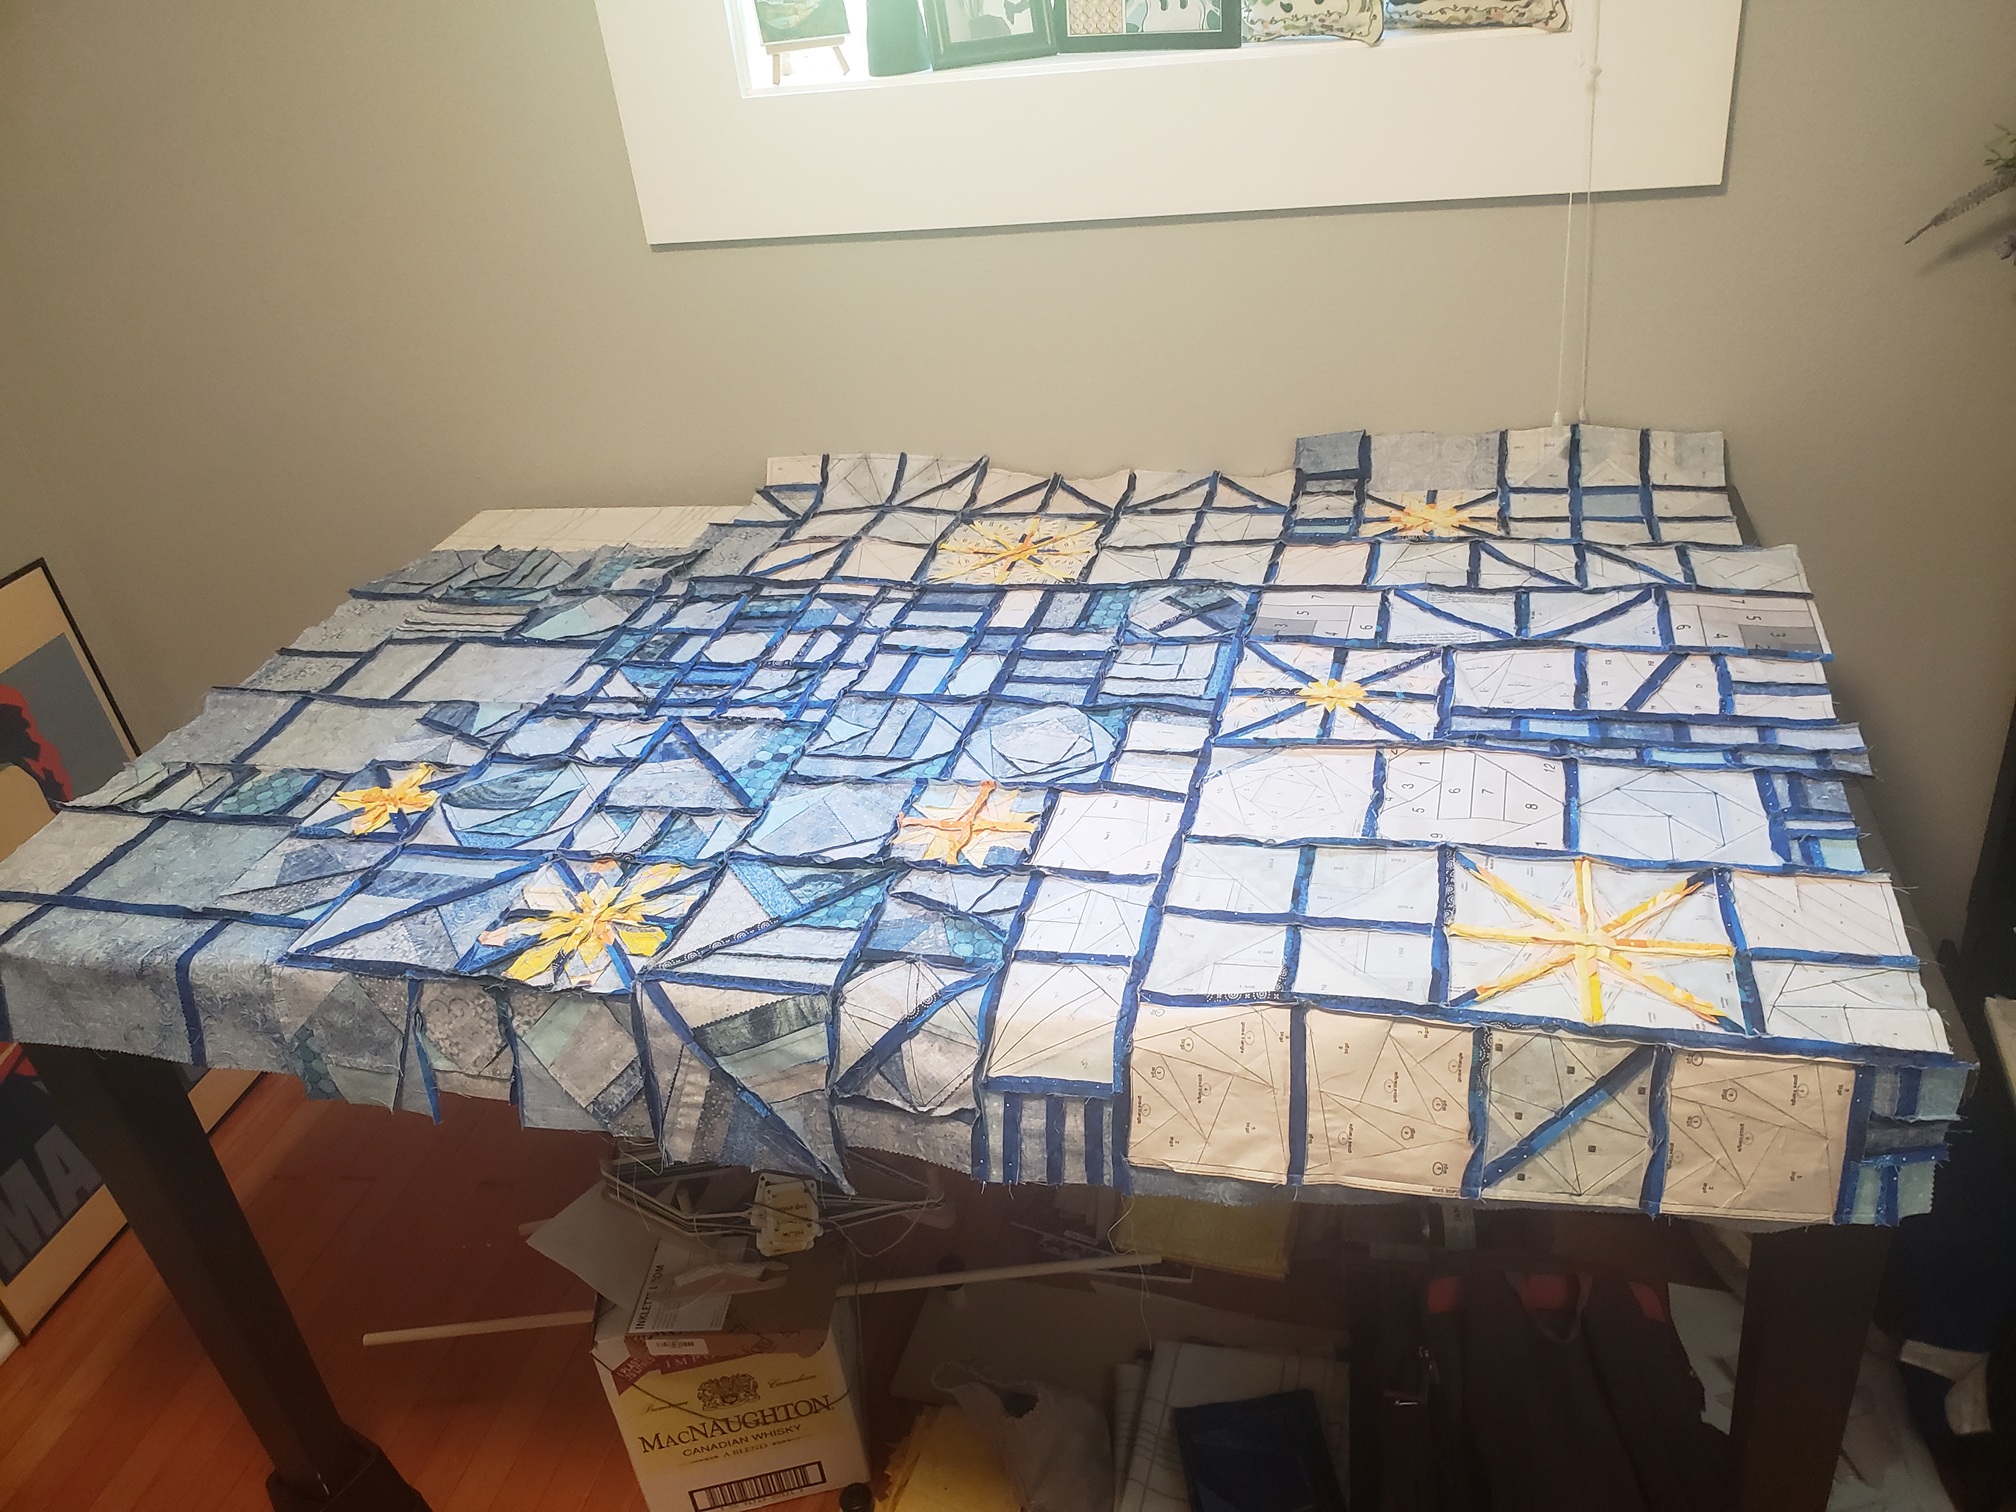
I set a new goal to create 35 new squares, and started working toward that, but had to put this project aside to work on other things. As of this post, this is where I've left off:
Looking Ahead
I was originally going to put batting and a backing on the dress below the waistline but I'm starting to question that, because I do want the classic quilted look, but it would also make it really heavy...and possibly droopy looking? I think I'll try to somehow temporarily attach the batting to the back along with the backing fabric to see how it alters the silhouette. I am open to advice if anyone has some.
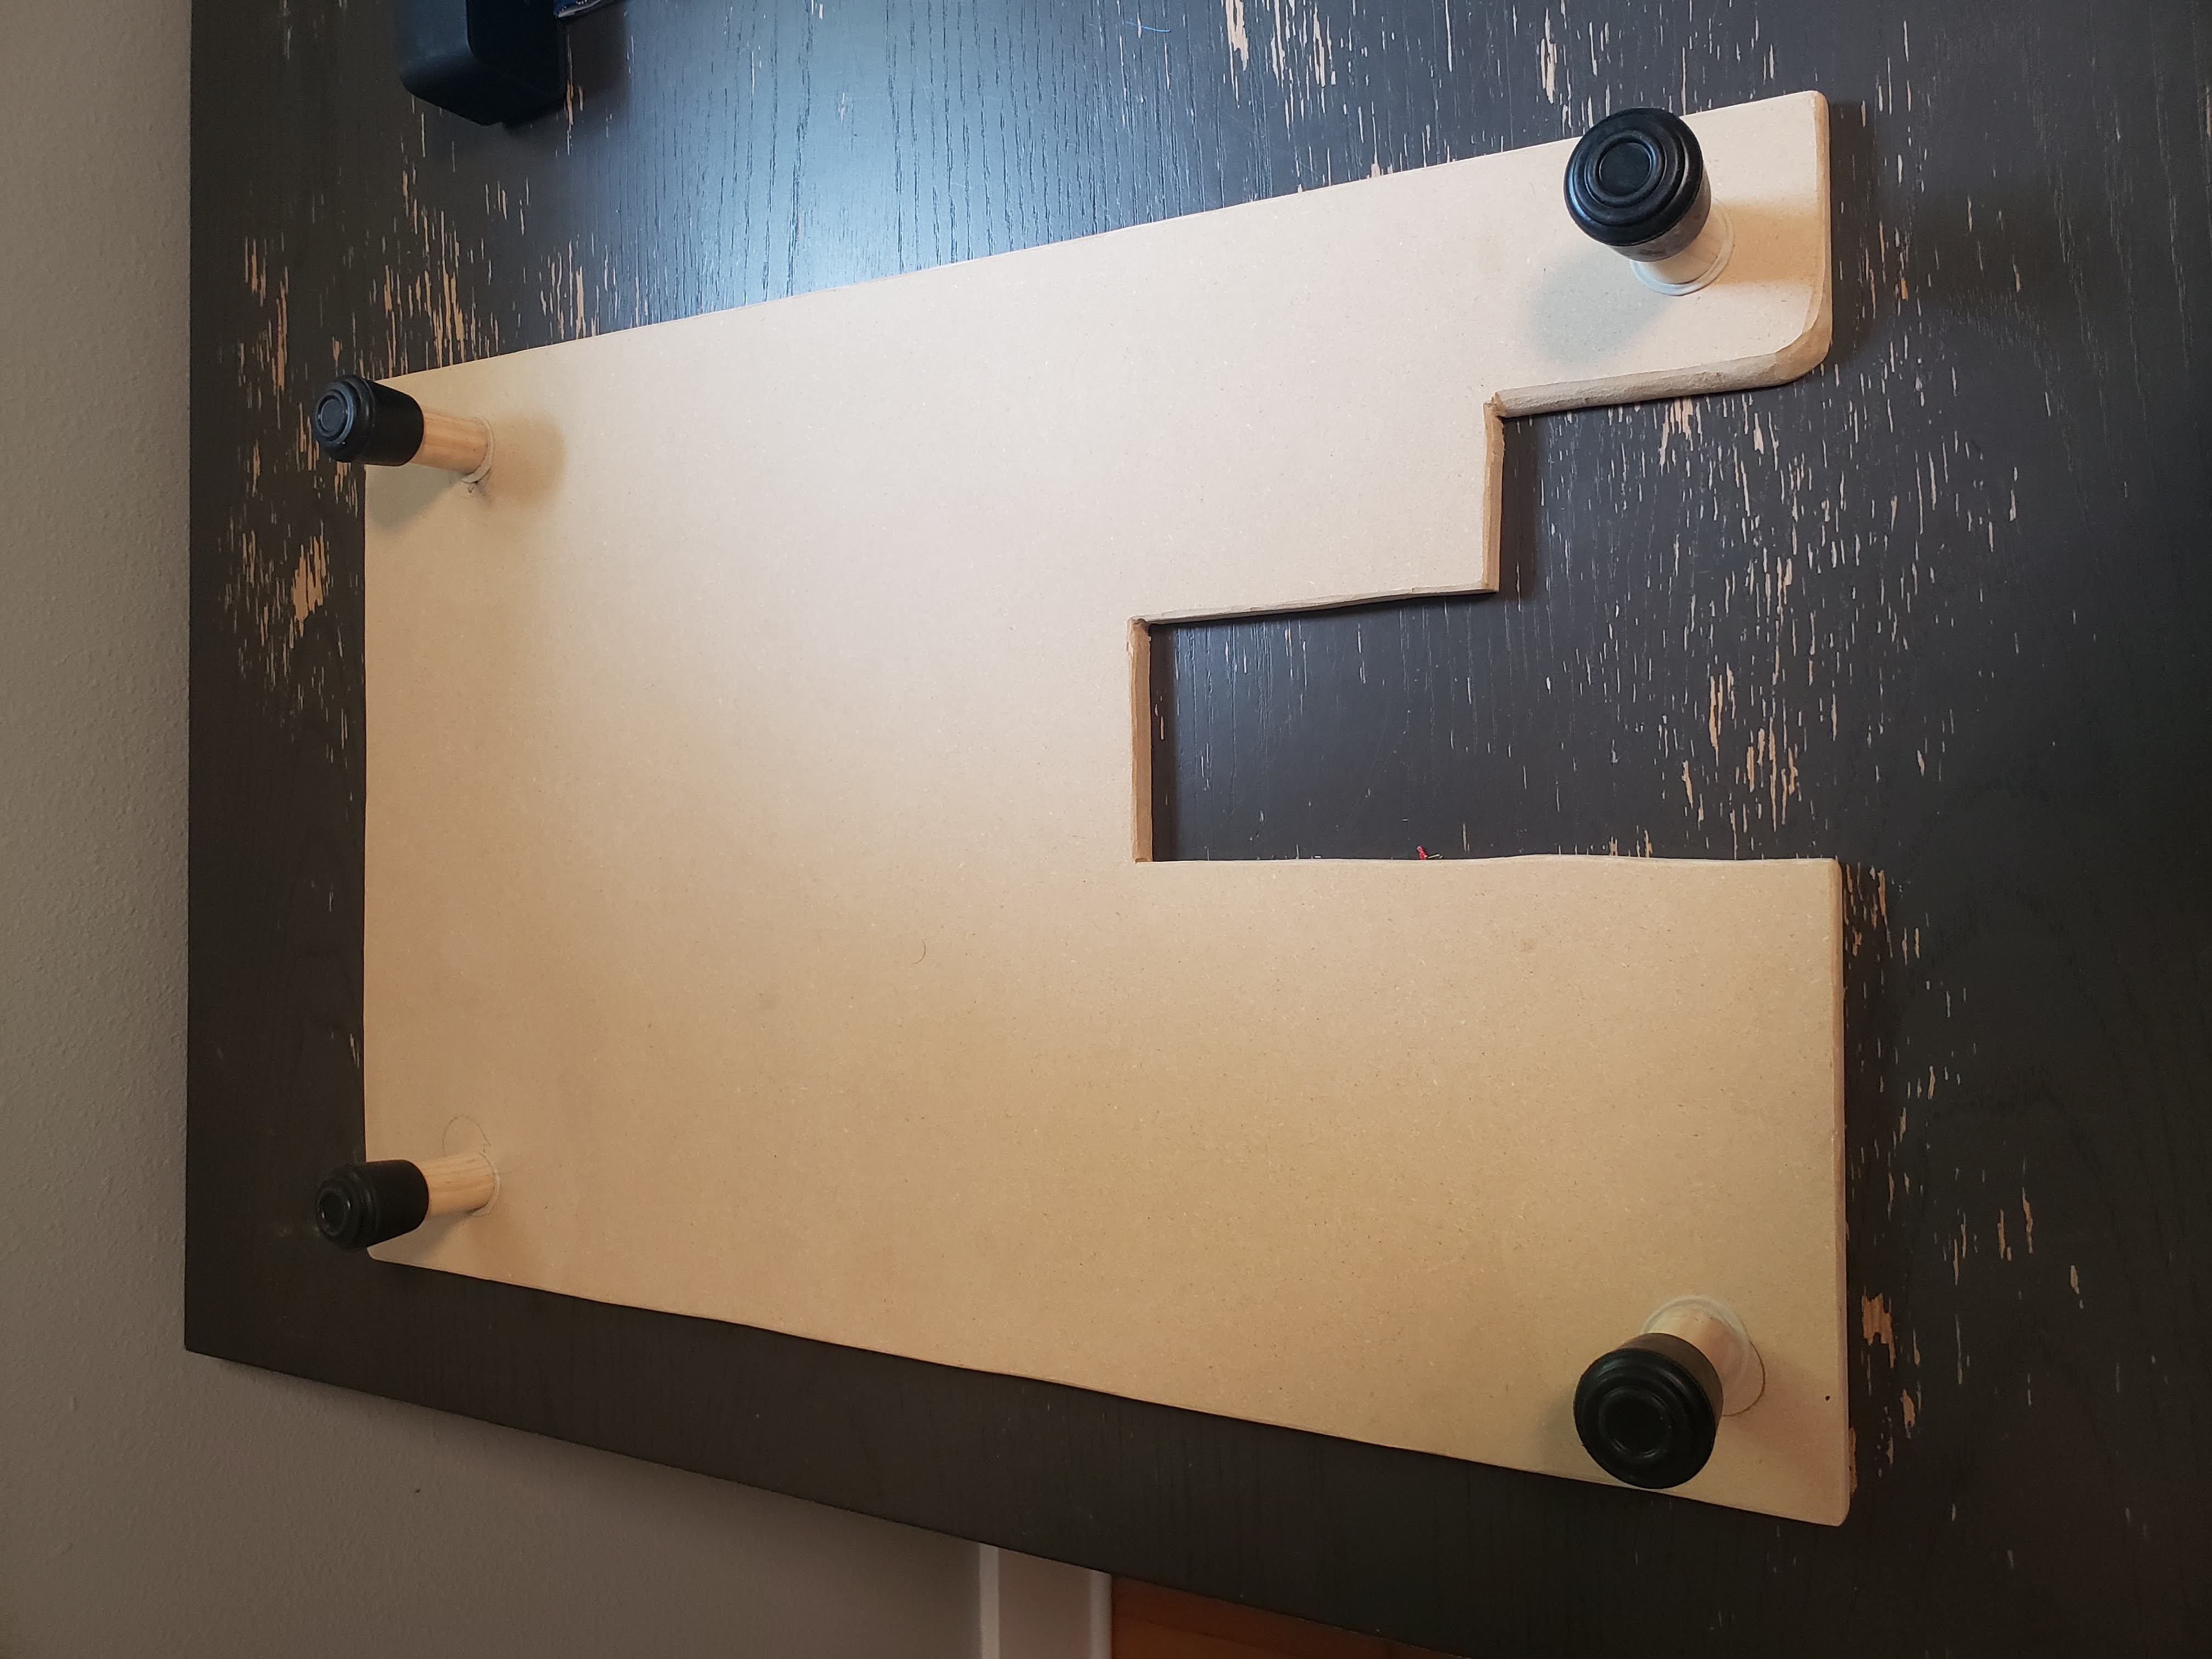
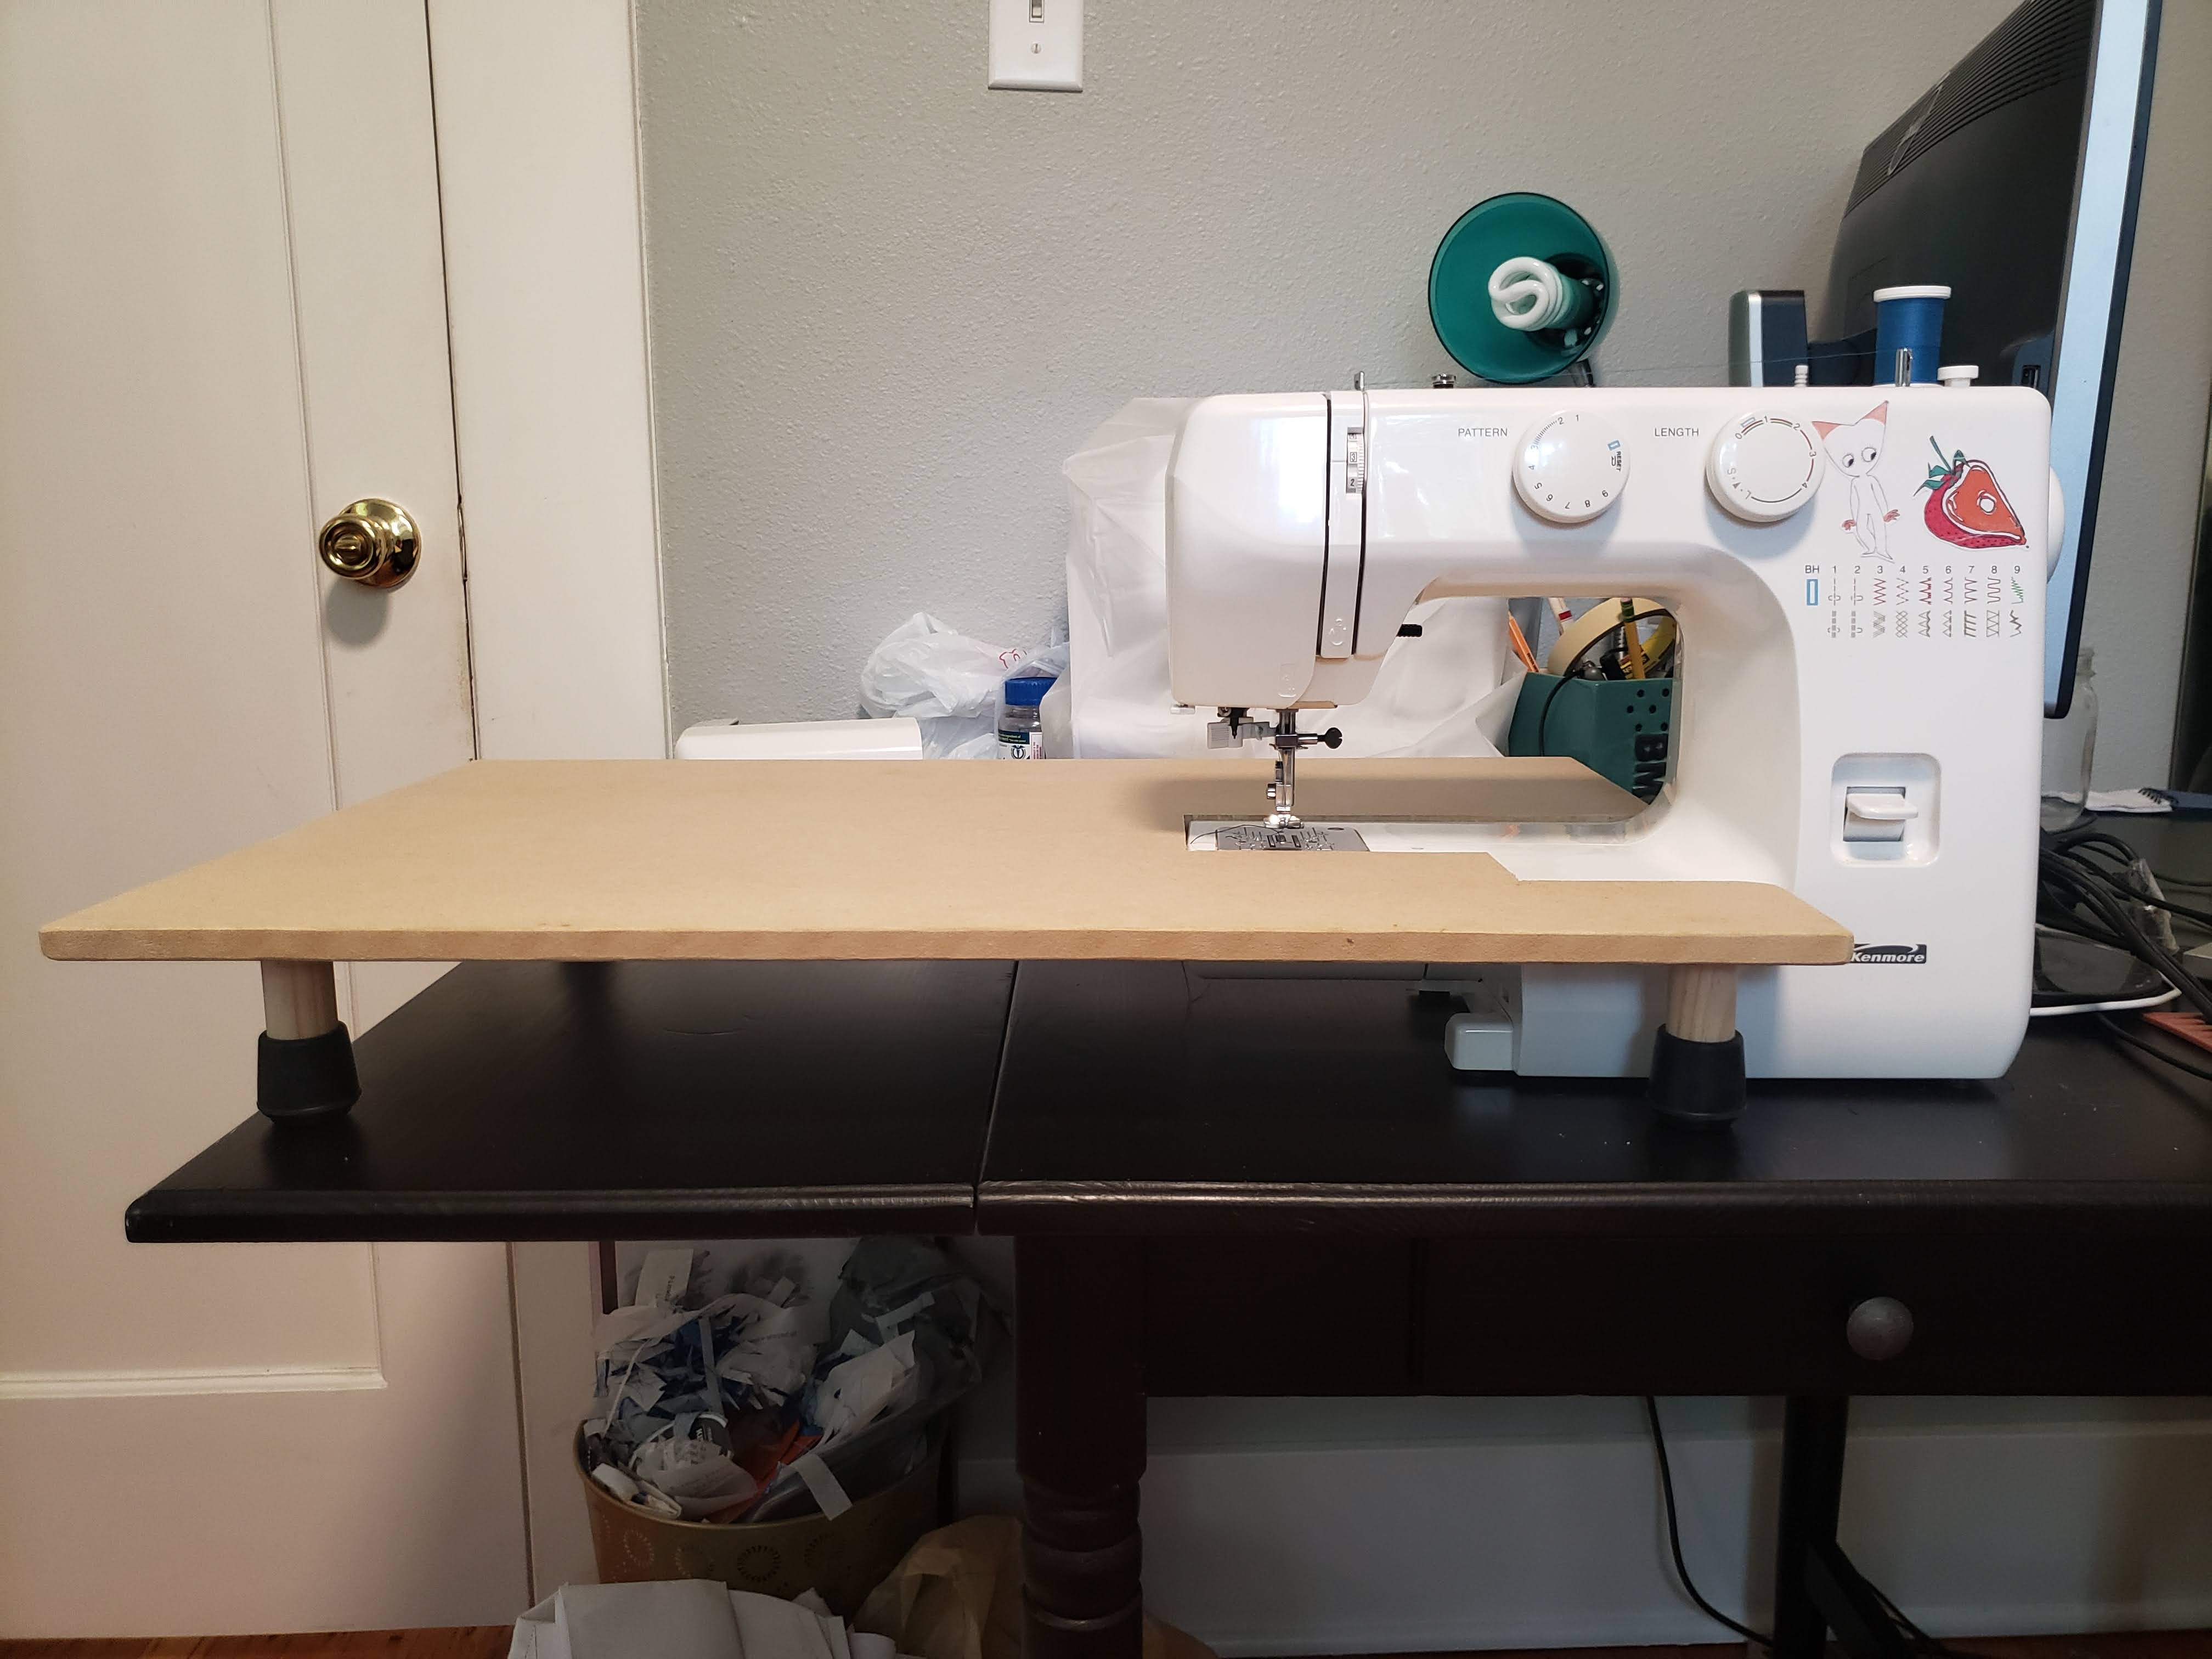
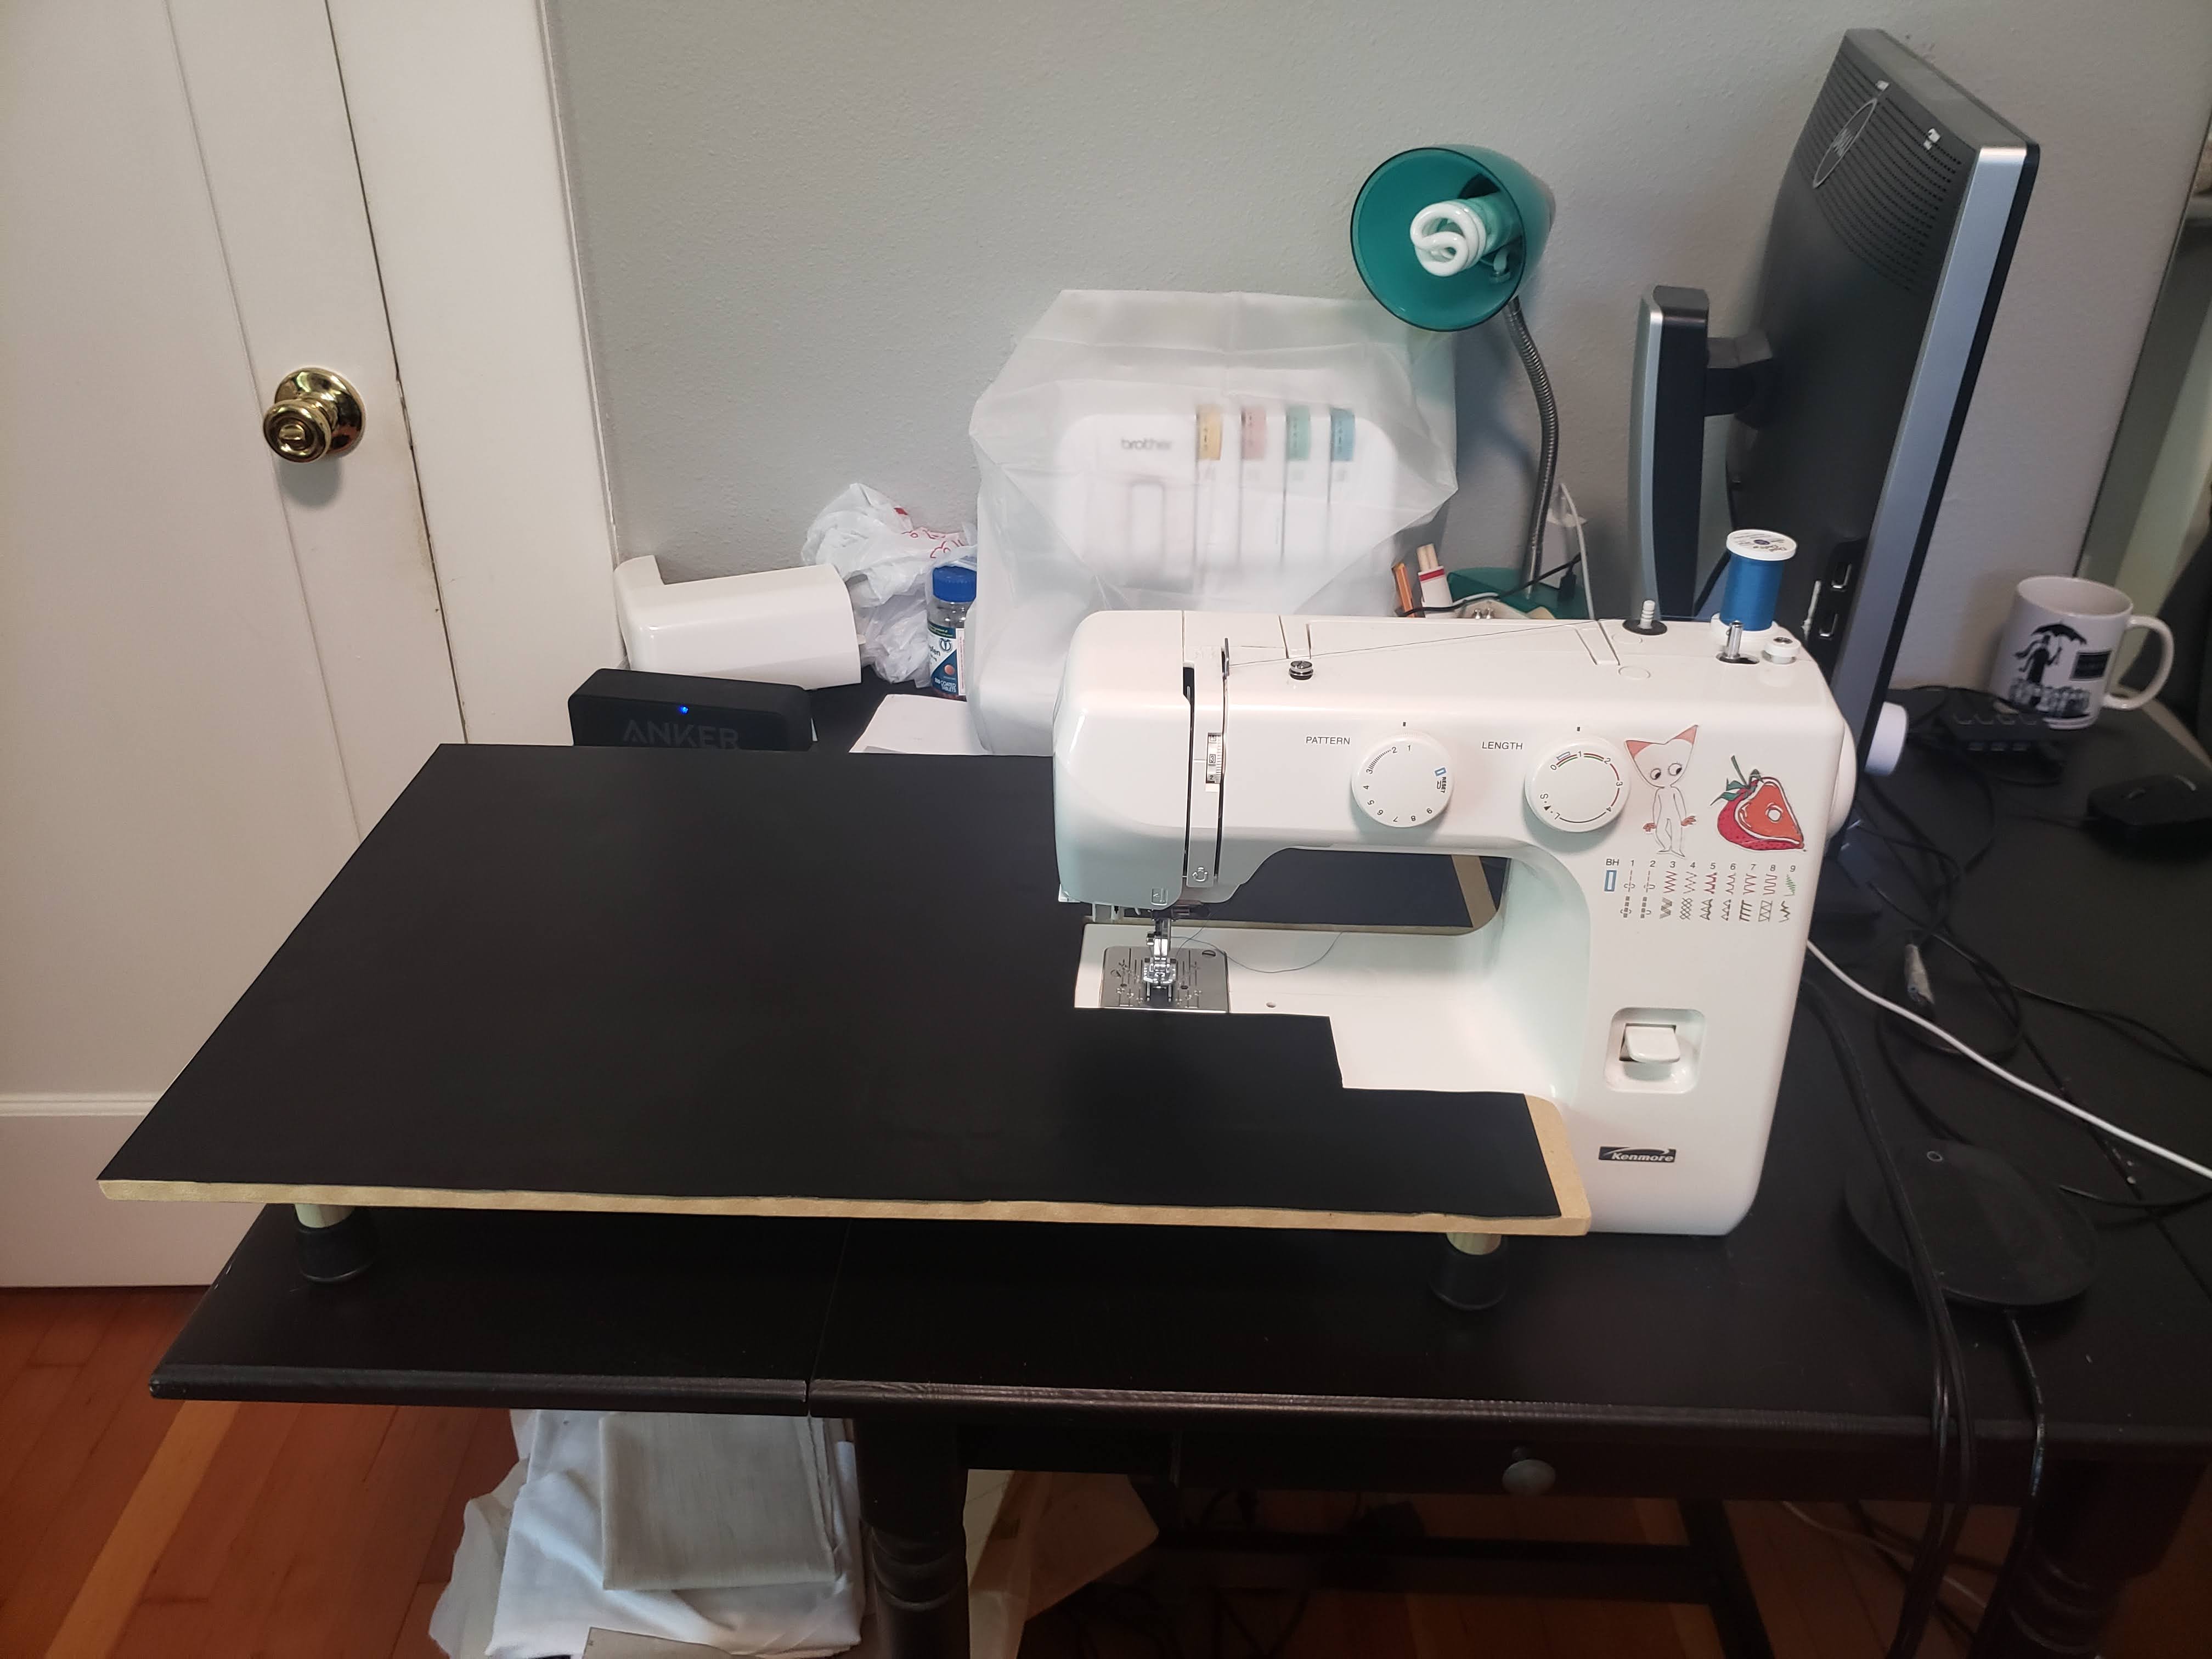
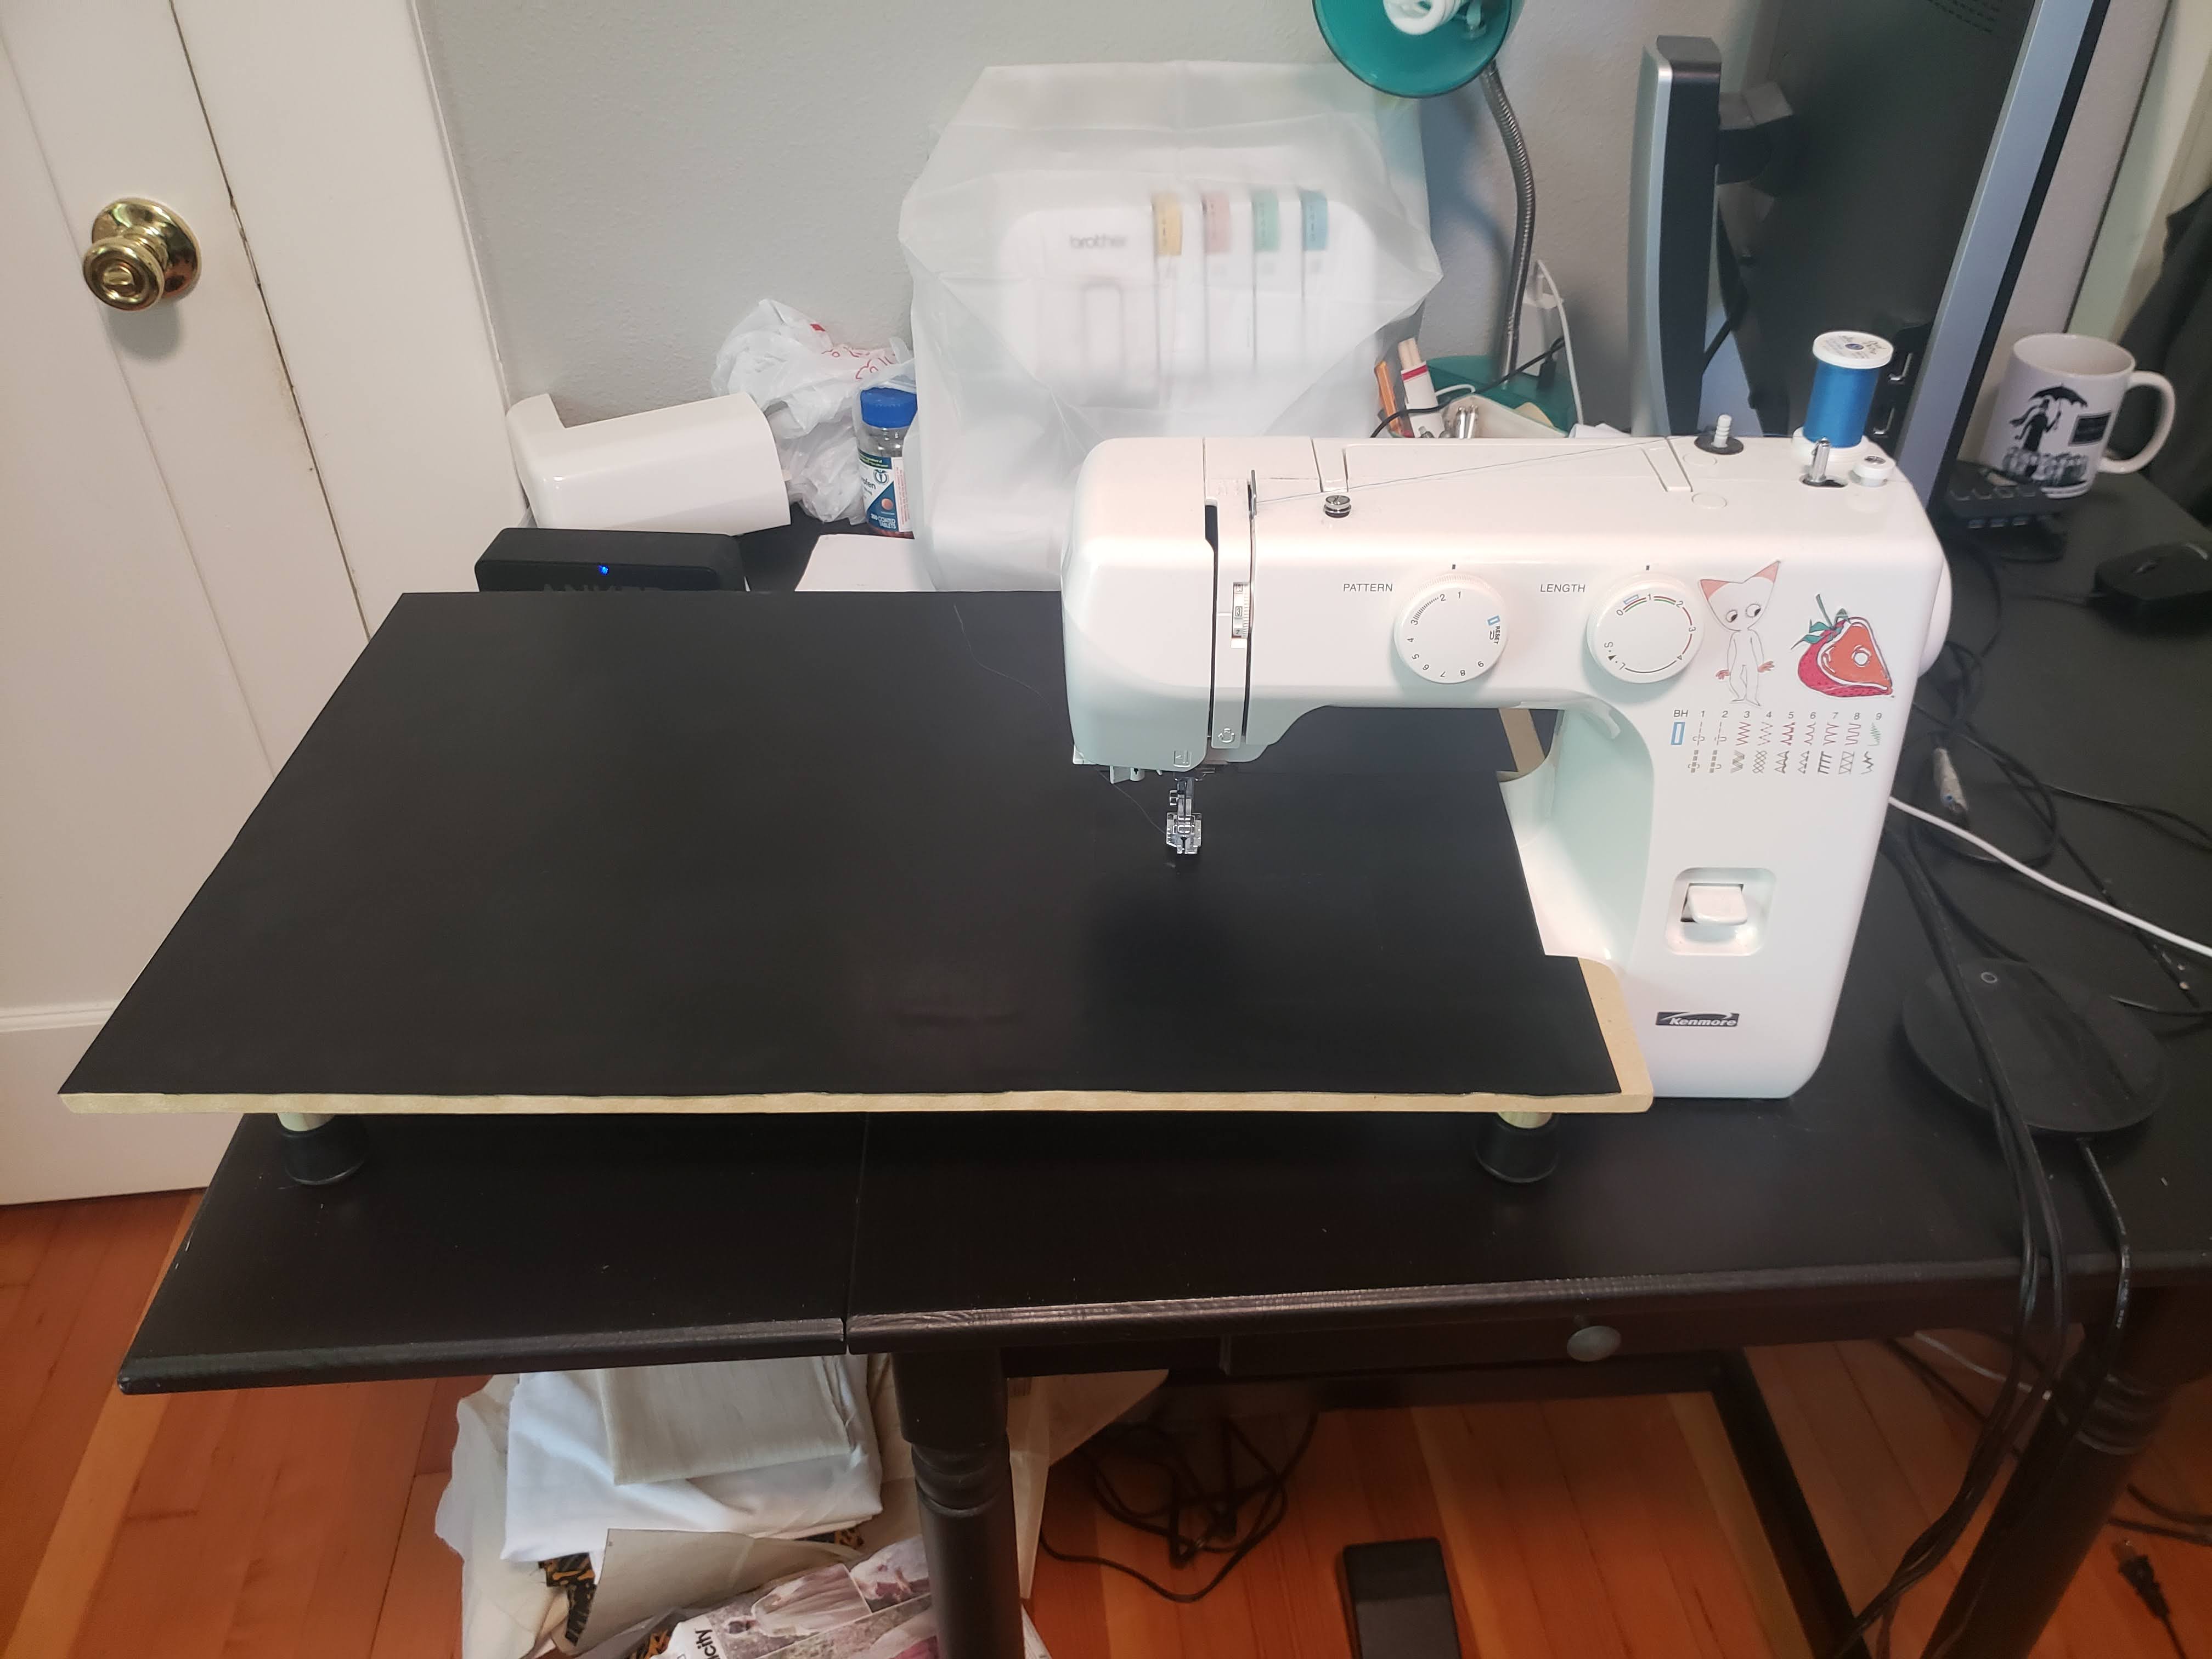
When it comes to quilting the dress, I have yet to decide whether or not I will do it myself (on my tiny kenmore sewing machine with a free-motion needle), or if I will pay to have someone with a long arm do it for me. Just in case, I have created a table that fits around my sewing machine to provide a flat, low-friction surface.
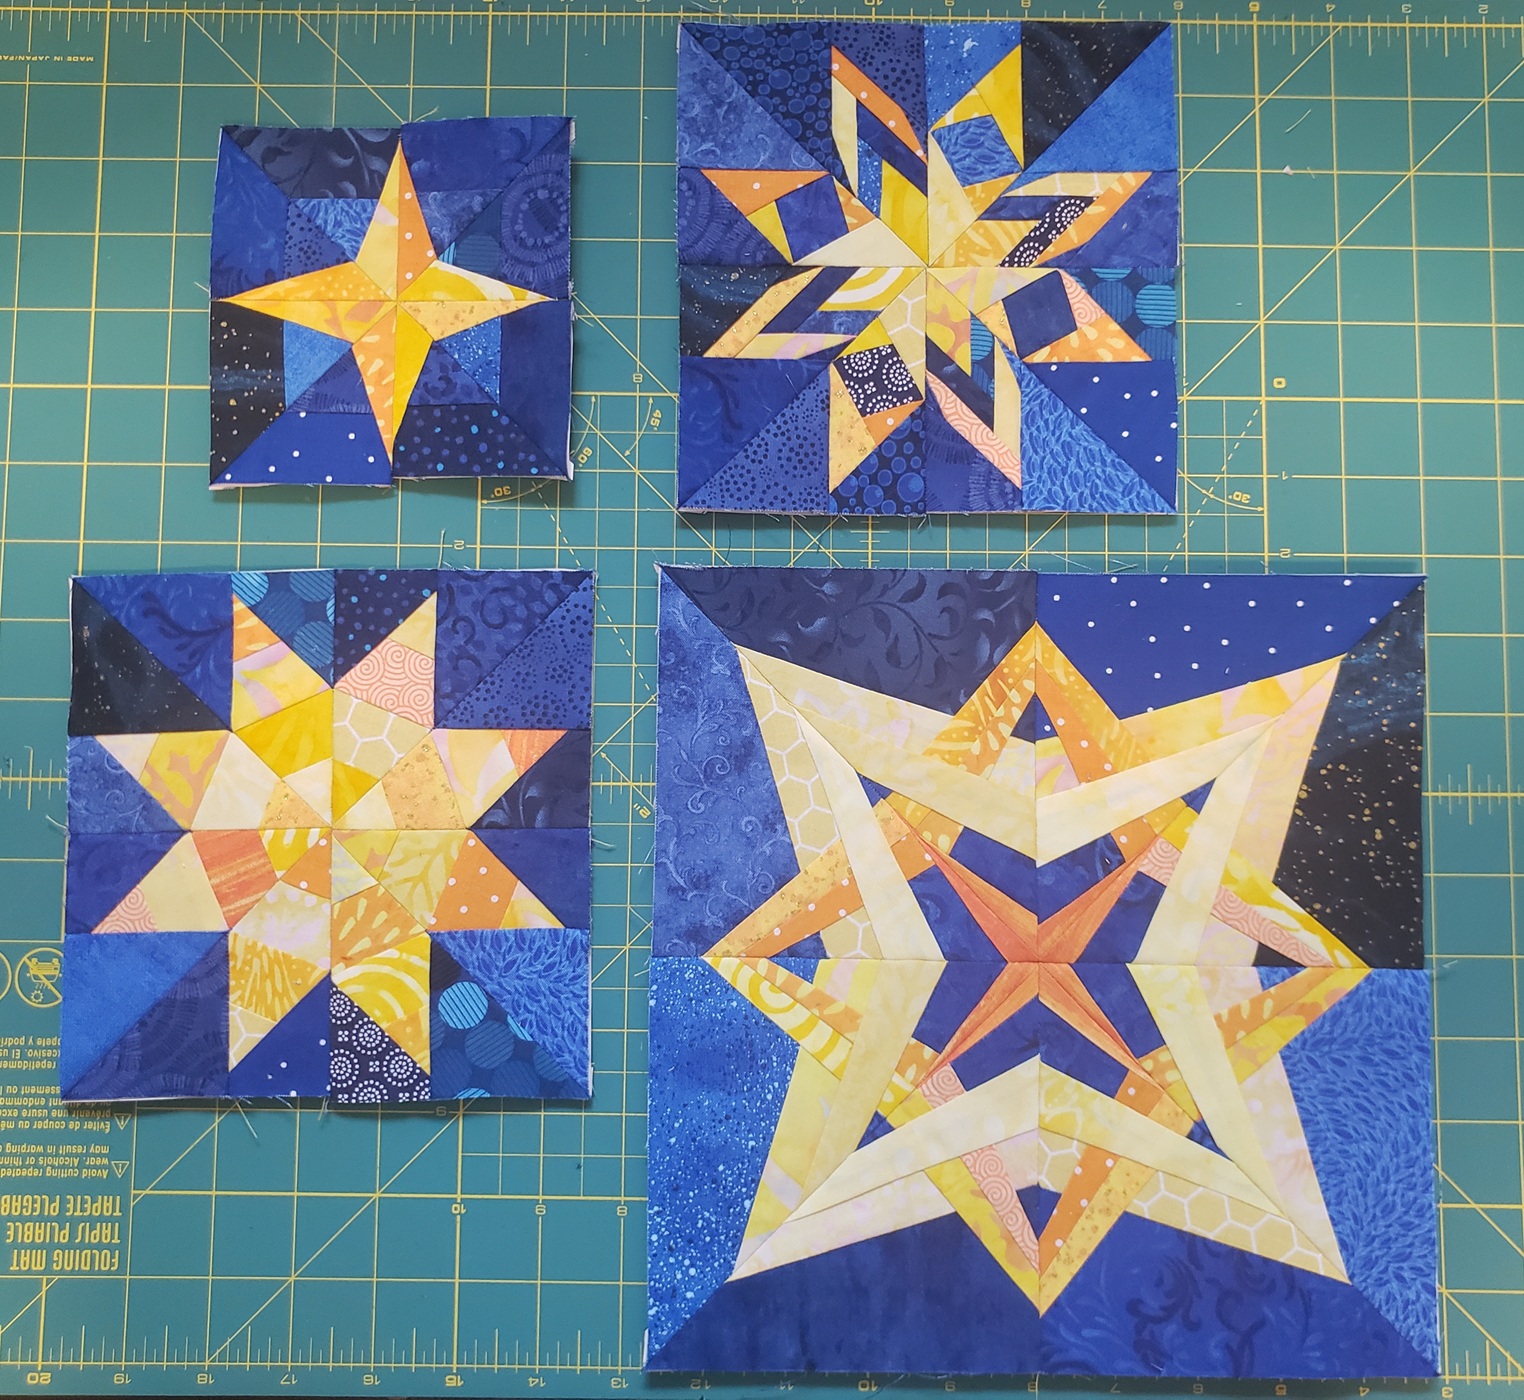
For the daytime side, I am drawing inspiration from this photo:

Here are my sky fabrics all layed out and ready to be pieced:

I am scratching my head over how the sun can be placed on the flattened skirt pattern such that even when it is pleated, the image is still readable. I figure that, like the night side, I will use my mock-up and sketch the general placement of the sun directly on the fabric. After that I'll true-up the lines and make my quilt pattern from there.
I hope to pick this project up again soon because when I finish it, I imagine it will be my proudest achievement to date. I need to find a worthy enough occasion to wear this beast of course...did anyone say Versailles?
Comments