
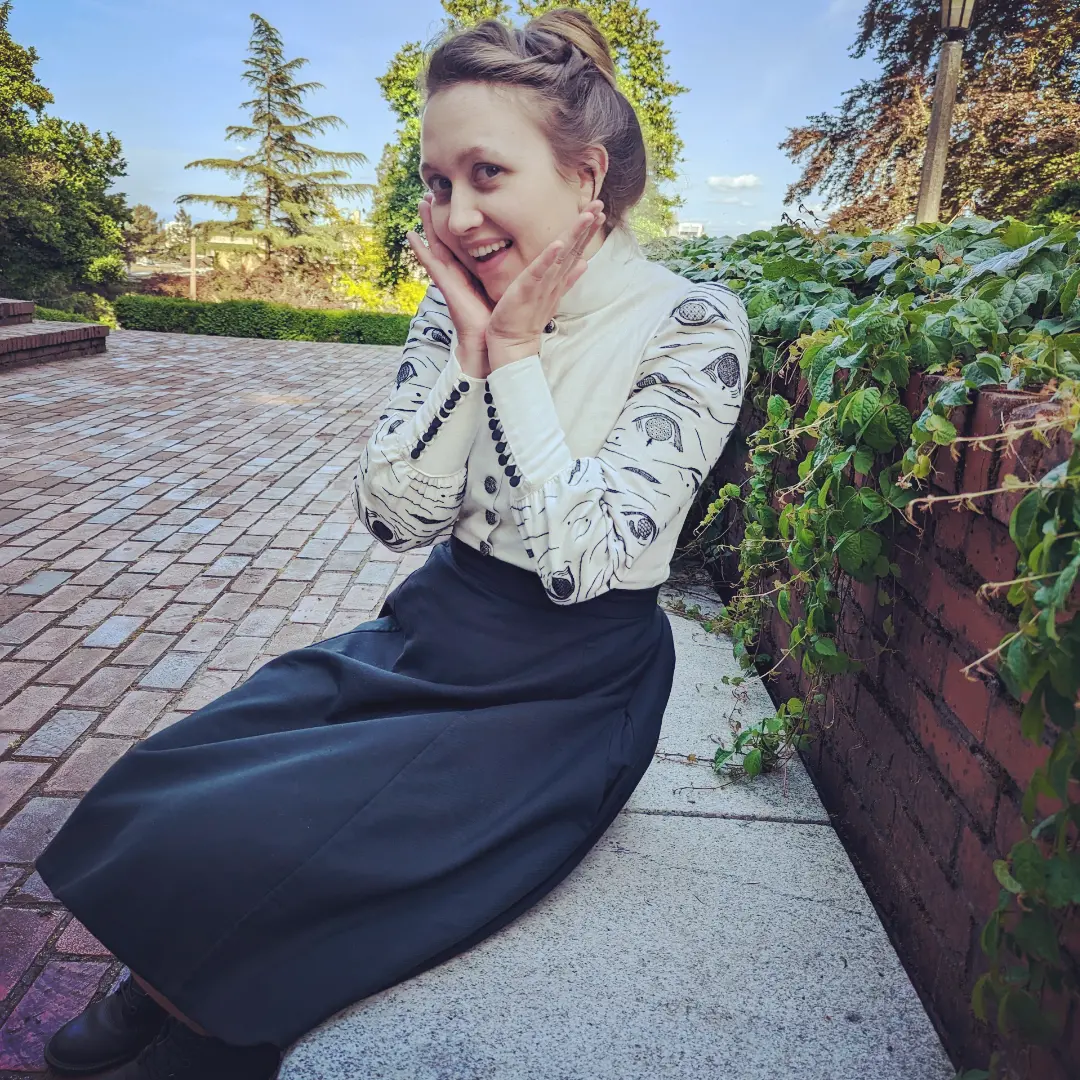
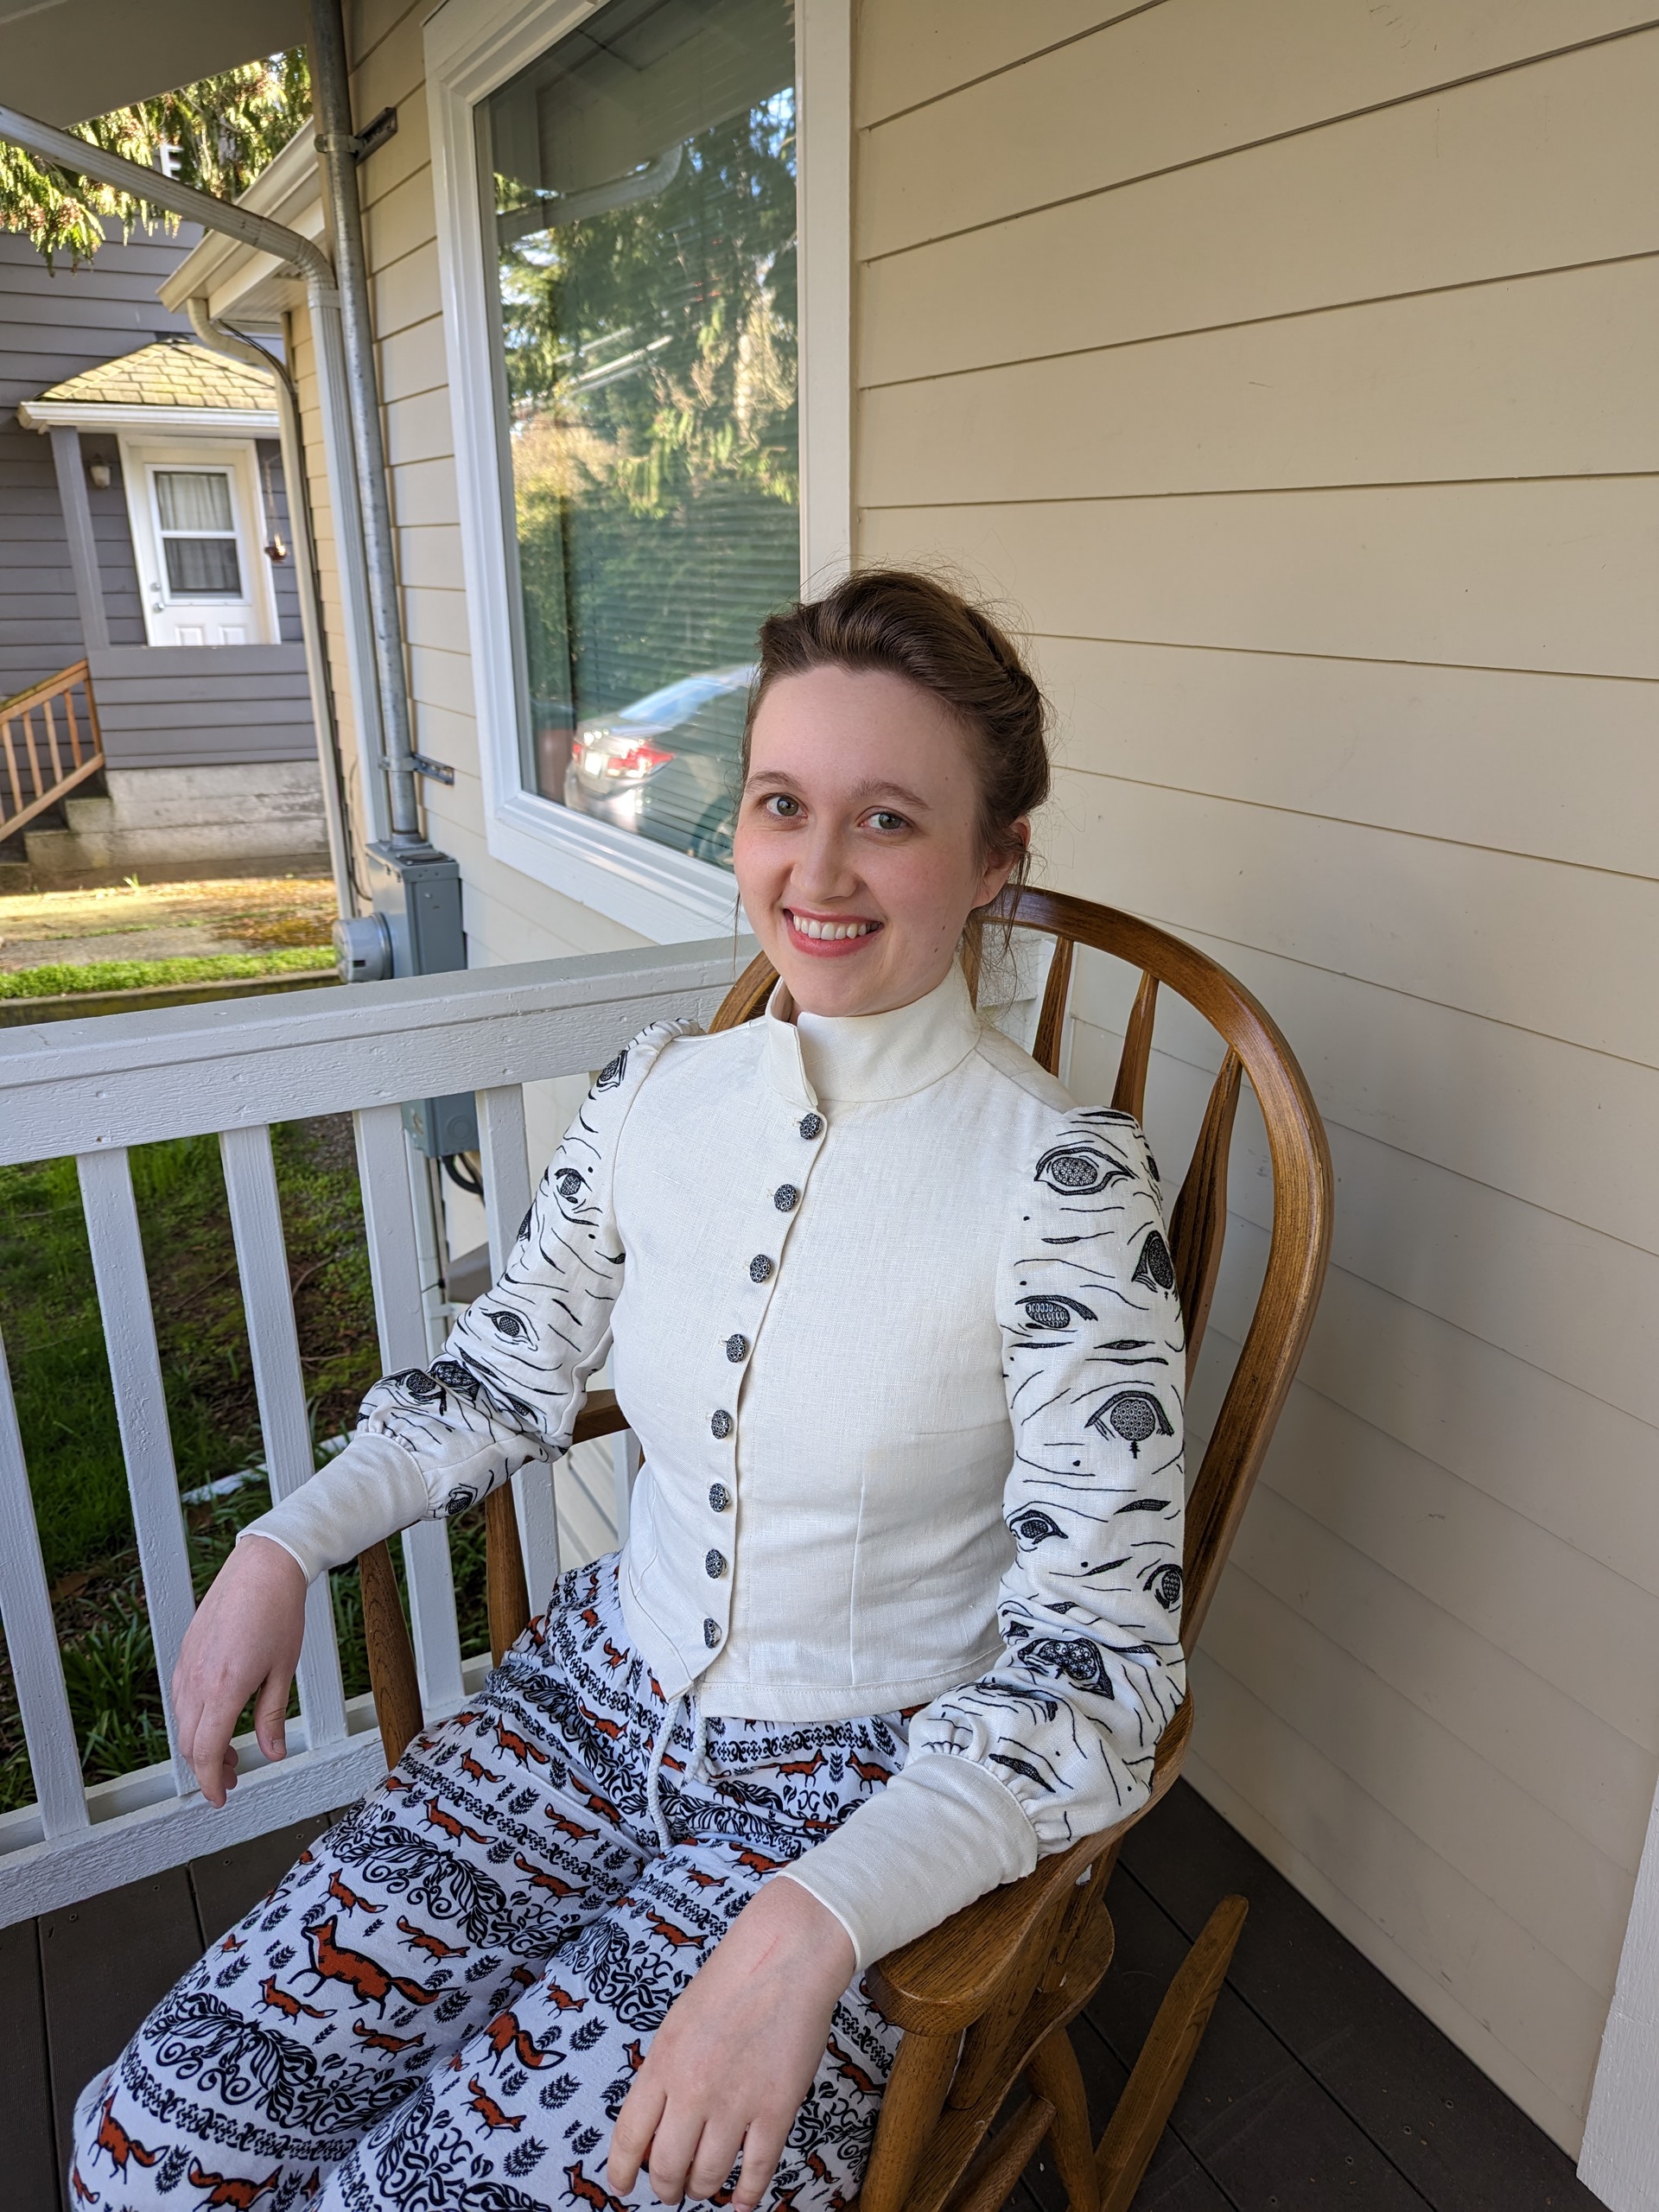
The Trees (and this shirt) Have Eyes
For this shirt, I was first inspired by a portrait of Elizabeth I that I came across in the chapter on blackwork in The Royal School of Needlework's "Book of Embroidery." In the portrait, she has gorgeous sleeves covered in floral blackwork embroidery.

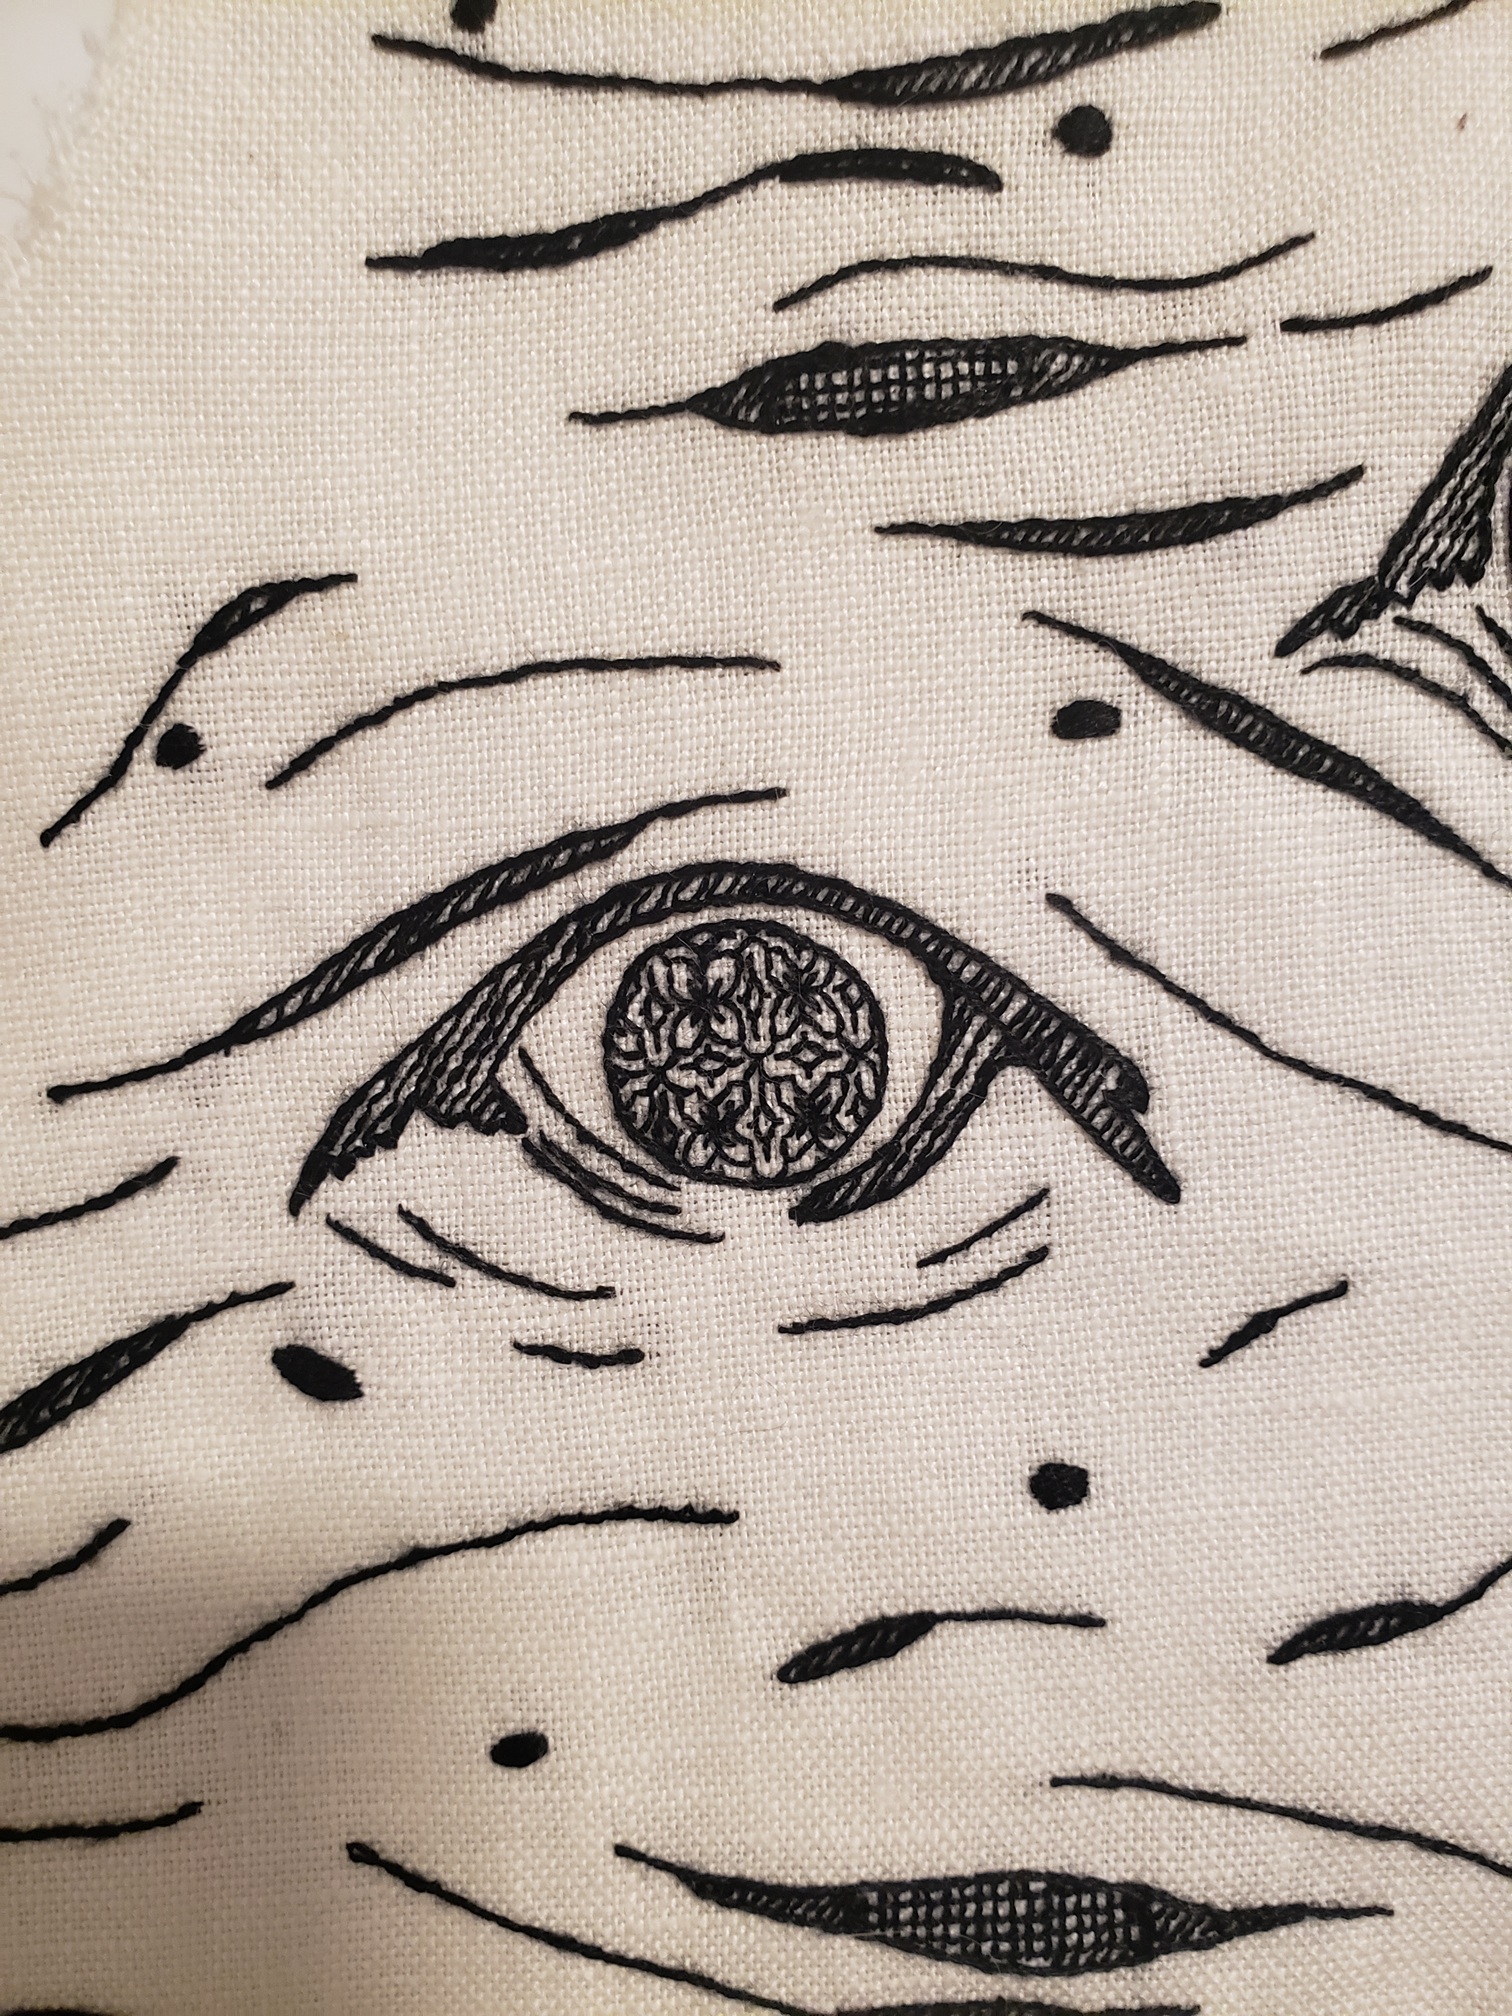
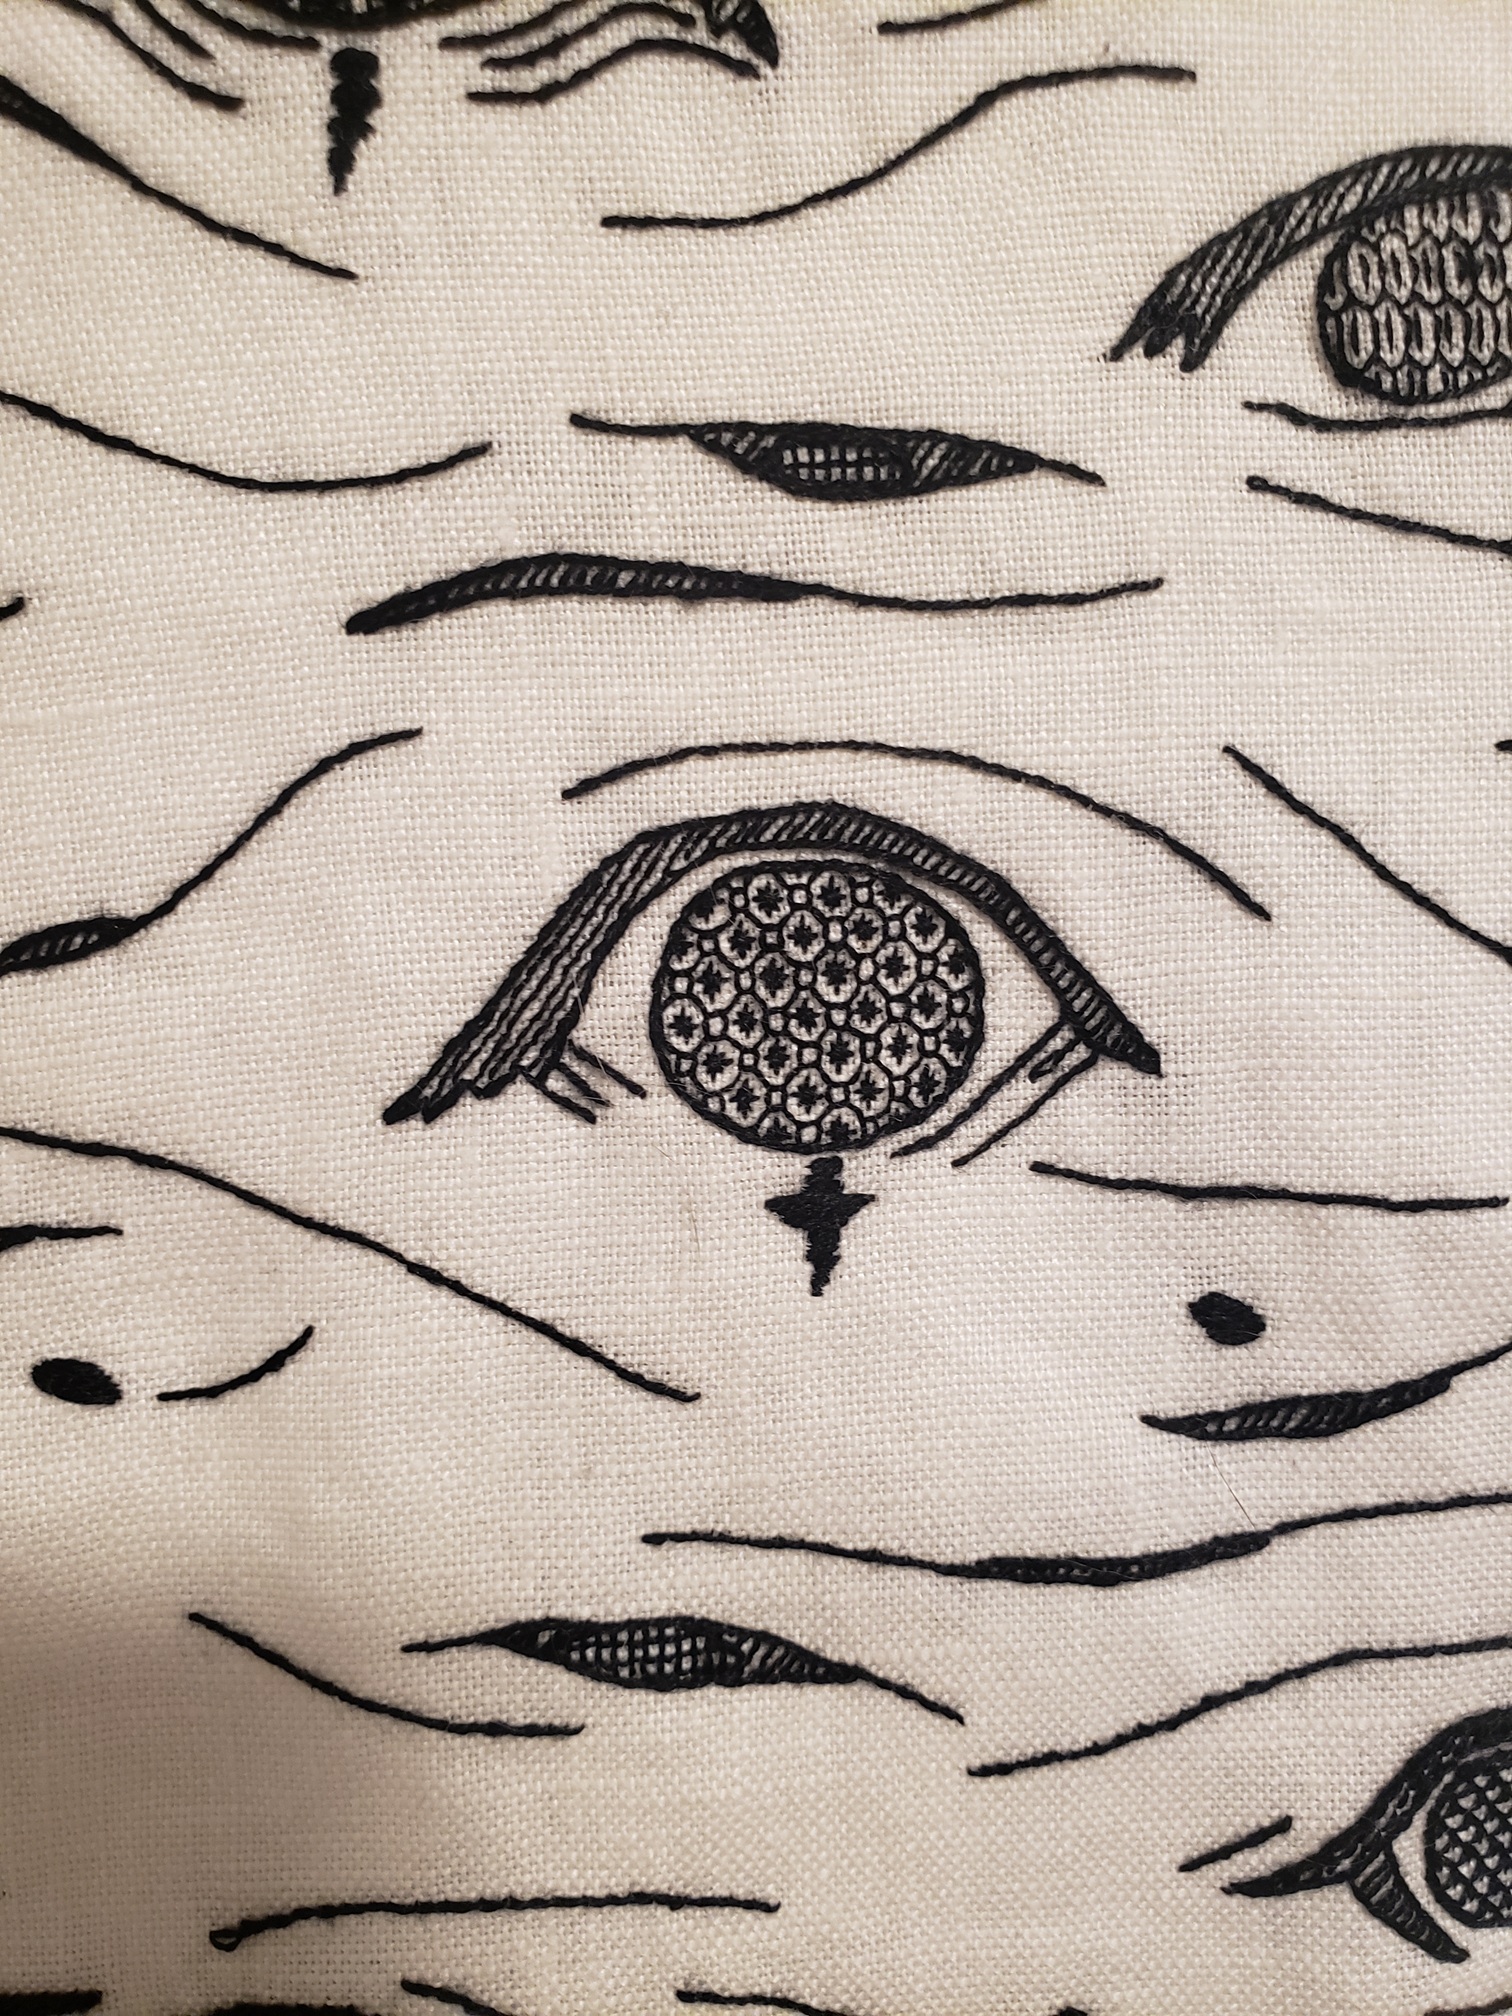
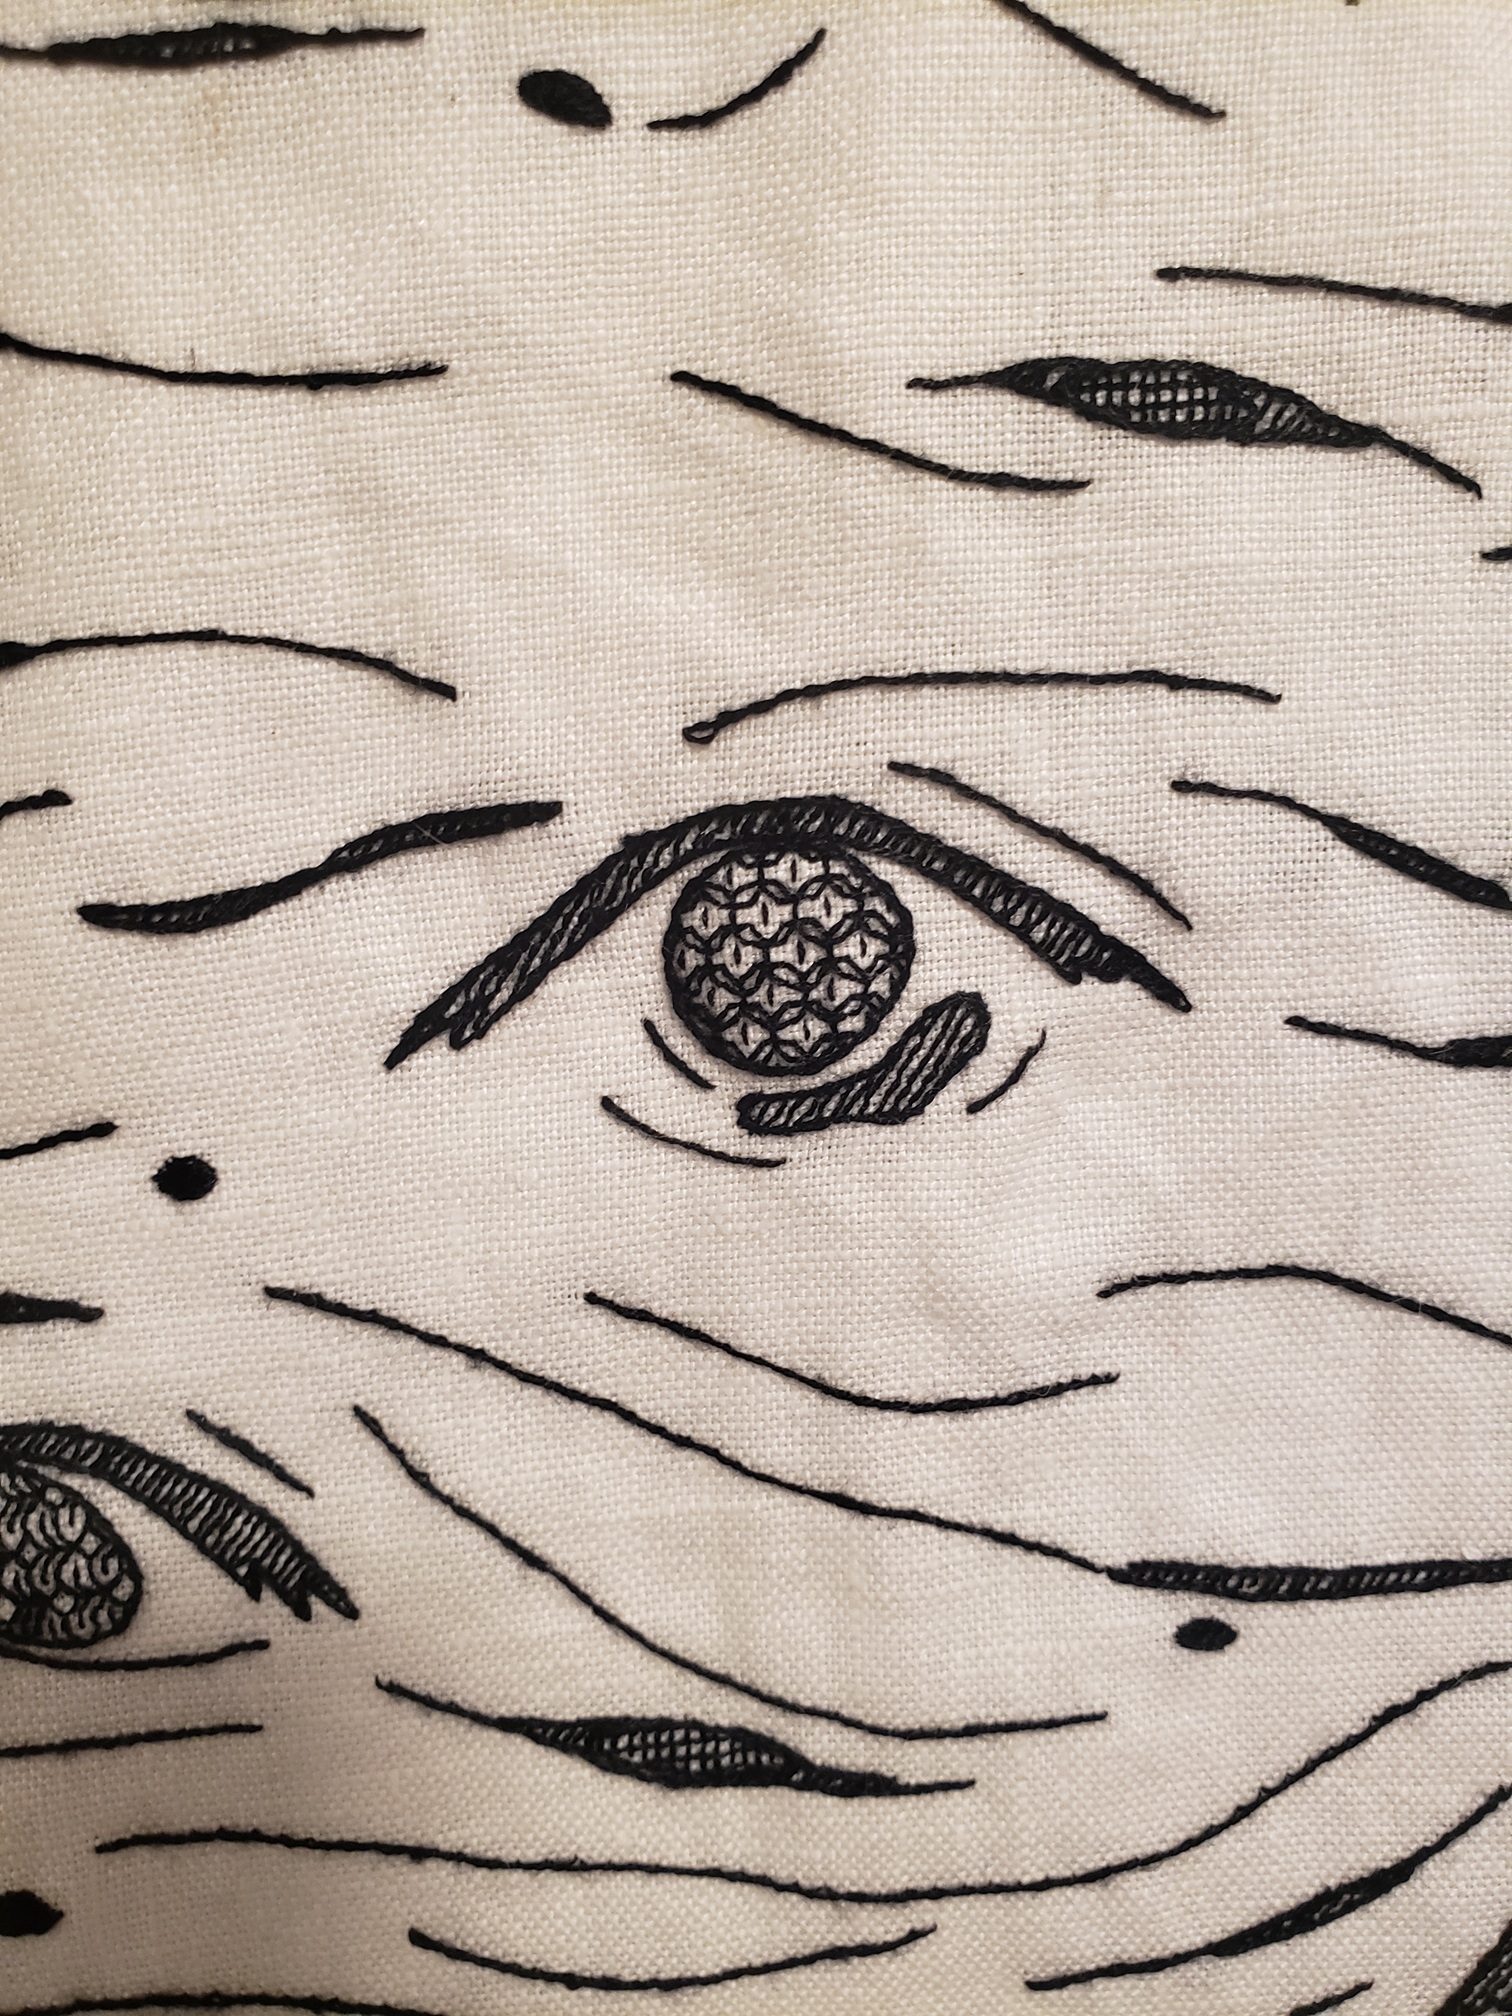
I loved the intricate fill patterns that varied from flower to flower, and wanted to do my own take on that—with eyes instead. I started by just doodling some ideas in my sketchbook, and then neatened the shapes from there. I arranged the eight unique eye shapes on a sleeve pattern that I had in my stash. The sleeve was from a vintage suit set with a tailored jacket and skirt. I found a tutorial on how to alter a sleeve block to turn it into a bishop sleeve (this was a mistake, but I'll get to that later).
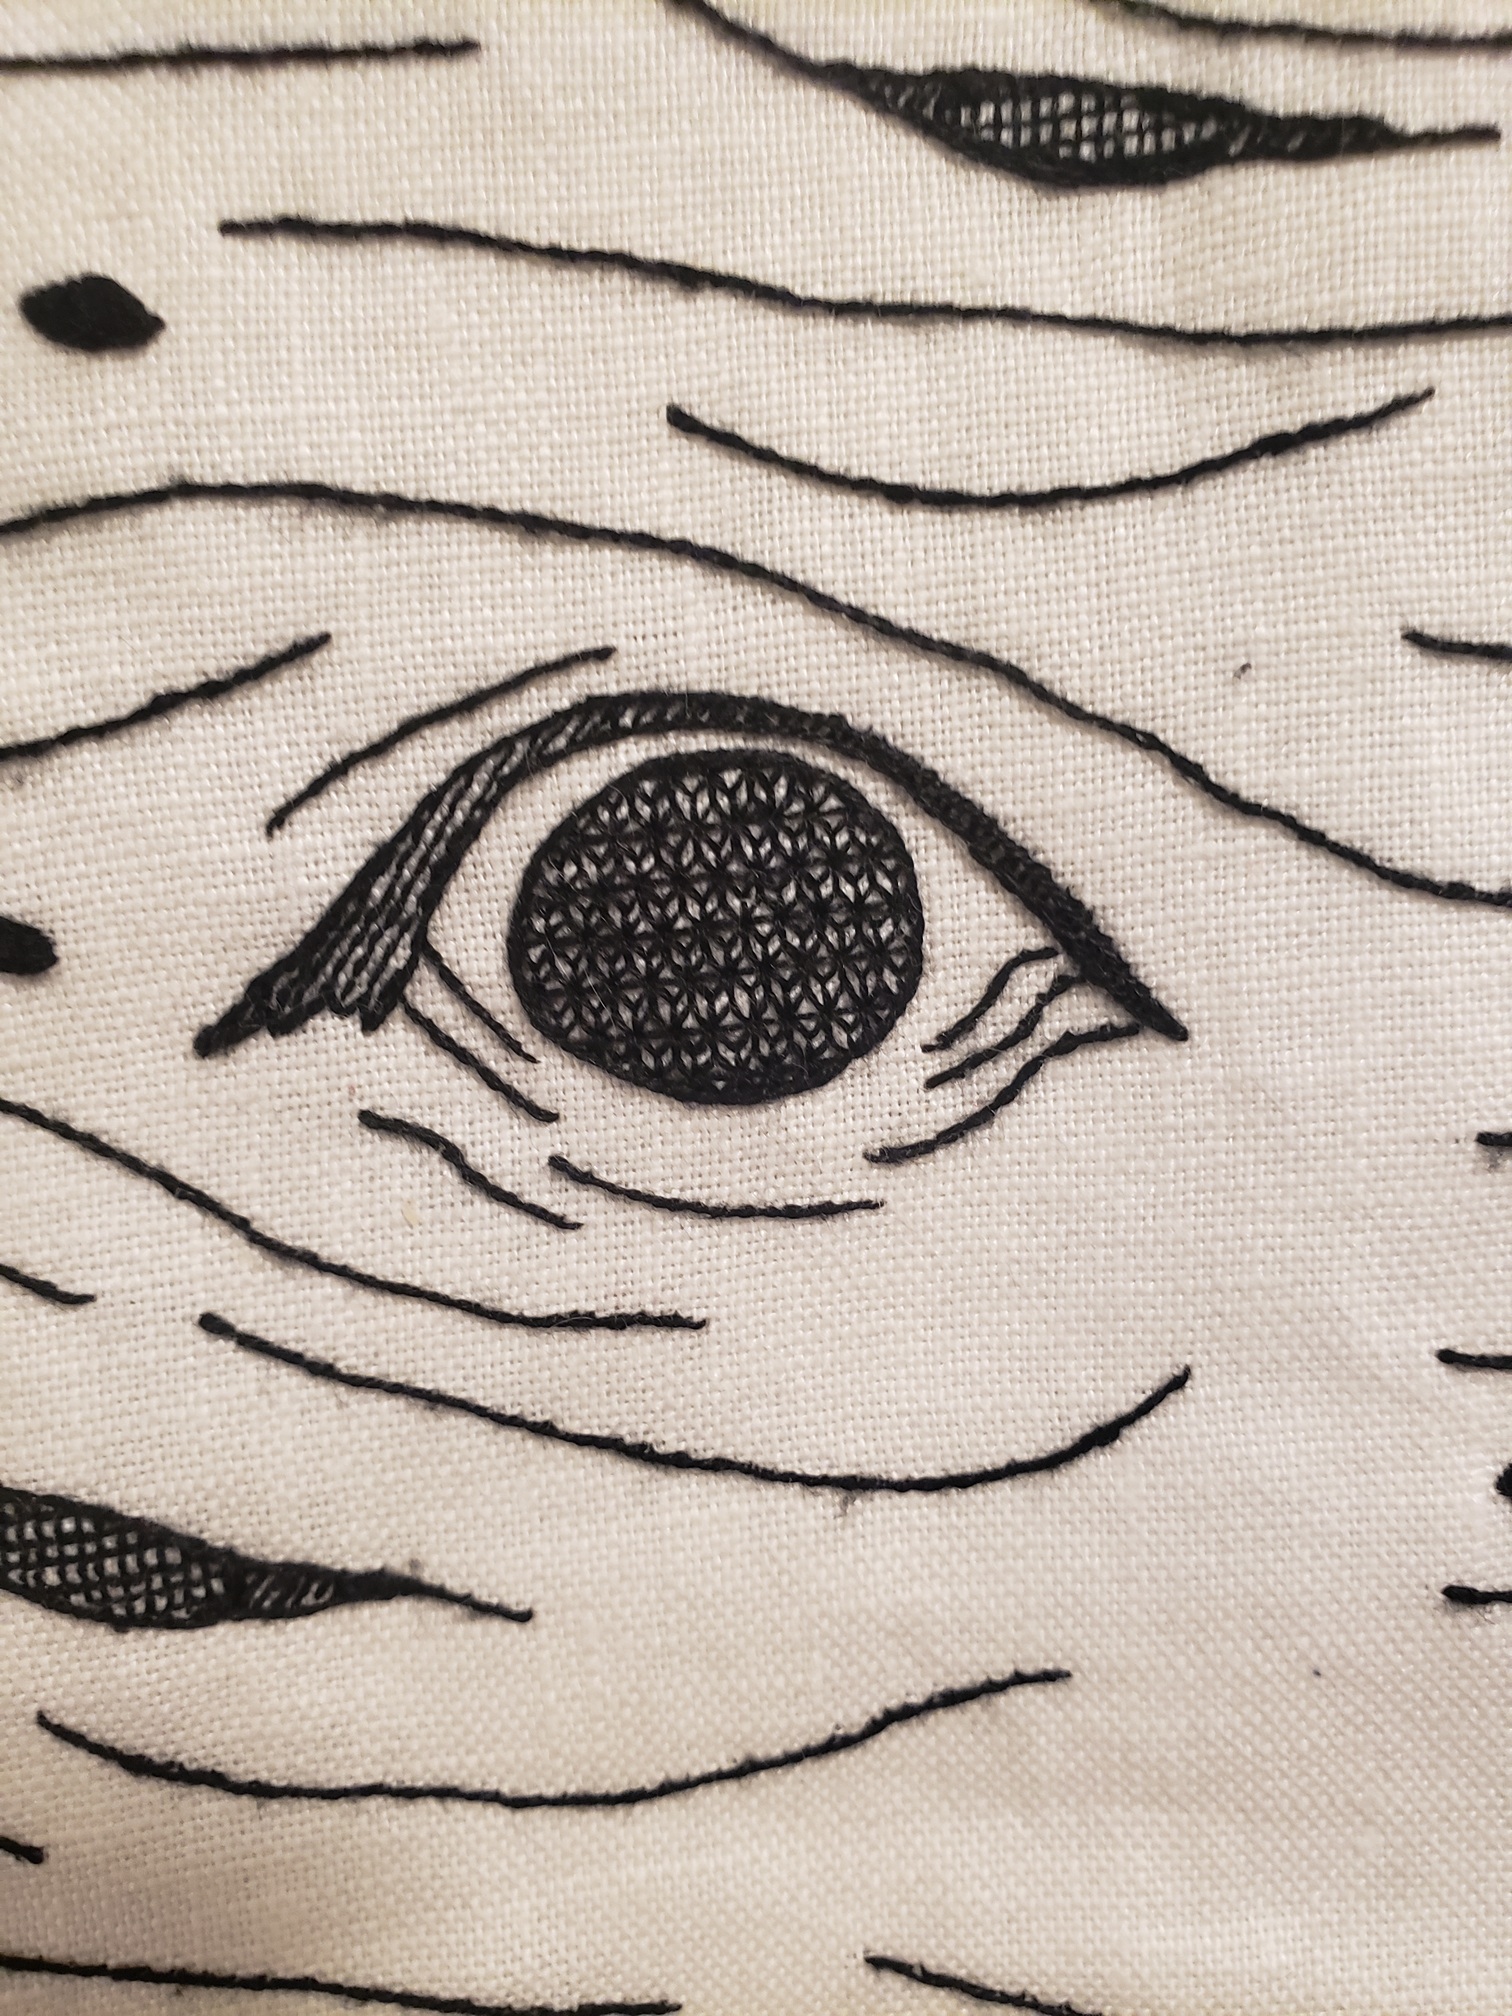
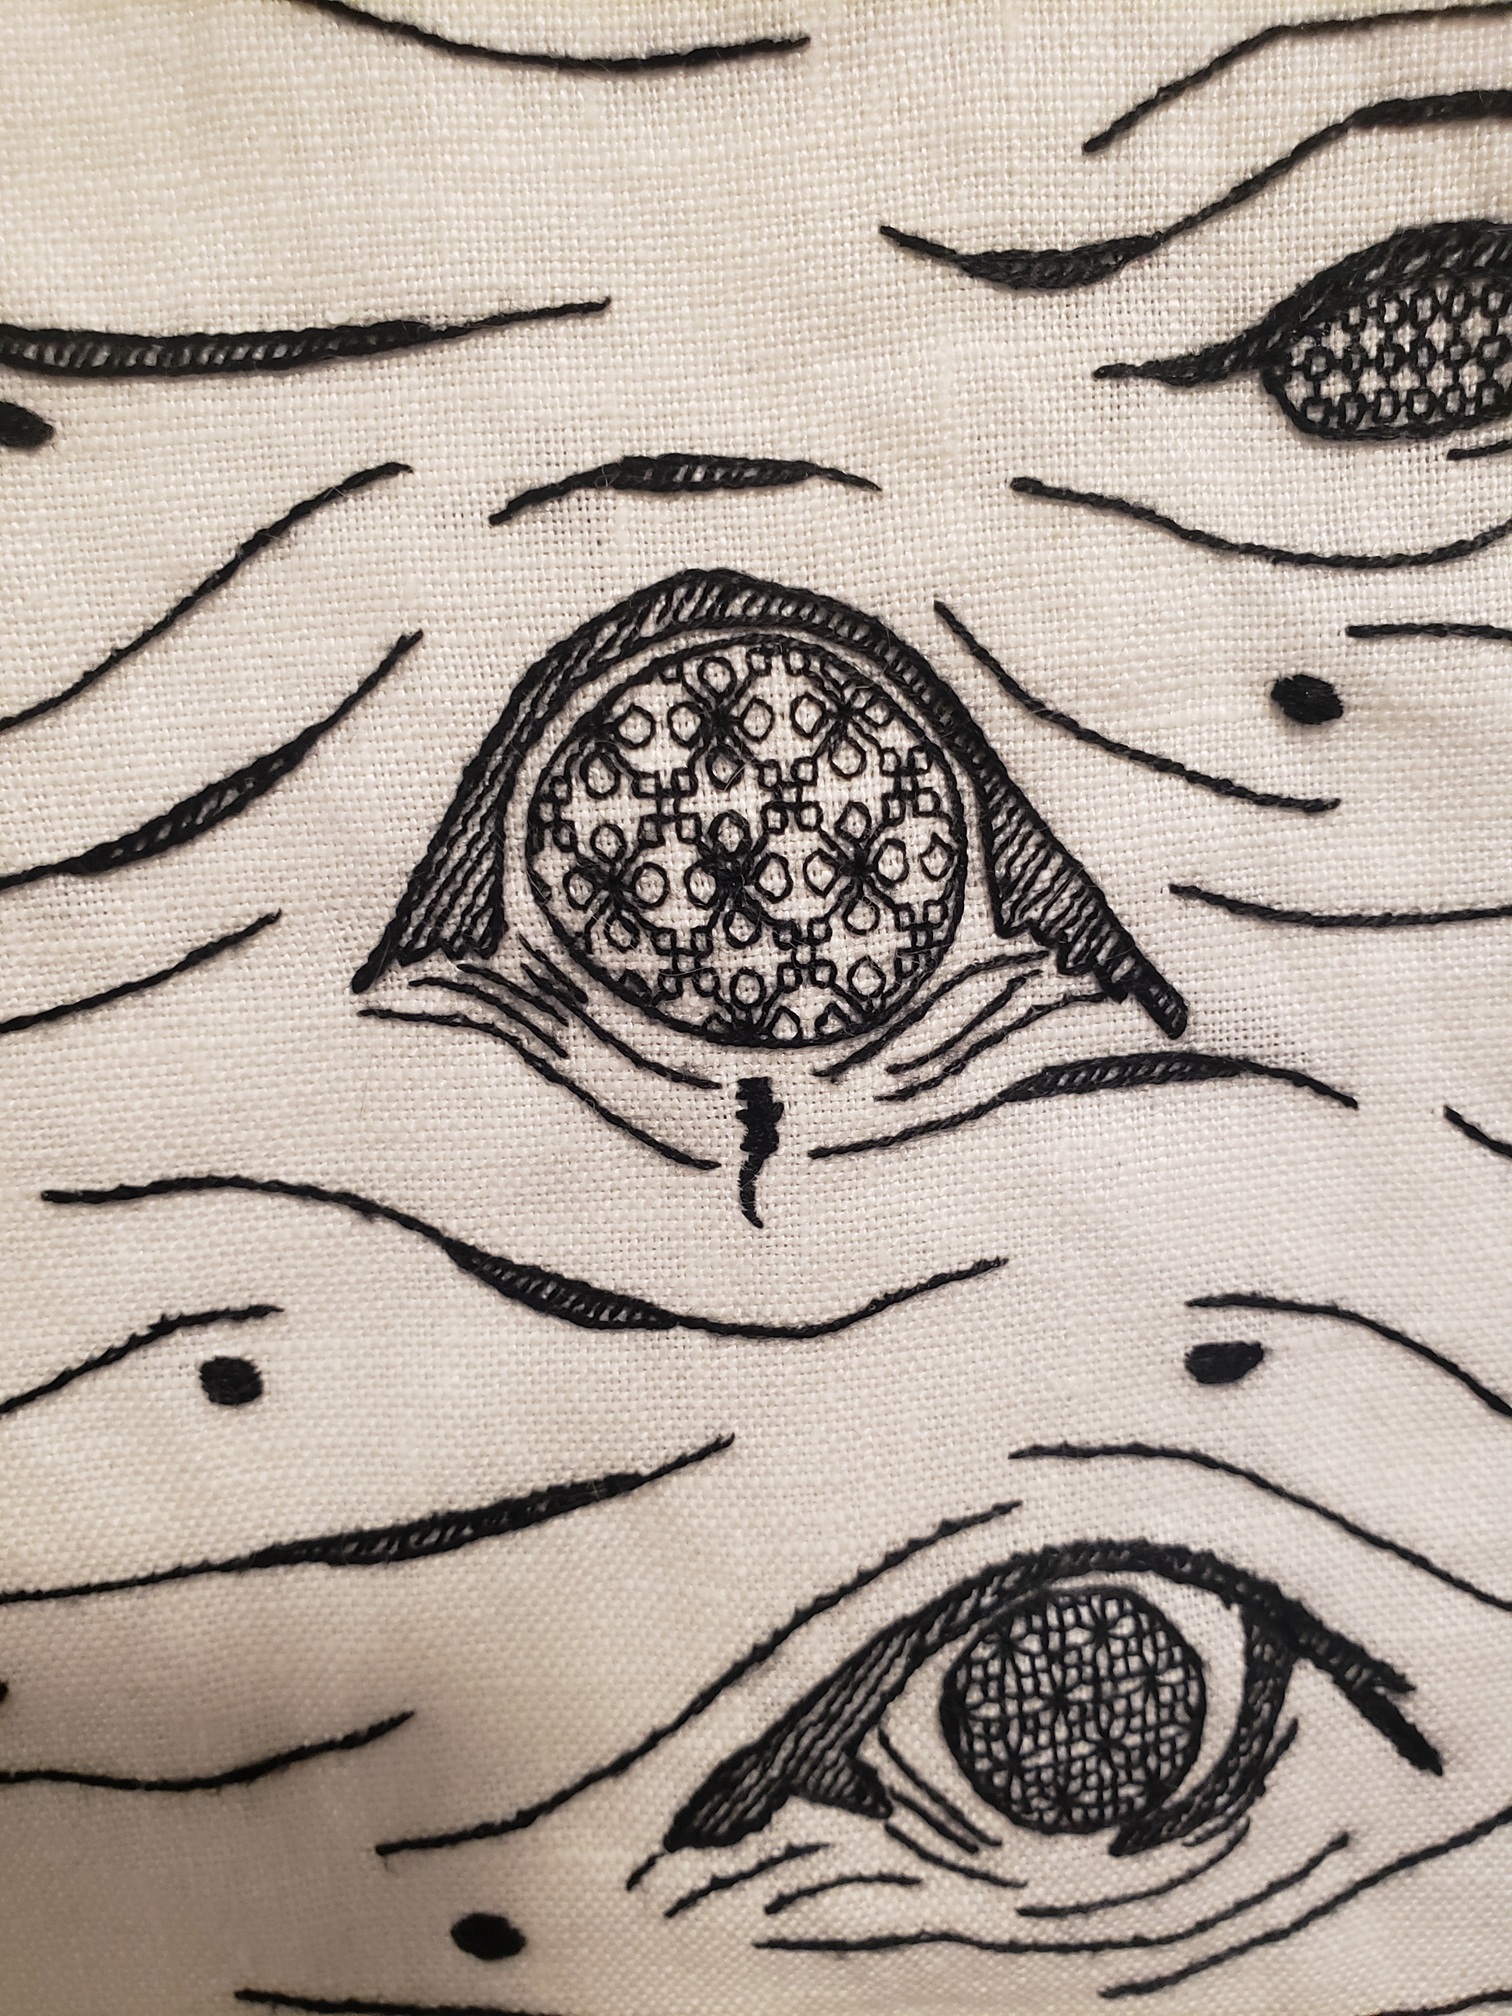
Worked in a single thread of black DMC floss, each eye was outlined with a stem stitch, and then filled with various patterns from the blackwork stitch bank in the aforementioned book (they also have an online stitch bank). I added lines, small "eye slivers", and dots in between to give the appearance of birch tree bark.
Believe it or not, but I practically embroidered the first sleeve two times. I was following some advice I read to create a more permanent outline (one that wouldn't fade with a lot of handling) by using running stitches to do an initial pass over the image. Since that had already taken awhile, I thought it might be fine and save some time to just fill in the gaps of the running stitch for the final work...

...it wasn't. About halfway through, I became pretty dissatisfied with the way it was looking. The outlines were too jagged/rough looking. So I switched to the much improved method of removing the running-stitch outline as I went and replacing it with a neater stem stitch (like I should have done from the start). It bothered me that the bottom half looked much better compared to the top, so, once again, I removed the old stitching and replaced it. Very inefficient, but I learned my lesson. The second sleeve went a lot smoother. I even forewent doing the running stitch outline and instead used a heat-erasable pen to draw onto the fabric. Luckily, since the fabric was white, I could use a light table to trace my image onto it.
After 200+ hours of embroidering, (yes, really) I was finished with the sleeves!


Now, all I had to do was create a shirt to attach the sleeves to.
"Wait, you didn't come up with a shirt pattern before making the sleeves?"
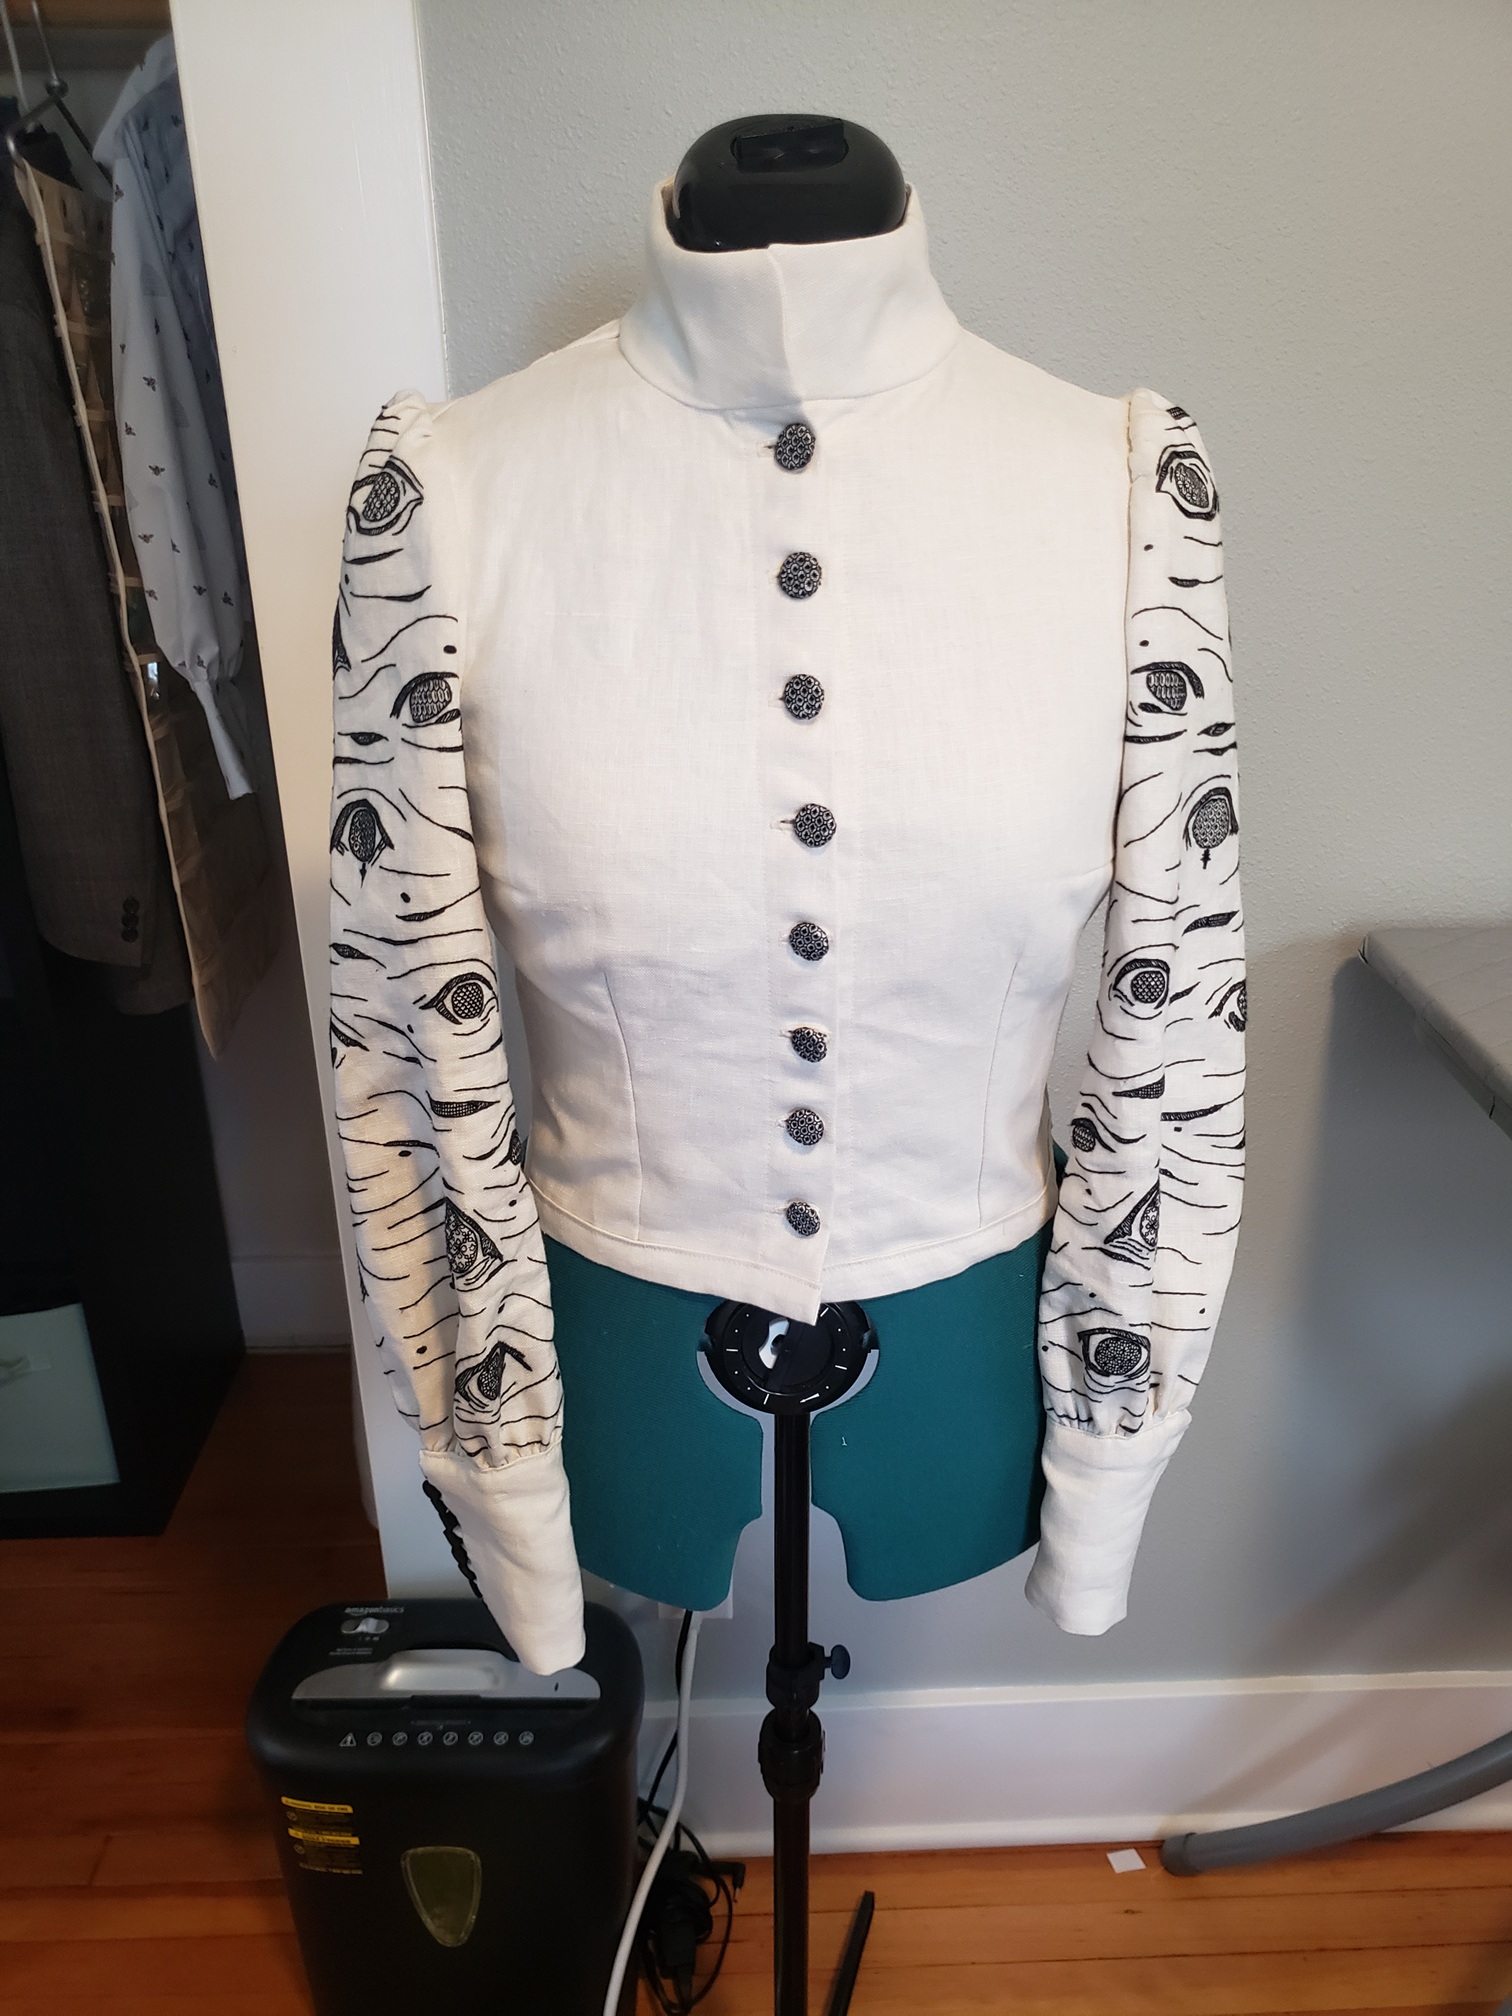
Hahahaha no! Of course not! That would make way too much sense. Also, remember how I said I used a suit jacket sleeve pattern to create a bishop sleeve? Well, this turned out to be a big issue (surprise, surprise) because suit jacket sleeves, unlike regular sleeve blocks, have much taller sleeve caps:

And because I had hundreds of hours of embroidery on my pre-cut sleeves (another bone-head move), I could not alter this shape. Taller sleevecaps are used in tailored clothing mainly because it reduces the amount of fabric under the armpit—resulting in a more fitted look, but greatly reducing the range of motion of the wearer, especially if the shirt is more form-fitting.
If I had been smart, I would have just drawn a basic sleeve shape on a rectangle of fabric and then embroidered within the lines, that way, it would be easy to change the shape later, plus, I wouldn't have had to deal with my embroidery hoop slipping out whenever I was working close to an edge. Hindsight is definitely 20/20.
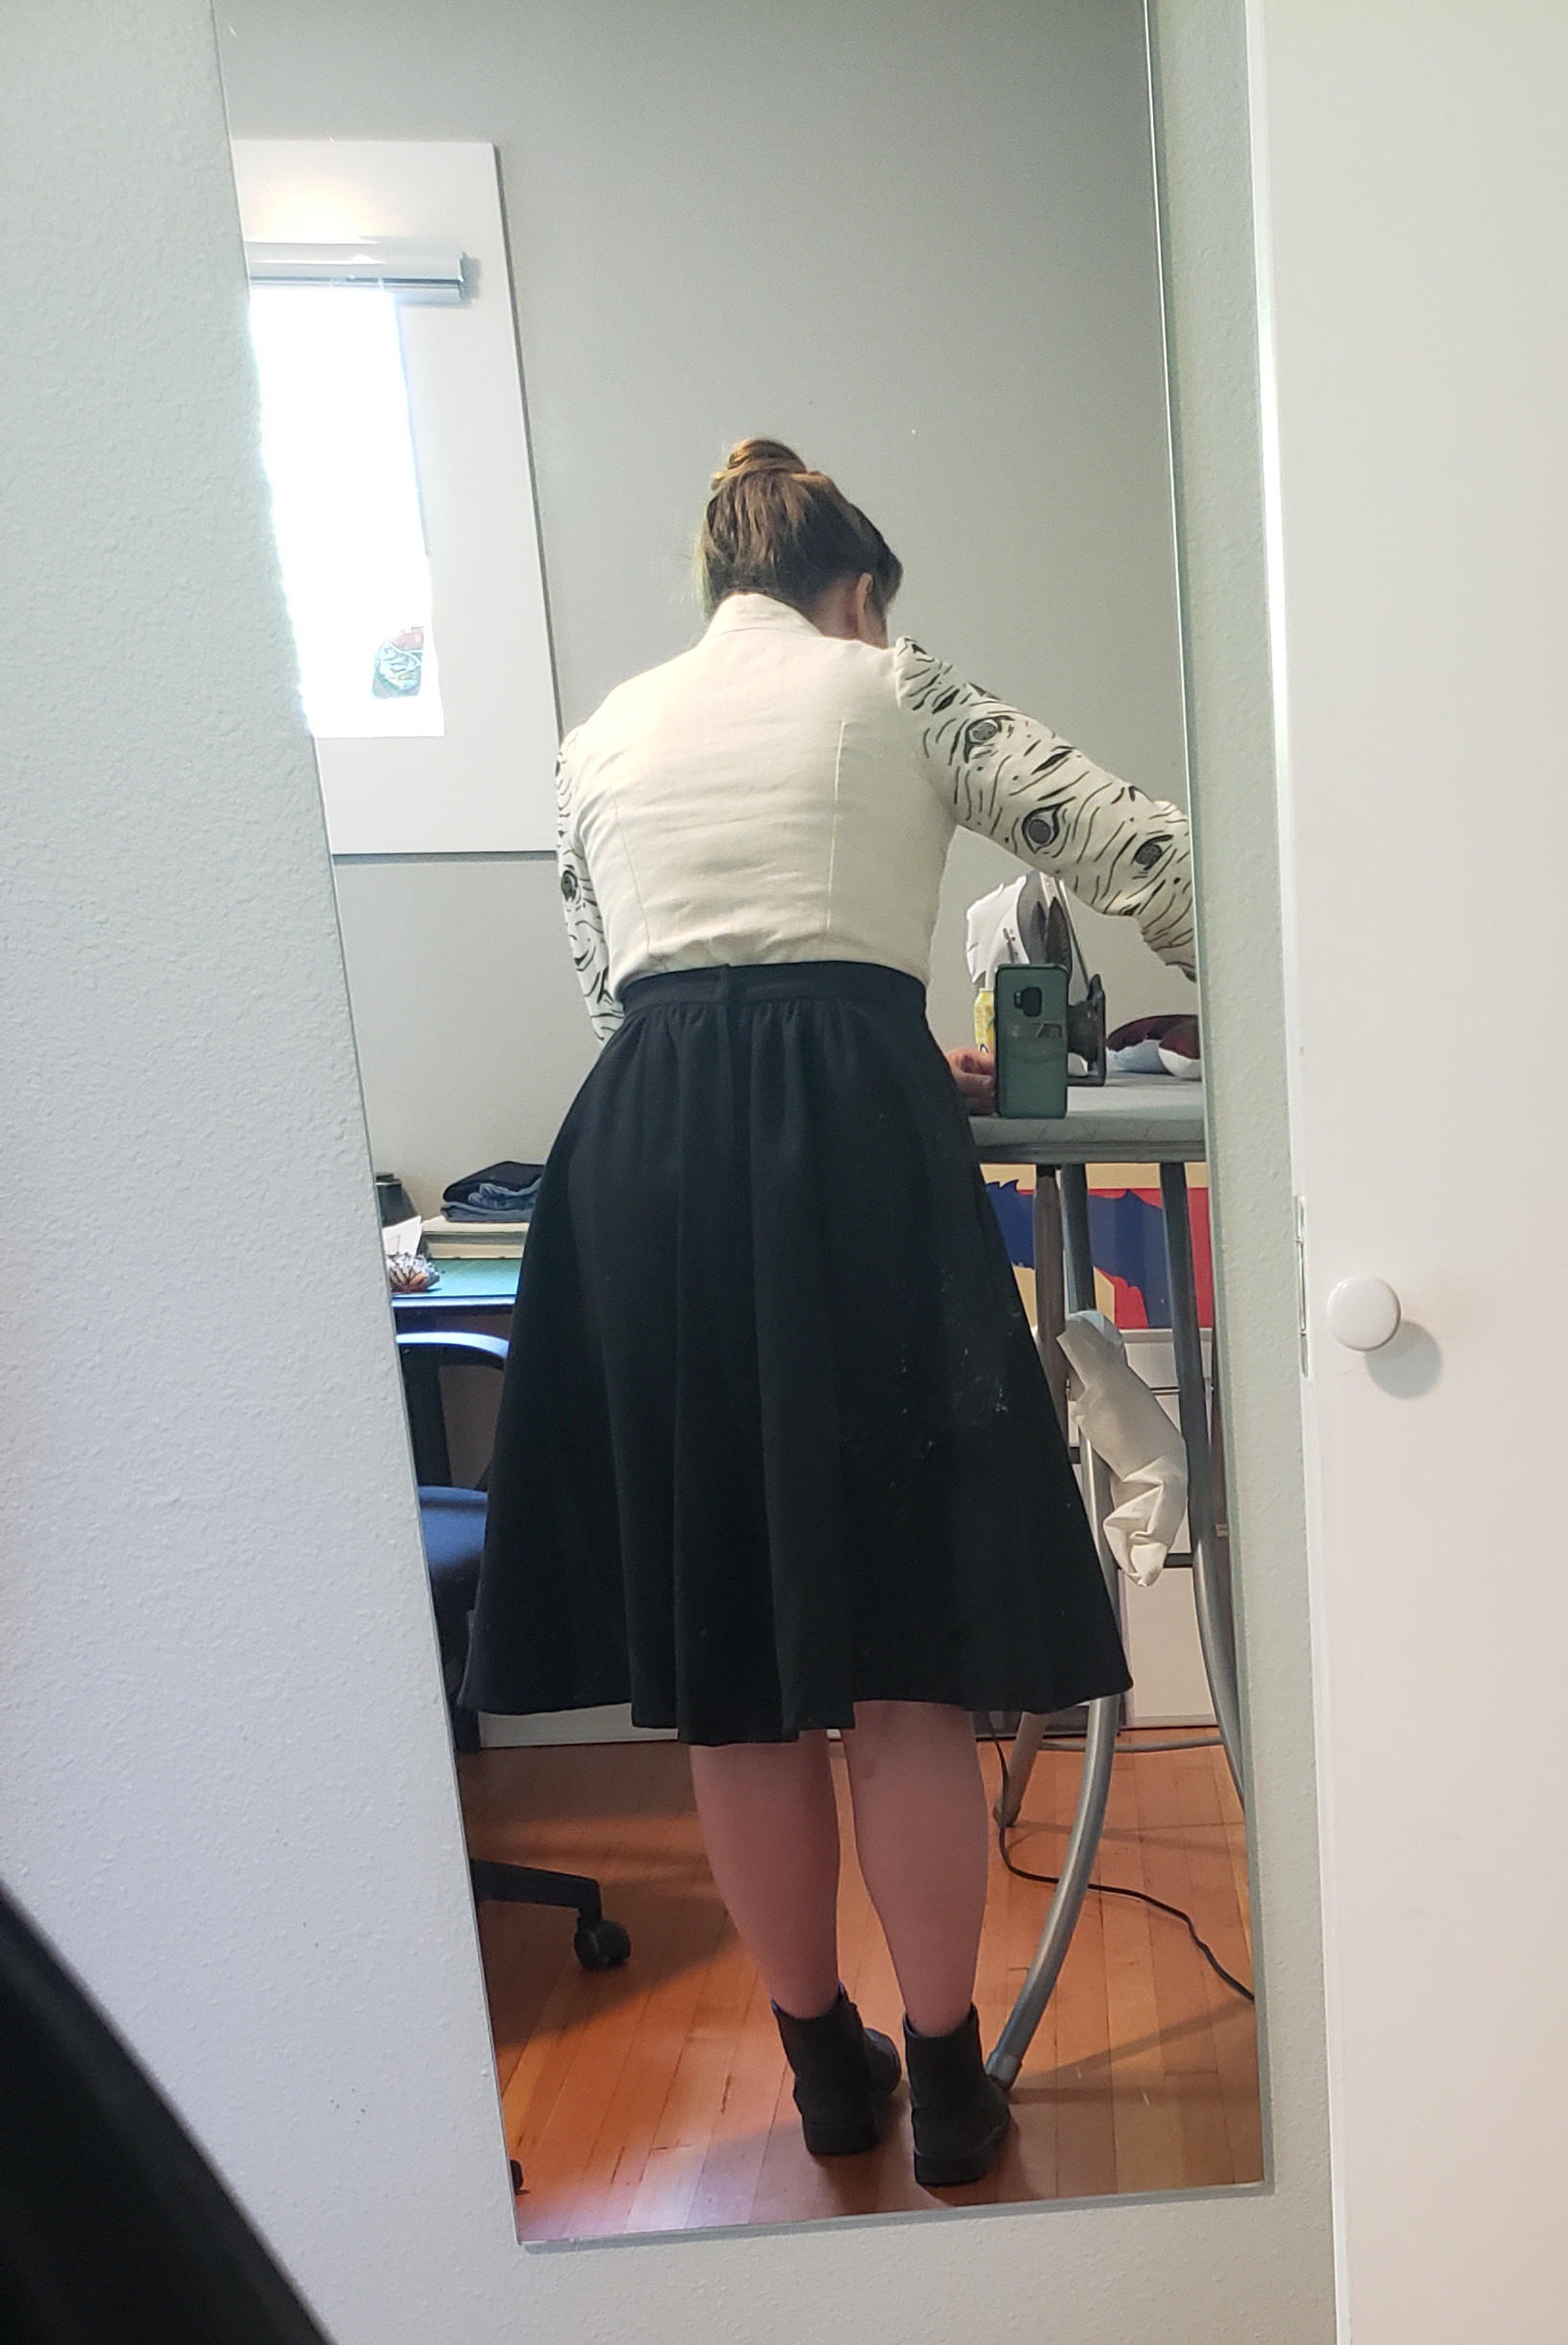
For the bodice, I chose to modify an existing pattern: the VikiSews Rosaria Dress. I liked the look of the bodice of the dress, and in my inexperience, I thought I could just take my sleeves, slap them on, and it would all work out. I did not realize that the large sleeves on the original was actually a crucial design feature. They were roomy enough to actually let you move your arms above your head. Not so for my shirt. The combination of both fitted sleeves and fitted bodice makes it impossible to lift you arms above shoulder height. Even that is a stretch.
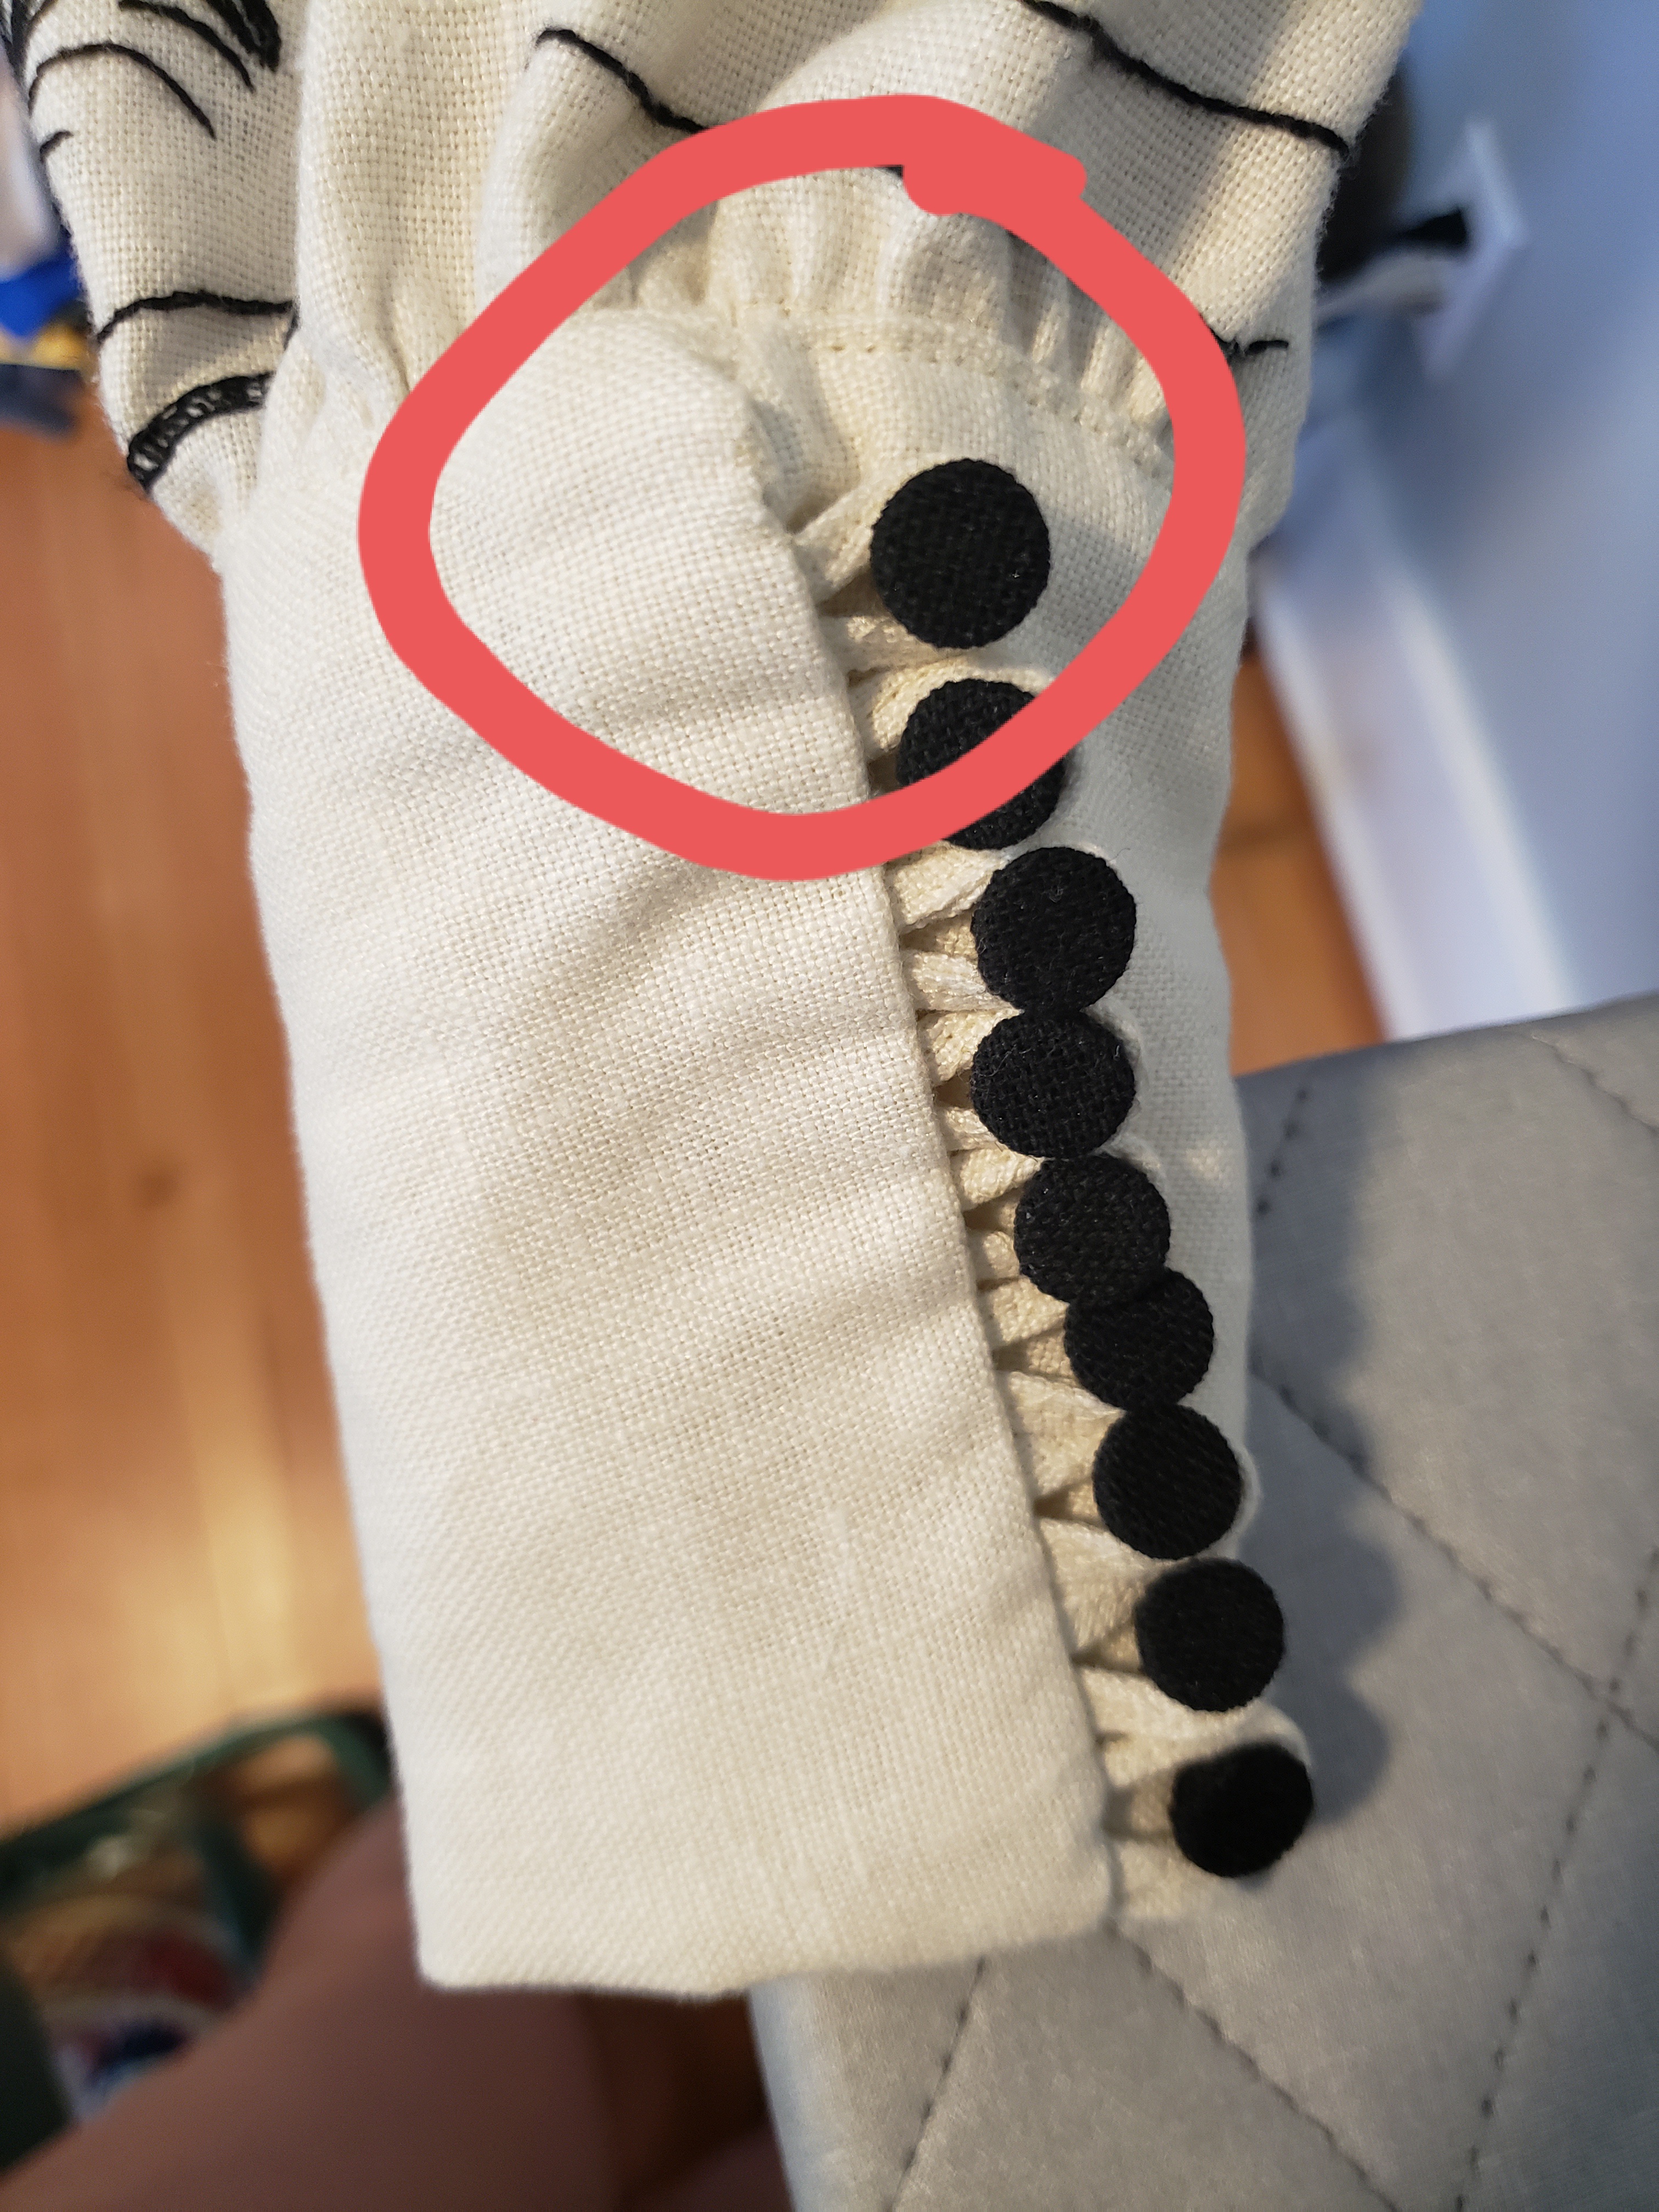
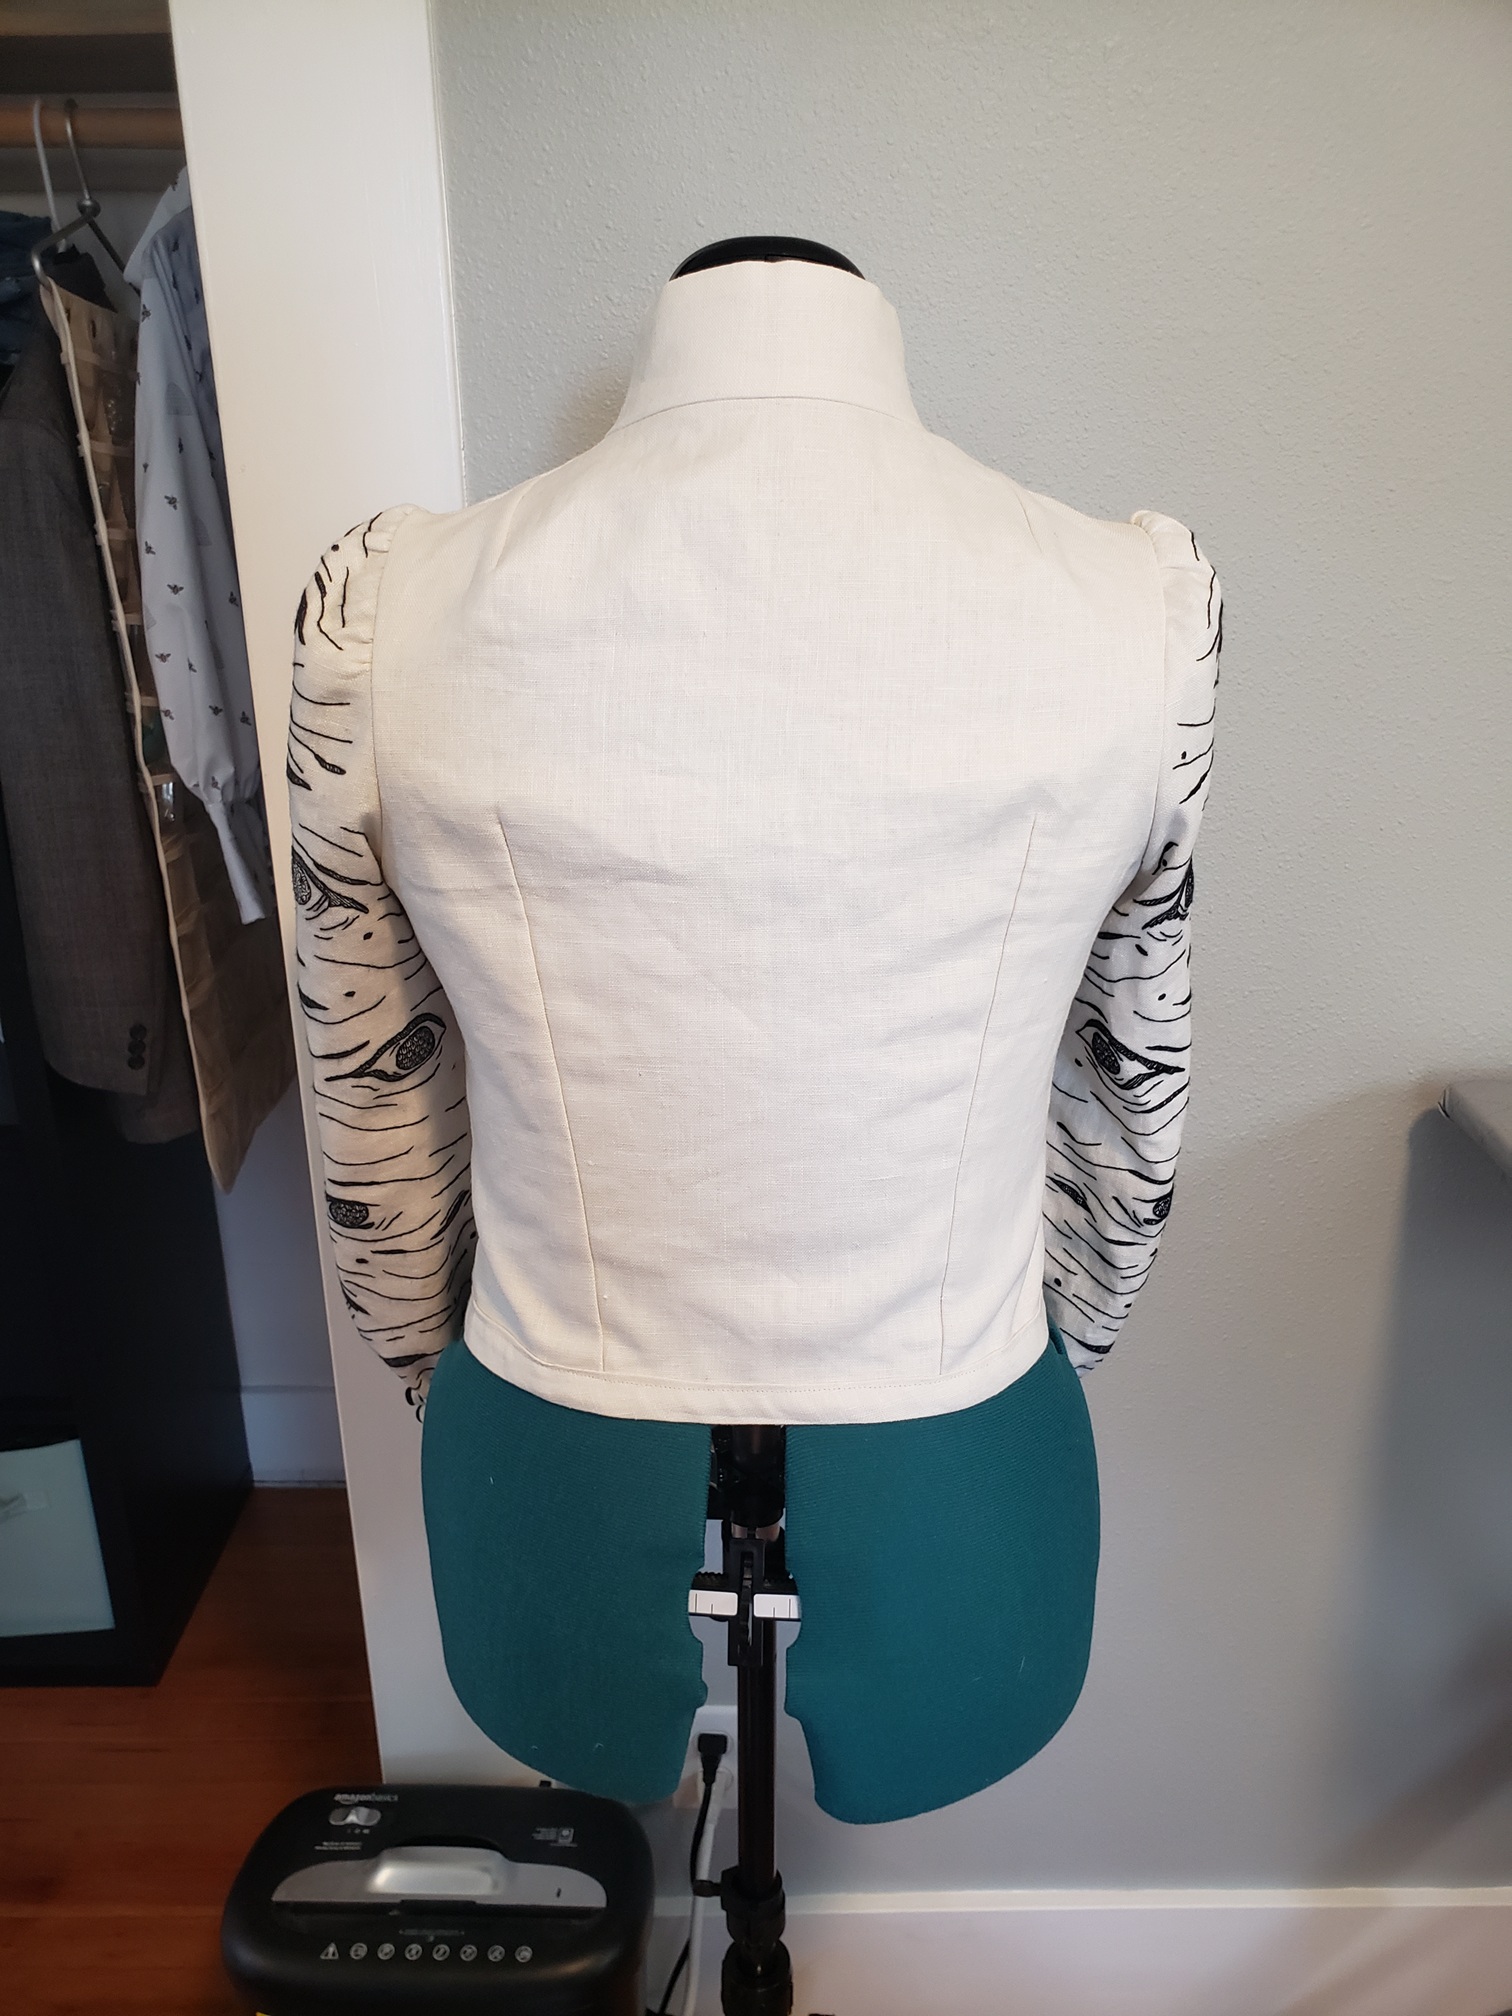
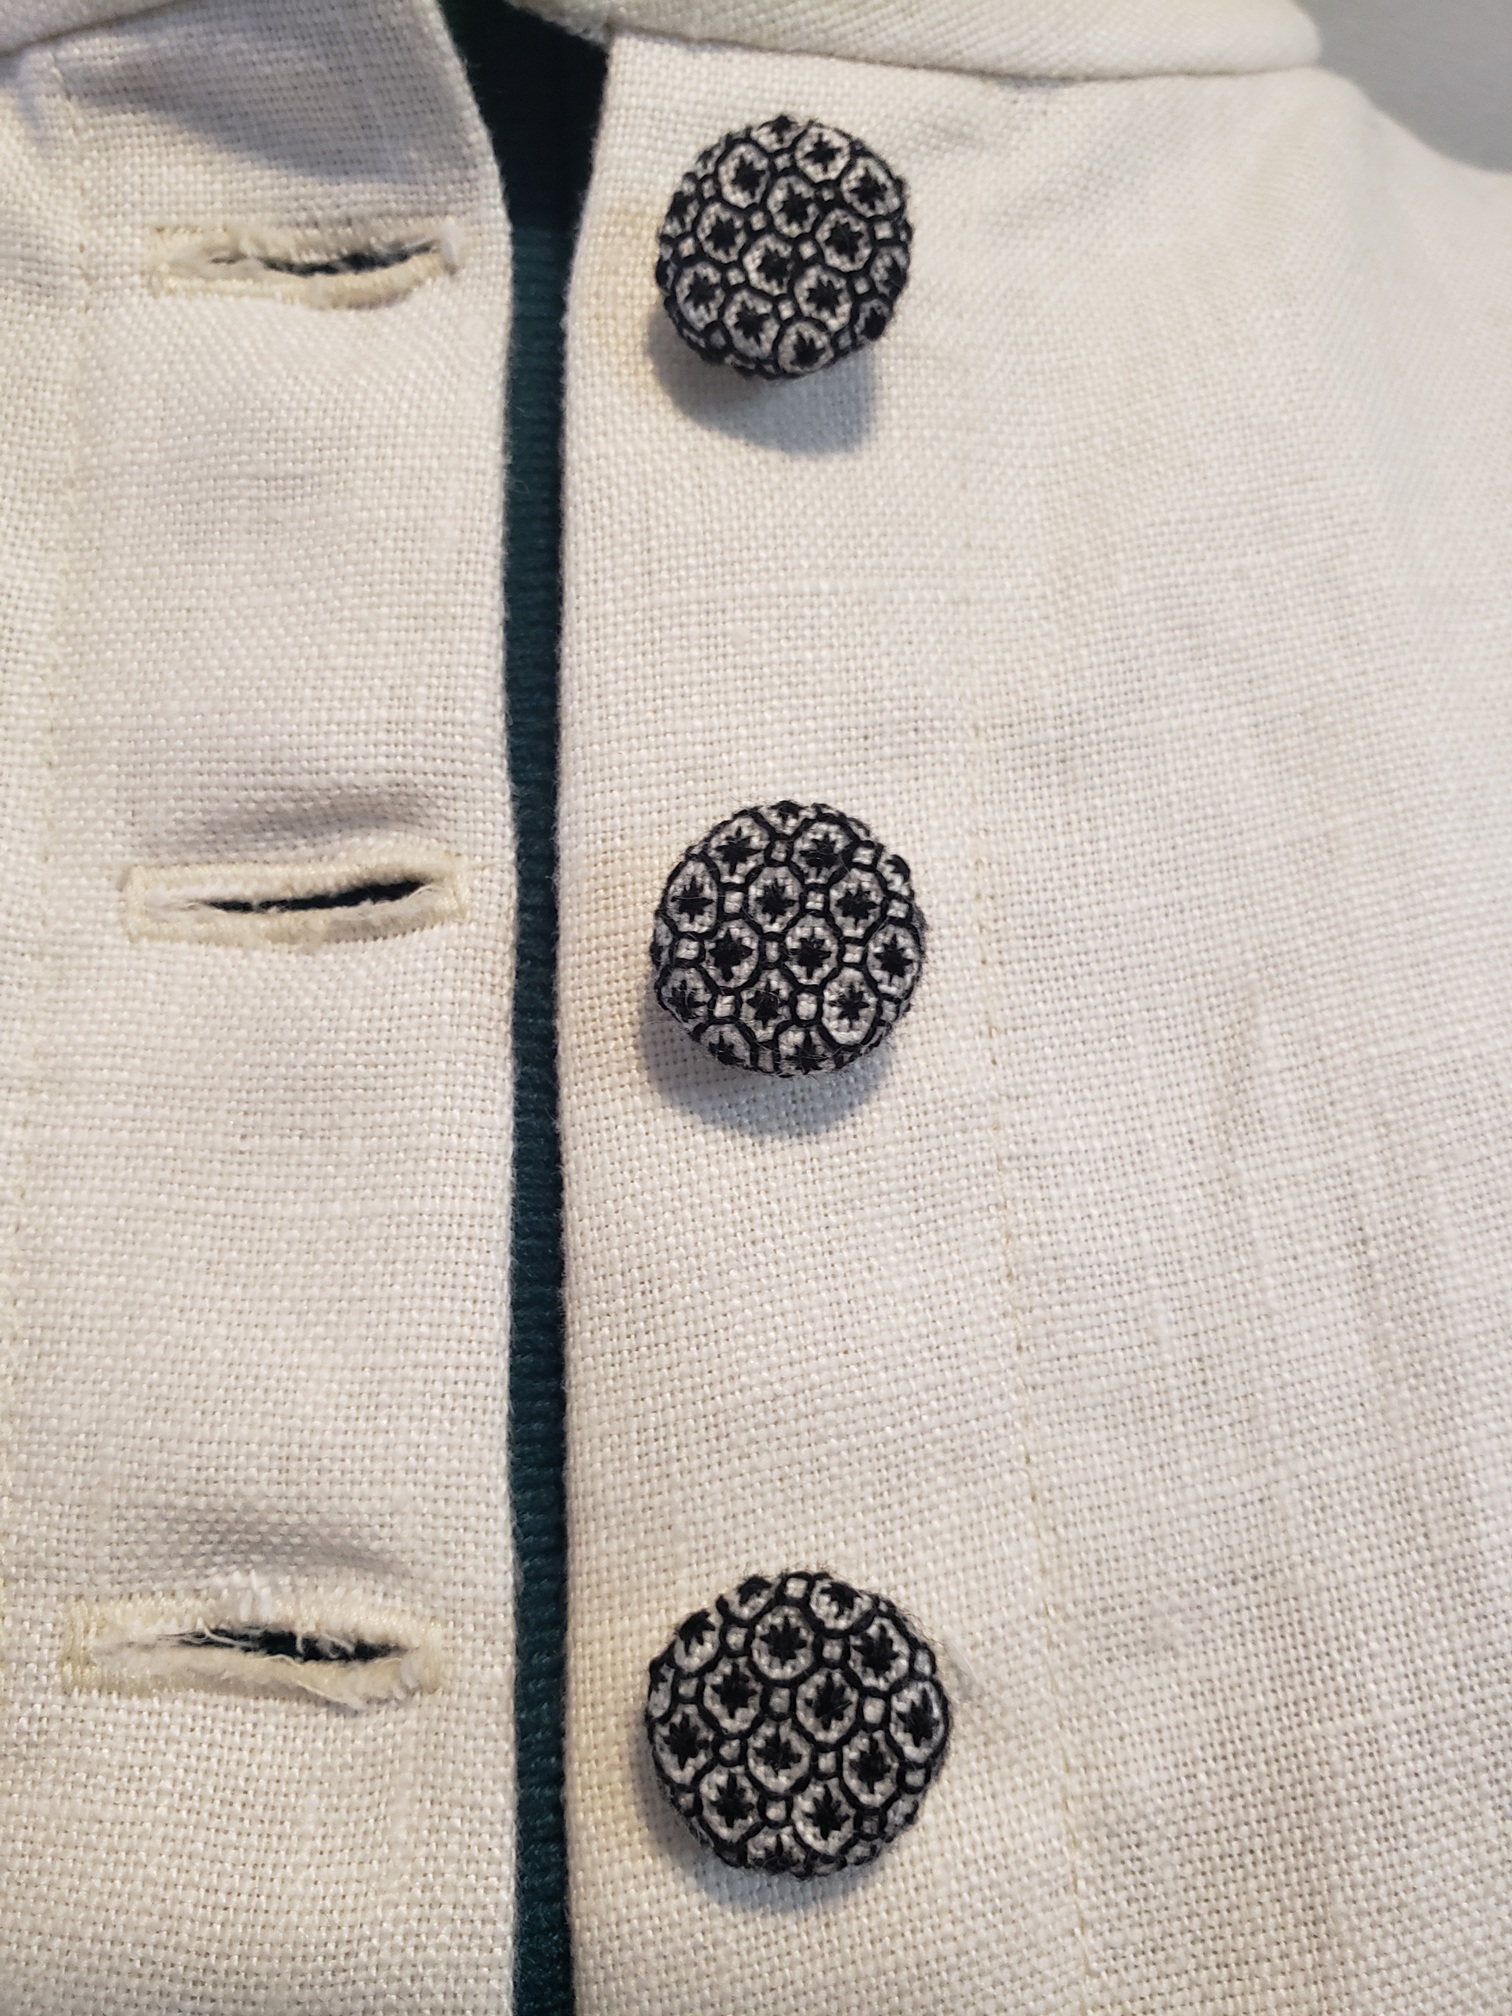
You'd think that when I created my mockup I would have caught and changed this, but no. I think at this point I just wanted it to be done, so I ignored all of these glaring fit issues. I did most of the fittings on my dress form, whose measurements were just different enough from mine to cause a whole host of other problems. There is this crease extending from the armpit to the bust that never goes away, the back is too long and wrinkles around my shoulder blades, the collar kind of chokes me whenever it's fully buttoned, and the cuffs should have a slit past the innermost button so that it can overlap more smoothly--instead I have a little lump:

All this to say, I am so appreciative that I managed to finally finish this beast of a project. Despite all of the fit issues, it's not wholly bad. The embroidery I am extremely proud of. I put in a lot of hours to finish that, and I think the overall design turned out really cool! I guess part of my reason for typing this all out is to give you a peak behind the curtain. I know I always appreciate it when a creator shares their struggles so I know that they're fallible just like me.
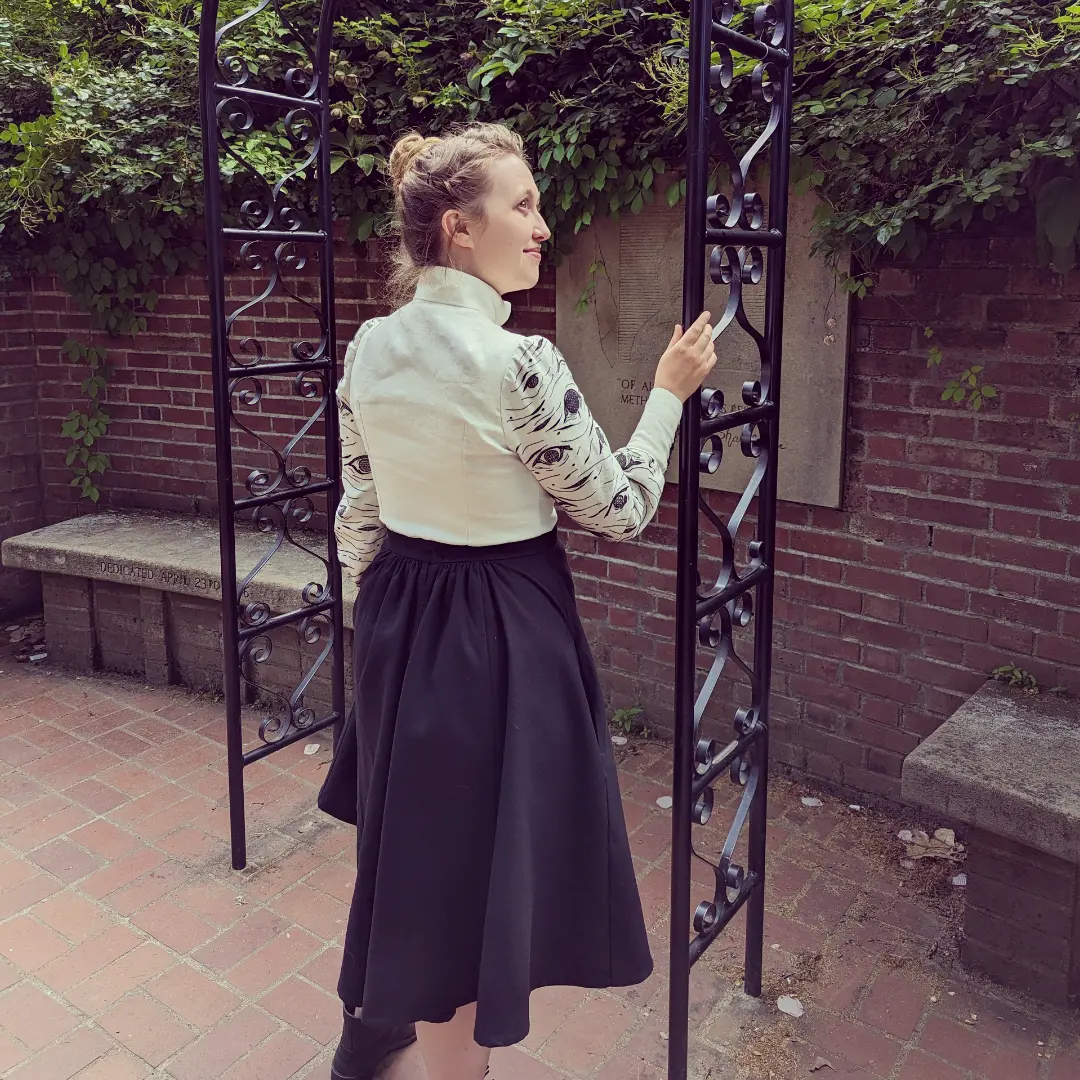
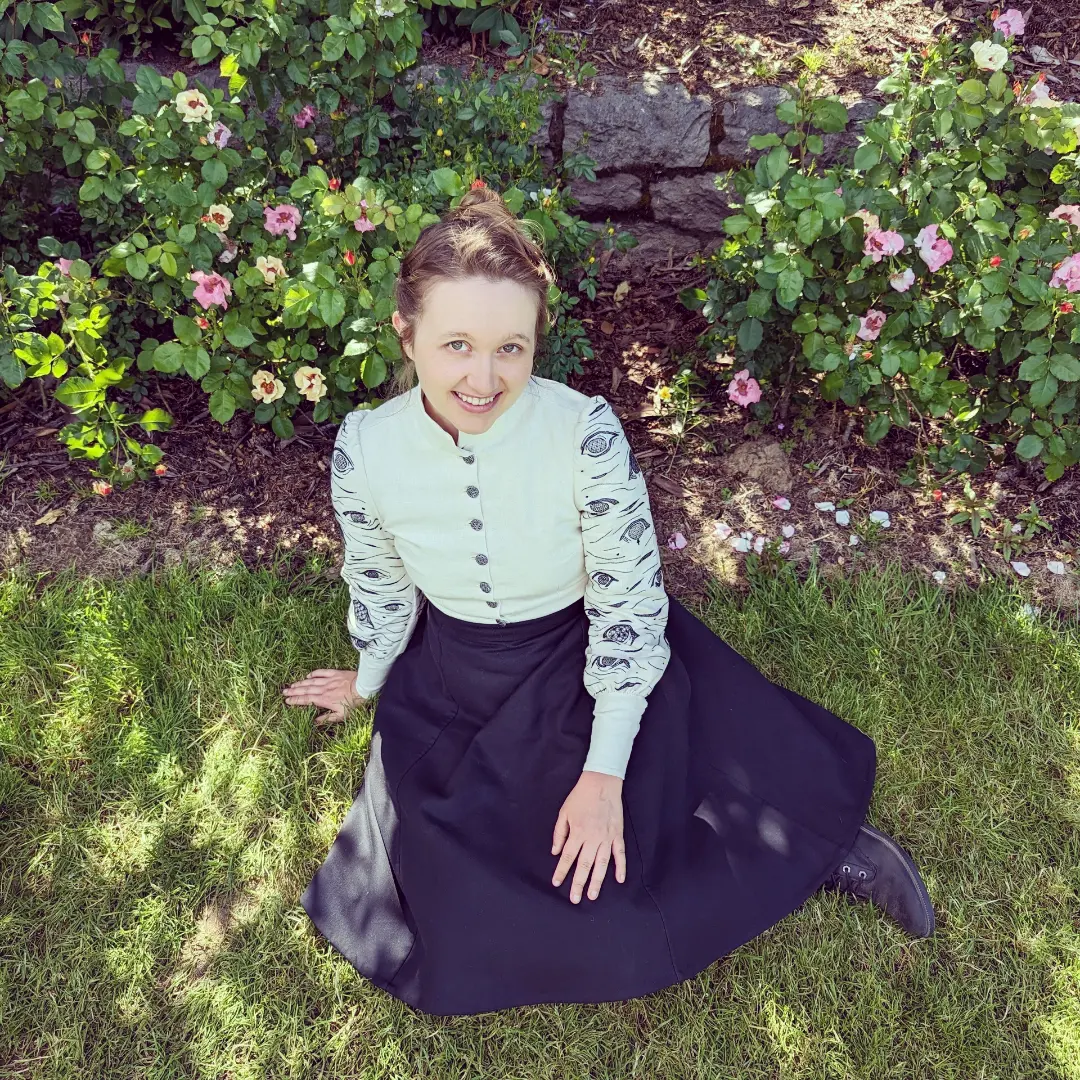
One day, I hope to give these sleeves a new home on a properly fitted shirt, so that I may wear them proudly. Today is sadly not that day. But for now, I will leave you with these final pictures, which were taken in such a way that the shirt actually looks decent (dare I say, super fucking cool?)


Comments